Anders Hesselbom
Programmerare, skeptiker, sekulärhumanist, antirasist.
Författare till bok om C64 och senbliven lantis.
Röstar pirat.
“Inte en singel” om Violator (Depeche Mode)
Just idag var det 34 år sedan Depeche Mode släppte albumet Violator. Och just idag diskuteras singelvalet på skivan i podcasten “Inte en singel” som finns att lyssna på här:
https://inte_en_singel.80tal.se/
Resurser för Commodore 64-utveckling
Om du som jag skriver program för Commodore 64 på fritiden, är denna sida ett register över de verktyg du behöver.
Utvecklingsmiljöer
Programmeringsspråk
Commodore DOS
Dokumentation
All about yout C64 – online help
Programming sound and music on yout Commodore 64
Commodore BASIC tokenized file
Editorer, musik
Editorer, grafik
Emulering
Övrigt
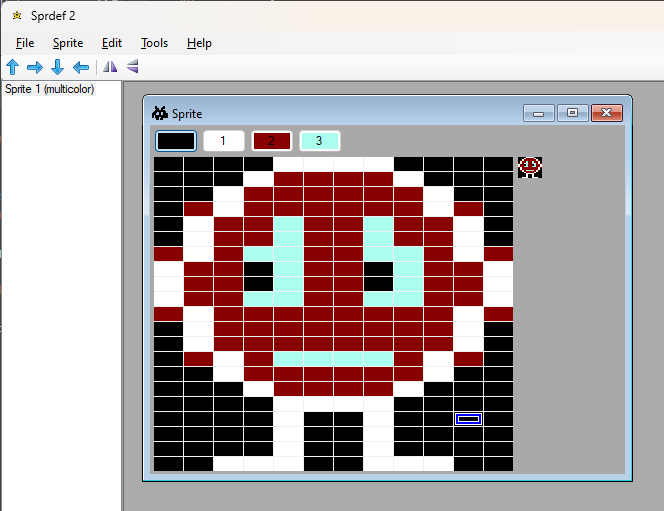
För min del har jag skrivit bok om Commodore BASIC 2.0 second release, och jag håller på att arbeta med en sprite editor.
En programmerare programmerar
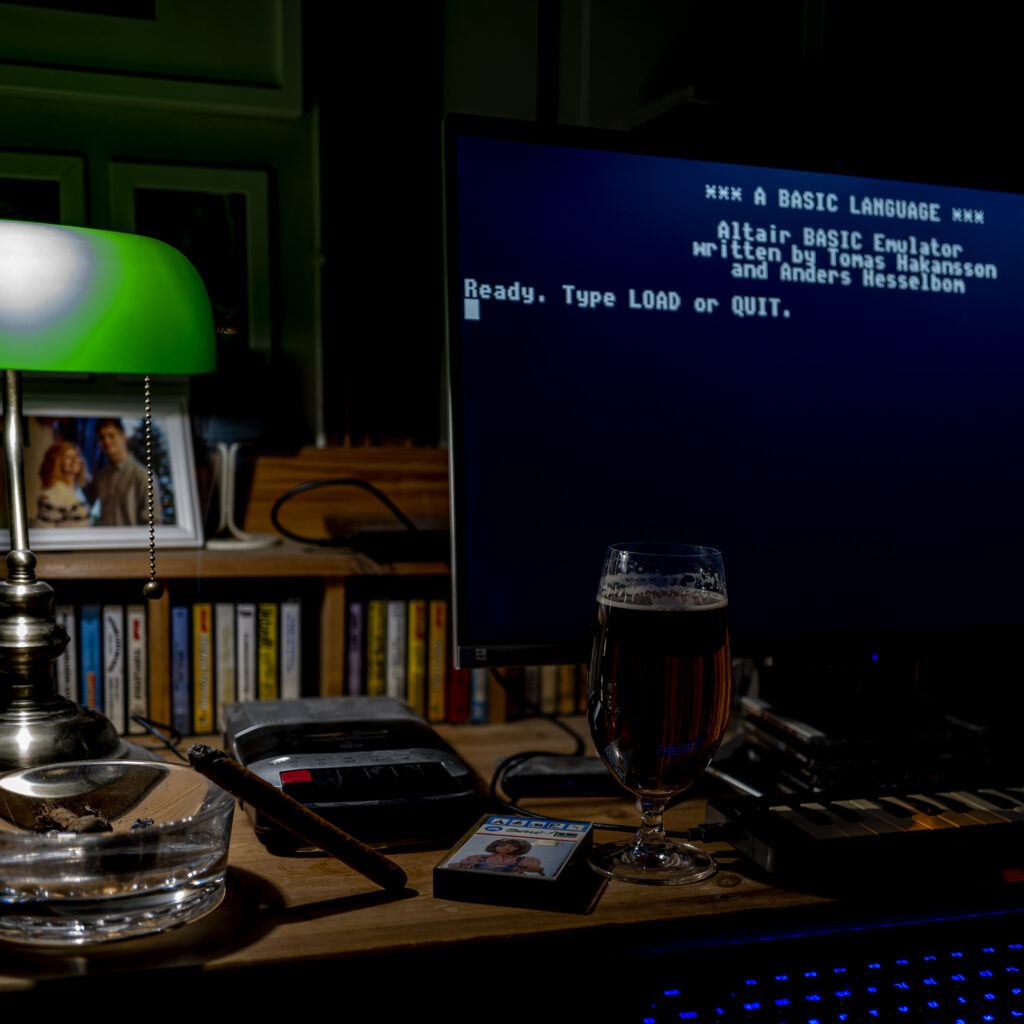
Jag är inte helt säker på att programmerare är ett framtidsyrke, för behovet dras allt jämt åt kring ett minskande behov av ytterligare ett whateverramverk för dagens systemutvecklare att använda. Som jag har uppfattat marknadens behov så kan det vara lönsamt för generalister att vara så generella som möjligt. En full stack-utvecklare bör vara så bred som möjligt, för att vara relevant. En specialist bör vara så smal som möjligt för att vara relevant. Jag kan tycka att en arbetsvecka är rejält utmattande, men faller gärna tillbaka till något som jag själv finner vara intellektuellt stimulerande, som t.ex. den Altair-emulator som jag och den mycket skärpte Tomas Håkansson har arbetat med i ett par år nu. Det lär dröja ytterligare ett par år innan version 1.0 finns på plats, men jag ser verkligen fram emot det.
Kapitlet om själva enheten Commodore 128 i min kommande bok
Första utkastet av andra kapitlet av min bok om Commodore 128 publiceras här för den som vill rätta eller kommentera. Maila mig, SMS:a mig eller skriv en kommentar här. Glöm inte att meddela om du vill ha ett erkännande i boken för din kommentar. Kapitlet syftar till att produktplacera datorn.
För att bevara formatering, har jag laddat upp kapitlet som PDF. Alla kontaktuppgifter (e-post, telefon, med mera) finns här. Och kapitlet finns här.
Melodifestivalen 2024
Jag är av den bestämda uppfattningen att både musiklansering (Melodifestivalen) och filmproduktion (Svenska Filminstitutet) bör lämnas till civilsamhället och marknaden, men så länge civilsamhället och marknaden beskattas så hårt som idag, så kan inte civilsamhället
Ikväll ska den svenska staten lansera ny musik, eller rent av nya artister, i Melodifestivalen. Som finansiär tänker jag såklart att betrakta spektaklet, och jag uppmanar alla att göra detsamma – den som går till valurnan utan att ens veta var han lägger sina pengar, bör inte ha rösträtt!
De flesta har naturligtvis högre ambitioner än den svenska renderingen av “public service”, men när det nu är som det är, har jag satsat en peng på att Elisa Lindström ska gå till final. Gör hon det, får jag en tusing rätt ned i fickan.
Tack, staten!
Kvällens nästanrymning
Vi bor mellan två rullstensåsar. Till väster ligger åsen med vägen norrut mot Örebro, och till öster ligger åsen med stallet och hagen. Kvällen började med att ett fallet träd hade krossat staketet och att vi noterade att flocken som stod där, endast bestod av 4 hästar – det nya stoet saknades. Efter att ha lagat skadan och letat igenom skogen utanför, hittade vi den sista. Så hon verkar trivas sitt nya stall.
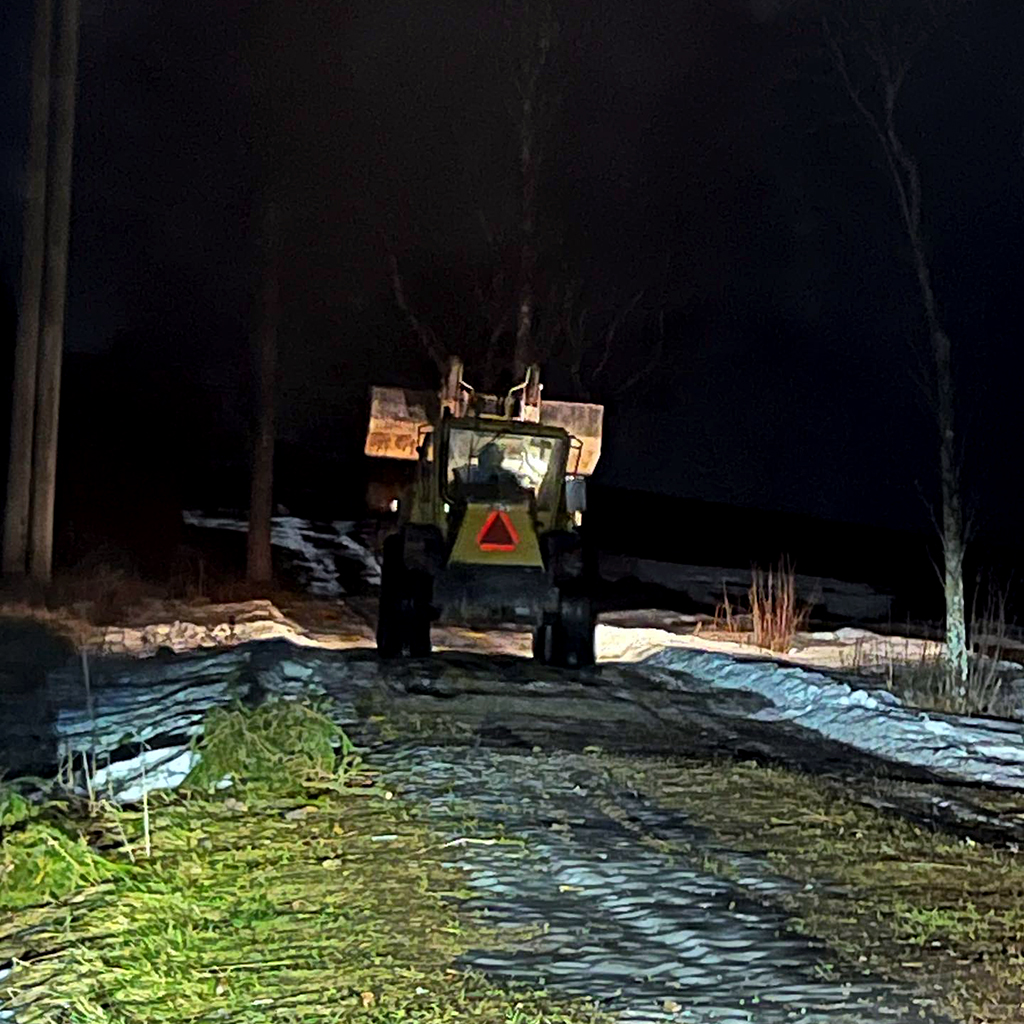
Häst #5 är installerad
Nu har vi installerat den femte hästen, ett sto (svensk varmblod) vid namn Akasia. Så kvällen kommer att ägnas åt att etablera den nya rangordningen i flocken. Min dotter Lova tog bilden.

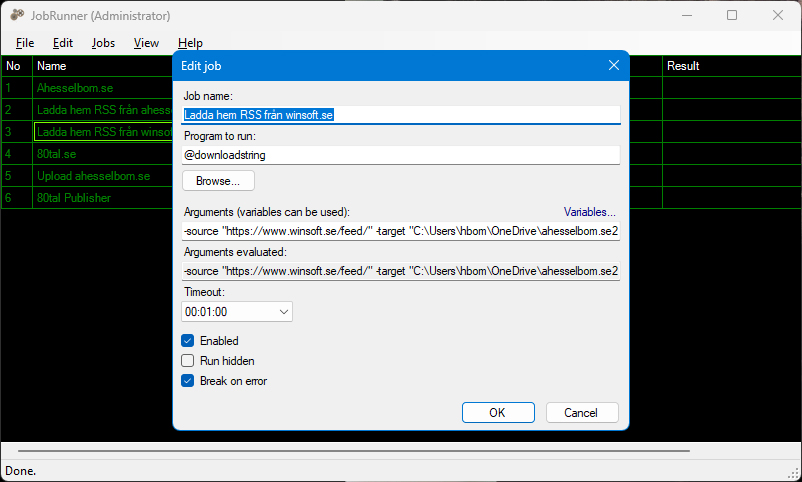
JobRunner 1.6 is available
Version 1.6 of JobRunner is available. It allows an system administrator to disable individual jobs in a batch.
Download installation program (Windows 10 or later): JobRunner.exe (Right click, Save link as…)
Source code (C# 8, .NET Framework 4.8): https://github.com/Anders-H/JobRunner
En ny terminalemulator för Windows Forms
Jag har utvecklat en GUI control för Windows Forms (.NET 8.0) som emulerar en textterminal från 1970-talet. Den stöder in- och utmatning av text samt enkel pixelbaserad grafik. Den har events som meddelar vad användaren gör, och funktioner för att ställa frågor till användaren. Denna kan användas som editor för radbaserade programmeringsspråk och som gränssnitt för textbaserade applikationer (som t.ex. textäventyr).
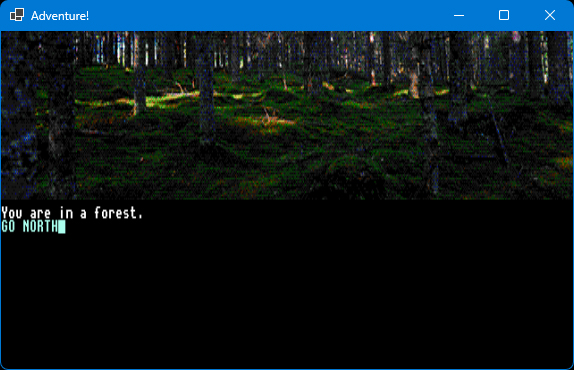
Här finns källkoden och några exempel, och här finns information om hur man installerar den och kommer igång.
Kapitlet om ljud i min kommande bok om Commodore 128
Första utkastet av sjunde kapitlet av min bok om Commodore 128 publiceras här för den som vill rätta eller kommentera. Maila mig, SMS:a mig eller skriv en kommentar här. Glöm inte att meddela om du vill ha ett erkännande i boken för din kommentar. Avgränsningen är enkla ljudeffekter, inte musik eller mer avancerade ljudeffekter, då dessa har var sitt kapitel avsatt.
Ljud
Commodore 128 har ungefär samma kapacitet till ljud som Commodore 64. I datorn finns en avancerad synthesizer innehållande tre röster och fyra vågformer. Vågformerna är triangel, sågtand, fyrkantsvåg och brus. Fyrkantsvågen har ställbar pulsbredd, vilket ger möjlighet till stora variationer.
Till skillnad från Commodore 64, tillåter Commodore 128 att man använder BASIC-kommandon för att åt datorns ljudkapacitet. Kommandot SOUND ger dig möjlighet att spela ljud i någon av de tre kanalerna, i valfri frekvens under valfri tid. Kommandot har även stöd för att böja frekvensen[1] på tonen ljudet som spelar.
Tre argument är obligatoriska. Dessa är val av röst (1, 2 eller 3), val av frekvens (0 till 65535) och längd (angivet i sextiondels sekunder). Använd endast dessa tre argument, spelas en rak ton med i en fyrkantsvåg med en neutral inställning på pulsbredden. Följande spelar tonen A under en sekund:
SOUND 1,3800,60
Du som kan musikteori kanske noterar att 3800 inte är jämt delbart med 220, och det beror på att frekvensangivelsen (det andra argumentet) ligger på en egen skala som inte stämmer med faktisk svängningshastighet.
Argumenten identifieras av sin ordning. Samtliga argument är:
- Kanal (1, 2 eller 3)
- Val av frekvens (0 till 65535)
- Längd (antal sekunder genom 60)
- Frekvensändring (0 = upp, 1 = ned, 2 = upp och ned)
- Låg frekvens (vid frekvensändring, också 0 till 65535)
- Hastighet vid frekvensändring (stegstorlek, också 0 till 65535)
- Vågform (0 till 3, se sida 28 i detta kapitel)
- Pulsbredd (0 till 4096, se sida 29 i detta kapitel)
Bara genom att läsa argumentlistan så förstår vi att kommandot SOUND är ganska kompetent. Men vi ser också att det saknas en hel del kapacitet innan vi kan säga att vi har en komplett synthesizer, inte minst ADSR[2]-inställningar.
Argumenten identifieras av sin ordning
Låt säga att jag vill spela samma ljud som tidigare, men jag vill ange vågformens pulsbredd. Igen, pulsbredd kommer att förklaras på sida 30, men för nu behöver du bara förhålla dig till att jag vill ange den. Att anropa SOUND med argument 1, 2, 3 (som tidigare) och 8 (pulsbredd), utan att ange något där emellan, innebär att jag anger fem kommatecken för att tala om att det är just det åttonde argumentet jag vill ange.
SOUND 1,3800,60,,,,2,50
Du bör nu höra ett A, fast med en lite förändrad karaktär på ljudet.
Frekvensändring
Oavsett om du vill böja en ton uppåt, nedåt eller oscillera (upp och ned), så måste du ange den högsta frekvensen som argument 2 och den lägsta frekvensen som argument 5.
Om du vill gå upp en oktav från låga A till höga A, kan du skriva följande kommando:
SOUND 1,3800,60,0,1900,32
Kanal 1, hög tonhöjd är 3800, längd är en sekund, riktning är uppåt, låg tonhöjd är 1900, frekvensändringens hastighet är 32.
Ett problem med att böja toner uppåt är att det andra argumentet faktiskt inte bara är den höga frekvensen, utan även startfrekvensen. Ljudet du hör från ovanstående kommando klättrar en oktav (från 1900), men avslöjar målfrekvensen (3800) under en mycket kort stund.
Om vi ändrar riktning från 0 (upp) till 1 (ned) så spelas frekvensändringen helt felfritt, eftersom vi lämnar startfrekvensen till målfrekvensen som är argument 5.
SOUND 1,3800,60,1,1900,32
Men när jobbet är slutfört, så återstartas det, vilket kan höras i slutet på ovanstående ljud. Det kan man vända till sin fördel, om man vill sätta ljud på t.ex. ett rymdskepp som upprepat skjuter med laser på en fiende:
SOUND 1,8000,60,1,3000,700
Man kan riktigt se laserstrålarna färdas genom rymden!
Nu har vi testat att böja en ton uppåt (riktning 0) och nedåt (riktning 1). Genom att välja att oscillera kan du skapa ljud som låter som larmtoner, som t.ex. detta:
SOUND 1,12000,360,2,9000,64
Kanal 1, tonjöjd är 12000, längden är sex sekunder, riktning är upp och ned, låg tonhöjd är 9000, frekvensändringens hastighet är 64.
Vågformer
Vågformen beskriver ljudets mest basala karaktär. Commodore 128 kan återge fyra olika vågformer. Dessa är:
- 0: Triangel (mjuka ljud som xylofon eller flöjt)
- 1: Sågtand (en klang liknande dragspel eller gitarr)
- 2: Fyrkant med variabel pulsbredd (lite vassare ljud som trumpet eller piano)
- 3: Brus (ofta slagverk)
Dessa fyra vågformer utgör grunden för de olika musikinstrument som din dator kan återge. Detta program spelar upp två sekunder från varje ljud, där fyrkantsvågen återges i sitt grundutförande med en pulsbredd på 2048:
10 FOR A=0 TO 3 |
Rad 10 räknar från 0 till 3, vilket innebär att rad 20 och 30 körs fyra gånger. Rad 20 spelar en ton i två sekunder som byggs upp av de fyra vågformer som din Commodore kan återge. Rad 30 pausar och rad 40 upprepar. |
När du kör programmet så kommer du att höra fyra vågformer, som spelas upp i turordning. Förutom dessa fyra vågformer, kan din Commodore 128 ändra ljudets karaktär rejält när vågform 2 (fyrkant) används, för fyrkantsvågen har variabel pulsbredd.
Pulsbredd
Pulsbredden anger förhållandet mellan impulsens höga och låga värde. Fyrkantens värde består i sitt ursprungsförhållande av lika lång hög som låg impuls, vilket skapar denna figur:
+------------------------------------------------+
|    ----    ----    ----    ----    ----    ----|
|                                                |
|----    ----    ----    ----    ----    ----    |
+------------------------------------------------+
Detta motsvara alltså den ursprungliga pulsbredden 2048. 0 är lägst och 4096 är högst. Du kan skriva in följande kommando för att höra den ursprungliga pulsbredden:
SOUND 1,3800,60,,,,2,2048
Halverar du talet 2048 (alltså om du anger 1024) får du följande kurva:
+------------------------------------------------+
|  ------  ------  ------  ------  ------  ------|
|                                                |
|--      --      --      --      --      --      |
+------------------------------------------------+
Testa genom att skriva:
SOUND 1,3800,60,,,,2,1024
Ljudet är nästan identiskt med det ljud du hade fått av att istället addera hälften (1024) ursprungspulsbredden (2048):
SOUND 1,3800,60,,,,2,3072
Det motsvarar följande vågform:
+------------------------------------------------+
|      --      --      --      --      --      --|
|                                                |
|------  ------  ------  ------  ------  ------  |
+------------------------------------------------+
Testa gärna att skriva program som varierar pulsbredden!
Ljudstyrka
Kommandot VOL påverkar ljudstyrkan både för pågående ljud och efterföljande ljud. VOL accepterar ett argument som är ett tal mellan 0 och 15, där 0 betyder absolut tystnad och 15 betyder högsta möjliga ljud. Ett för högt eller för lågt värde ger felet illegal quantity. Följande program använder VOL för att oscillera ljudstyrkan:
10 SOUND 1,12000,360,2,9000,64 |
Rad 10 startar ett larmljud. Rad 20 säger att volymoscillering ska ske 9 gånger (0 till 8). Rad 30-60 sänker volymen med en kort paus (rad 50). Rad 70-100 höjer volymen. Rad 110 hoppar tillbaka till rad 30 så länge T är mindre än eller lika med 8. |
Inför de kommande två kapitlen om musik och om avancerade ljudeffekter, så kan det vara bra att veta när datorn spelar ett ljud direkt, och när datorn väntar. Grundregeln är att datorn väntar med att spela upp ett ljud, tills det ljud som spelas ljust nu är färdigt, givet att det nya ljudet begärs i en kanal som redan spelar ett ljud. Det innebär följande:
Kommandot SOUND sätter processorn i arbete utan att blockera BASIC-tolken, vilket vi tidigare sett i kapitlet om sprites. Skillnaden här är att om din dator satts i arbete att spela ett ljud i en sekund på en viss kanal, och stöter på ett kommando som ger datorn i uppdrag att spela en ny ton i samma kanal, så väntar BASIC-tolken på att pågående uppdrag ska vara utfört innan nästa uppdrag påbörjas. Vi kan studera detta genom att titta på följande program som spelar ett C dur-ackord i en kanal. Det kommer inte att fungera. Istället för att höra ett ackord, så hör vi en ton i taget spelas upp (C, E och G). Vi väljer full ljudstyrka.
10 VOL 15
20 SOUND 1,8900,120,,,,1
30 SOUND 1,11100,120,,,,1
40 SOUND 1,13500,120,,,,1
Orsaken är att kanal 1 inte kan spela något annat än C innan den är färdig. Och när den är färdig, och börjar spela ett E, så kan den inte spela nästa ton innan den har spelat färdigt E. Lösningen är att spela varje ton i C dur-ackordet i var sin kanal, så här:
10 VOL 15
20 SOUND 1,8900,120,,,,1
30 SOUND 2,11100,120,,,,1
40 SOUND 3,13500,120,,,,1
Om nya instruktioner att spela ljud inkommer, väntar din dator med att utföra dem tills ackordet är färdigt. Men det finns undantag, vilket vi tittar på i kapitlet om avancerade ljudeffekter.
[1] På engelska: Pitch bend.
[2] Attack, Decay, Sustain, Release – se kapitlet om ordförklaringar (appendix B).
100 filmer
Jag antog utmaningen att titta på och kommentera etthundra filmer, och här är resultatet.
Film 1 av 100: Spirited (2022) av Sean Anders med Will Ferrell och Ryan Reynolds. Började som en bedrövlig kopia på Scroodged men överraskade med att falla lite tillbaka på Dickens originalstory. Konceptet fungerade om man inte förväntar sig mer än vad Sean Anders brukar leverera. Betyg: 2/5.
Film 2 av 100: Blåst på konfekten (1979) av Blake Edwards med Dudley Moore, Julie Andrews och Bo Derek. En film som frugan slänger fram som förslag när inget annat finns att se. George (Moore) är både en framgångsrik kompositör och en alkoholiserad framtida äkta man. En av de bästa komedier jag någonsin sett. Totalbetyget är 4/5, men som komedi är det solklart 5/5.
Film 3 av 100: The girl, the gold watch and everything (1980) av William Wiard med Robert Hays och Pam Dawber. Man ärver en klocka som kan stoppa tiden. Några skurkar utsätter honom för en komplott, men han och hans drömtjej använder klockan till sin fördel. Lagom trevlig film. Den dåliga produktionen, t.ex. när frysta individer mot slutet av filmen flyttas runt, bidrar till charmen. Betyg: 3/5.
Film 4 av 100: Lights out (2016) av David F. Sandberg med Teresa Palmer och Gabriel Bateman. Konceptet är samma som nästan alla andra skräckfilmer de senaste 20 åren, nämligen att något smyger omkring nattetid i mörkret i ditt hem. Denna är bättre än de flesta, tack vare intressanta karaktärer och hyfsat bra backstory. Premissen bakom spökets drivkraft och själva existens kunde ha varit mer logisk, men den är bättre än det mesta jag sett på denna sida av millennieskiftet, och tillräckligt bra för att jag skulle köpa den, och slutet som drar nytta av den. Betyg, kompenserat för att det är en modern skräckfilm: 4/5.
Film 5 av 100: Levande måltavla (1985) av John Glen med Roger Moore och Christopher Walken. Förmodligen en av de bästa Bond-filmerna med Moore i rollen som Bond. Inledningen där Bonds expertis som slalomåkare kommer till pass, är egentligen pinsamt dåligt. Sen får vi se hur Bond stoppar utplånandet av Silicon Valley, som ska sprängas för att ge en galen finansman världsmonopol på mikrochips. Filmen i övrigt växlar mellan att vara småkul och riktigt bra. Det hela kunde ha varit 30 minuter kortare. Älskar hästanläggningen. Betyg: 3/5.
Film 6 av 100: Avatar (2009) av James Cameron med Sam Worthington och Zoe Saldana. En trevlig värld att drömma sig bort till, men på det totala en ganska dålig film, mycket på grund av huvudintrigen är något slags naturromantiskt och religiöst trams. Det som fungerar är introduktionen med sin upptäckarglädje och sidoberättelserna om lojalitet, men egentligen är filmen bara en långversion av trailern. Betyg: 2/5.
Film 7 av 100: Ghostbusters (2016) av Paul Feig med Melissa McCarthy och Kristen Wiig. En komedi som skildrar spöken som härjar i New York. Ett spöksaneringsföretag bildas och lyckas tillslut rädda staden. En riktigt bra berättelse, ett fenomenalt magplask till genomförande. Som tittare kommer du kunna tänka ut bättre skämt än de som spelas upp på skärmen framför dig. Roligast var nog när hjälten, Abby Yates, sa att hon fiser av anjovis, men för mig är inte sådant tillräckligt roligt om inte regin är riktigt bra, och det är den inte. Betyg: 1/5.
Film 8 av 100: Outbreak – I farozonen (1995) av Wolfgang Petersen med Dustin Hoffman och Rene Russo. Ett dödligt virus som råkar spridas till USA visar sig vara en del av en topphemlig militär plan. En fenomenalt fängslande film, som tyvärr lider av att sista delen är alldeles fullproppad med otroliga händelser, som t.ex. en helikopter med gigantisk precision och räckvidd och ett serum som slängs ihop på två minuter. Men fortfarande riktigt spännande. Betyg: 4/5.
Film 9 av 100: Rivierans guldgossar (1988) av Frank Oz (som för den yngre publiken är känd som Miss Piggy från Mupparna och Yoda från Stjärnornas krig) med Steve Martin och Michael Caine. Småskojare ställer till med problem för en professionell sol- och vårare och lyckas övertyga proffset att ett samarbete kan gynna dem båda. Jag är inte speciellt förtjust i Steve Martin, men filmen är bra på det totala. Beträffande Michael Caine brukar jag gilla hans insats men sällan hans filmer. Eftersom komedi sällan är stor film, vill jag bedöma denna som just komedi, vilket drar upp betyget ett steg. Betyg: 4/5.
Film 10 av 100: Adam & Eva (1997) av Måns Herngren och Hannes Holm med Björn Kjellman och Josefin Nilsson. Adam är väl egentligen inte riktigt mogen att binda sig, och är orsaken till att hans förhållande med Eva är svajigt. Under resans gång hinner han både ge sig på barnflickan, bli petad av Eva och genomgå en livskris. Jag vet inte varför filmen inte riktigt håller hela vägen, för ingredienserna är mycket bra. Jacob Erickssons karaktär Åke får en guldstjärna. Betyg: 4/5.
Film 11 av 100: En prins i New York (1988) av John Landis med Eddie Murphy och Arsenio Hall. En afrikansk prins går under cover som fattig i New York för att hitta en kvinna som älskar honom för den han är, inte för vad han är. En makalös rolig film, fullproppad med roliga stereotyper, de flesta spelade av Murphy och Hall själva. Den bjuder på många skratt, men jag tror inte Paramount hade släppt igenom filmen idag, åtminstone inte i detta skick. En moviebox-klassiker för gubbar i min ålder! Betyg: 4/5.
Film 12 av 100: The Golden Child (1986) av Michael Ritchie med Eddie Murphy och Charlotte Lewis. Murphy spelar killen-hela-dagen i form av detektiv Jarrell som specialiserat sig på att hitta försvunna barn. Plötsligt får Jarrell ett uppdrag som går ut på att hitta ett magiskt barn innan ockulta krafter hinner eliminera det. Faktiskt bättre än det låter och hyfsat bra Ritchie-vibbar, men han har gjort bättre och summan är ganska medioker. Betyg: 3/5.
Film 13 av 100: Highlander (1986) av Russell Mulcahy med Christopher Lambert och Sean Connery. Den här filmen måste ha sett ut som en trafikolycka på papper, men filmen är förvånansvärt bra! Kanske för att för att produktionen bärs upp av riktigt bra kameraarbete och klippning. Folk hugger huvudet av varandra i New York och en journalist får ta del av bakgrundsberättelsen, som innefattar märkliga regler om odödlighet och huvudseparation. Ett extra plus att man skruvade upp självaste rockgruppen Queen till att skriva soundtracket! Betyg: 4/5.
Film 14 av 100: Tjejen som visste för mycket (1978) av Colin Higgins med Goldie Hawn och Chevy Chase. Gloria (Hawn) blir utan vetskap inblandad i stor sammansvärjning och får hjälp av en polis (Chase) att förstå vad som pågår. Mycket bra genomförande av huvudberättelsen och gott om riktigt dråplig komedi mellan varven. Gillar både när Dudley Moore strippar och när Gloria kastar ut en dvärg genom fönstret. Klassiskt titelspår framfört av Barry Manilow. Betyg: 5/5.
Film 15 av 100: Eyes wide shut (1999) av Stanley Kubrick med Tom Cruise och Nicole Kidman. Jag tolkar detta som ett försök från överklassen att skildra sig själva från arbetarklassens perspektiv, vilket är det enda som är lite fumligt i filmen. Köper man det, får man följa med på en resa där en läkare från den övre medelklassen, nästan av en slump, får följa med överklassen till ett möte med ett hemligt ordenssällskap. Vi får även se ”flugorna kring skiten” som profiterar på överklassens diskreta charm. Makalöst bra skildrat, och trots att tempot är lugn, blir man fängslad. Betyg: 5/5.
Film 16 av 100: Falling down (1993) av Joel Schumacher med Michael Douglas och Robert Duvall. En man får nog och börjar hävda sin rätt. Detta är en lömsk film, eftersom den skapar mycket sympati kring Douglas karaktär. Ganska snart sitter man och tänker ”bra gjort!” när han drämmer till en person med ett basebollträ eller skjuter en person i benet och griper hans tillhörigheter. Men helt plötsligt visar det sig att det är en sociopat man utvecklat sympati för. Filmen är inte särskilt övertygande, men den engagerar och den är inte tråkig under en enda minut. Douglas gör en bra skådespelarinsats. Betyg: 4/5.
Film 17 av 100: Indiana Jones och kristalldödskallens rike (2008) av Steven Spielberg med Harrison Ford och Cate Blanchett. Kommunister förföljer Indiana Jones i förhoppning att komma över ett rymdvarelsehuvud i kristall. Manuset är ett förfärligt staplande av händelser på varandra, specialeffekterna är bedrövliga (inte minst när ett slagsmål utspelar sig på två bilar som far genom djungeln, vars mark råkar vara lika slät som en motorväg) och slutet är pinsamt. Obegripligt att detta släpptes igenom, men det får mig att undra vad uppföljaren, The dial of destiny, ska handla om. Betyg: 1/5.
Film 18 av 100: The shape of water (2017) av Guillermo del Toro med Sally Hawkins och Octavia Spencer. Såg den för att trailern lovade mycket, och efteråt får man nästan känslan att det kan vara en vidareutveckling på Skräcken i Svarta lagunen. En ensam kvinna arbetar som vaktmästare, och utvecklar en relation till amfibien från den Svarta lagunen. Filmen är inte perfekt, men innehåller tillräckligt mycket intressanta vinklar för att vara sevärd. Betyg: 4/5.
Film 19 av 100: Rocketman (2019) av Dexter Fletcher med Taron Egerton och Jamie Bell. Inte alla biografier vågar ta huvudrollens perspektiv, utan tassar hellre runt publikens olika föreställningar om personen som porträtteras. Rocketman är inte den enda film som vågar ta nästa steg, men det är en av få som gör det riktigt bra. Jag förstår att man mystifierar talang av kommersiella skäl, men den noggranne betraktaren kan se insinuationer att det faktiskt finns övning i bakgrunden. För mig har filmen fått Elton John att växa från popstjärna till en genuint rik själ. Betyg: 5/5.
Film 20 av 100: Hard ticket to Hawaii (1987) av Andy Sidaris med Ronn Moss och Dona Speir. The Agency (Donna och Taryn) ropas in när narkotikapoliser för på Hawaii, där de kommer över diamanter tillhörande drogimperiet. En eskalerande konflikt uppstår. Donna och Taryn får flyga kors och tvärs i ett fraktplan för att lösa problemet, och fler personer från båda läger dras in. Grymt tuff film på 90 minuter utan en enda tråkig stund. Betyg: 4/5.
Film 21 av 100: The invisible man (2020) av Leigh Whannell med Elisabeth Moss och Oliver Jackson-Cohen. En ganska bra lågbudgetinspelning av den klassiska filmen Den osynlige mannen från 1933. I den här filmen är mannen galen redan innan han blir osynlig, vilket bidrar till hans motiv att iscensätta sin död, bli osynlig och ge sig efter sin fru för att göra hennes liv surt. Filmen innehåller en hel del riktiga spänningsmoment och några, ur spänningssynpunkt, spännande händelser. Frun fattar tyvärr en hel del frustrerande dåliga beslut under resans gång, men det kanske behövdes för spänningen. I slutscenen, där mannen bedyrar sin oskuld, har manusförfattaren redan glömt att filmen började med en stor lögn – en iscensatt död. Jag hade ändå en bra resa. Betyg: 3/5.
Film 22 av 100: Super troopers (2001) av Jay Chandrasekhar med Jay Chandrasekhar och Kevin Heffernan. Traditionell trashkomedi om två rivaliserande gäng. Mycket humor bygger på att de flesta tvångsmässigt beter sig som snorungar, trots att det ena gänget är state troopers och det andra gänget är poliser. Intrigerna är rätt värdelösa, men jag kan inte avfärda filmen eftersom jag flera gånger skrattade högt åt hur snabbt alla faller in i sina gamla mönster, trots flera försök att växa upp. De tyska sadomasochisterna var ett onödigt stickspår. Betyg: 3 (stark) av 5.
Film 23 av 100: The man from Earth (2007) av Richard Schenkman med William Katt och David Lee Smith. Valde att se denna för att jag gillade skådisen från Titta han flyger, som bjöd mig på stor underhållning som ung. Berättelsen är ganska platt och kvasig, men trots att inte filmen har med sig världens bästa skådespelare lyckades den både fånga min uppmärksamhet och få mig att gilla berättarstilen. Mer av en tv-teater än en film. Kan förmodligen bara ses en gång, men bör ses. Betyg: 5 av 5.
Film 24 av 100: Tango & Cash (1989) av Andrey Konchalovskiy och Albert Magnoli med Sylvester Stallone och Kurt Russell. Klassisk polisaction innehållande precis alla filmkändisar som fanns år 1989. Omaka par av superpoliser hotar en storskalig kriminell verksamhet, som försvarar sig genom att rikta falska anklagelser mot duon, som till slut får upprättelse. Scenerna följer inte särskilt bra. T.ex. placeras rekvisita där den behövs för att klippet ska hänga ihop, utan tanke på tidigare klipp. Men det spelar ingen roll, för filmen är helt grym. Den har allt! Betyg: 4 (stark) av 5.
Film 25 av 100: Big Hero 6 (2014) av Don Hall och Chris Williams. En animerad film som utspelar sig i ett parallellt universum där San Fransisco och Tokyo är samma stad. Bakom stereotyper om rollfigurer med motgångar från barndomen som lyckas och vänskap över klass- och könsgränser ryms en smårolig berättelse om en tuppfäktare (fast med robotar) som kommer in på en skola för uppfinnare för att sedan rädda världen. Passar bäst för 13-åringar och håller inte för en vuxen publik. Betyg: 2/5.
Film 26 av 100: Babylon (2022) av Damien Chazelle med Brad Pitt och Margot Robbie. Efter en säkert en halvtimmes long prolog börjar denna film lämna det kaos den inleddes med och utvecklas till en både dråplig och gripande berättelse om ett generationsskifte i filmbranschen. Tveksamt om den verkligen behövde vara 3 timmar och 9 minuter lång. Man kunde ha kortat ner t.ex. festscenerna. Men i övrigt, en utmärkt film! Betyg: 4/5.
Film 27 av 100: Seriously Red (2022) av Gracie Otto med Krew Boylan och Daniel Webber. En ganska rolig men ganska tragisk berättelse om en vuxen kvinna med en mental mognad som en 15-åring som bor med en dysfunktionell mor och som skyller alla sina motgångar på andra. Men sjunga kan hon, och filmen är en resa från uppgång till fall som Dolly Parton-imitatör. Dåligt kameraarbete (utomhusscenerna är aningen överexponerade) och märkligt slut, men över lag värd att se om man är beredd att avsätta en timme och trekvart. Betyg: 3/5.
Film 28 av 100: Tintin i hajsjön (1972) av Raymond Leblanc. Mig veterligen den enda berättelsen om journalisten Tintin som inte författats av Georges ”Hergé” Remi. Tintin och Haddock är på väg till Syldavien för att hälsa på professor Kalkyl. Utsätts för mordförsök på planet, genom att piloterna oanmält lämnar planet. Sällskapet räddas av två barn som följer dem till Kalkyl, vars hem infiltrerats av kriminella som försöker komma över hans uppfinningar. Fantastiska teckningar, tillräckligt bra berättelse och genomförande. Betyg (bedömd som barnfilm): 5/5.
Film 29 av 100: En amerikansk varulv i London (1981) av John Landis med David Naughton och Griffin Dunne. Två amerikaner på luffen någonstans i Storbritannien får snabbt höra att något inte är som det ska. Den ene blir dödad, men exakt vad som inte står rätt till, uppenbarar sig under resans gång. En utmärkt varulvsfilm som har glimten i ögat på rätt sätt. Den kan distansera sig, utan att be om ursäkt. Som tittare sitter man på helspänn genom hela filmen. Inte alla specialeffekter har åldrats felfritt, de är ändå helt makalöst snygga. Betyg (bedömd som skräckfilm): 5/5.
Film 30 av 100: Project X – topphemligt (1987) av Jonathan Kaplan med Matthew Broderick och Helen Hunt. Militären utbildar i hemlighet schimpanser till kamikazepiloter. Lojalitet ställs mot vetenskap som ställs mot empati. Det man ser spelas upp framför ögonen känns föga trovärdigt och resan till uppgörelsen fängslar mer än själva uppgörelsen, men det var ändå en ganska trivsam resa. Betyg: 3/5.
Film 31 av 100: The Imaginarium of Doctor Parnassus (2009) av Terry Gilliam med Heath Ledger och Lily Cole. Ett sällskap reser runt med ett underhållningskoncept som består av ett besök in i en fantasivärld. Parnassus själv har sålt sina barns själar till djävulen i utbyte mot evigt liv, och när tiden för att lämna bort dottern närmar sig, försöker han få till en ny vadslagning för att komma undan. Inte Gilliams bästa film, men något som måste ses. Betyg: 3 (stark) av 5.
Film 32 av 100: Cats (2019) av Tom Hooper med James Corden och Judi Dench. Filmen som får dig att fundera på varför musikalen Cats uppskattas av en publik, för inga ledtrådar ges i filmen. Detta var verkligen skit. Betyg: 1/5.
Film 33 av 100: Splash (1984) av Ron Howard med Tom Hanks och Daryl Hannah. En man stöter på en kvinna, som tittaren får veta är en sjöjungfru som räddade honom från drunkning som liten. Mycket charmigt genomförande, mycket 80-talselektronik och riktigt snyggt kameraarbete. Ett extra plus till John Candy för sin påstådda 12-tumspenis – en romantisk komedi väl värd sina nästan två timmar! Betyg: 4/5.
Film 34 av 100: Skräcknatten (1985) av Tom Holland med William Ragsdale och Amanda Bearse. Charley är lite mer engagerad i skräckfilm än han borde vara. Den lite utstötta kompisen ”Spöket” spär på intresset men flickvännen Amy är inte det minsta road. När Charley misstänker att en vampyr har köpt grannhuset tar han hjälp av en gammal skräckmästare, som av en händelse råkar heta Vincent i efternamn. En riktig klassiker med många referenser och intressanta produktionsdetaljer! Betyg: 4 (stark) av 5.
Film 35 av 100: Raskenstam (1983) av Gunnar Hellström med Gunnar Hellström och Agnetha Fältskog. Ett fritt porträtt av sol-och-våraren Gustaf Raskenstam. Inget märkvärdigt, men ett trevligt sällskap. Betyg: 3/5.
Film 36 av 100: Call girl (2012) av Mikael Marcimain med Sofia Karemyr och Simon J. Berger. En ganska modig film som ger en bild av folkhemmet bakom kulisserna, inte minst hur det kan ha sett ut bakom Geijer-affären. För att berätta historien har man använt personer som för tankarna både till Palme och Hyland, förmodligen en aning tillrättalagt. Rätt snyggt genomförande. Betyg: 3 (stark) av 5.
Film 37 av 100: Nude on the moon (1961) av Doris Wishman. För att förstå Wishman bör man lägga ganska mycket tid på att läsa intervjuer med henne och se några av hennes filmer. Helt oavsett är denna film höjden av lyckträff: Vetenskapsmän flyger till månen, som tydligen är en nudistkoloni! Det blir mångudinnan som får avgöra expeditionens framtid, och medan den ena vetenskapsmannen blir förälskad får den andre kval kring hans framtid. Betalade ganska mycket för DVD:n, som tyvärr ser ut som en sämre VHS. Betyg: 3/5.
Film 38 av 100: Unknown island (1948) av Jack Bernhard med Virginia Grey och Phillip Reed. En riktigt bra äventyrsfilm som byggs upp på en skum bar i Singapore och slutar på en öde ö i stilla havet, bebodd av gigantiska urtidsdjur. Blandad kvalité på specialeffekterna och inte alltid helt värdelöst. Intrigerna på ön känns onödiga, men som tur är håller sig filmen till den anständiga längden av 75 minuter. Betyg: 3/5.
Film 39 av 100: The Rachel Papers (1989) av Damian Harris med Dexter Fletcher och Ione Skye. Typisk sexkomedi från sent 1980-tal. Charles får för sig att han ska skaffa erfarenhet genom att vara med äldre kvinnor innan han fyller 20, vilket naturligtvis leder till komplikationer. Med tanke på hur kändistät filmen är (Jonathan Pryce, James Spader, Michael Gambon, Bill Paterson, Aubrey Morris) hade jag kanske förväntat mig mera, men den är åtminstone småtrevlig. Betyg: 2/5.
Film 40 av 100: John Houdi: Tricks (2009) av och med John Houdi. En gammal dvd som numera finns att betrakta gratis på YouTube (https://www.youtube.com/watch?v=R0yaO4rqKO0). Det finns några olika kategorier av illusionister. Joe Labero gör Las Vegas-magi, Anders Fox gör close up-magi, och Houdi gör salongsmagi. Filmen är en nedkortad live-show som bara är dryga timmen lång, men Houdi är inte bara (med god marginal) Sveriges bästa salongsmagiker, han är dessutom rolig. I dagens TikTok-klimat skulle han säkert ha vunnit på att såga upp filmen till fyrtiotusenmiljarder klipp, men för den som vill hälla upp en cognac och sitta i en skön fåtölj under en dryg timme, är detta en solklar rekommendation. Betyg: 4/5.
Film 41 av 100: Clean slate (1994) av Mick Jackson med Dana Carvey och Valeria Golino. Trivial men underhållande film om en privatdetektiv som får minnesförlust av att somna. Han måste både lösa ett fall och återupptäcka det system som gör att han klarar vardagen. Skrattade flera gånger, t.ex. när storskurken misstas för hyresvärden eller alla kommentarer om hans tumme. Betyg: 4/5.
Film 42 av 100: Jakten på den försvunna skatten (1981) av Steven Spielberg med Harrison Ford och Karen Allen. Arkeolog och skattletare på 1930-talet verkar kunna komma åt vilken skatt som helst, men förlorar den i alltid i slutändan. Storslaget men hela filmen är fullproppad av ologiska händelser. Betyg: 3/5.
Film 43 av 100: Indiana Jones och de fördömdas tempel (1984) av Steven Spielberg med Harrison Ford och Kate Capshaw. En indisk by blir bestulen på sina religiösa symboler, och det visar sig både att dessa symboler har en faktisk signifikans och att Indiana Jones faktiskt kunde lösa mysteriet. Hade filmen haft en anständig längd vore den en fullträff, men 30 onödiga minuter drar ner betyget. Betyg: 4/5.
Film 44 av 100: Spelaren (1992) av Robert Altman med Tim Robbins och Greta Scacchi. Filmen lovar mycket genom att inledas med en 8 minuter lång scen utan klipp, och den håller hela vägen igenom. Filmproducent hotas efter att ha nekat ett filmmanus. Fängslande, snyggt och charmigt. Betyg: 5/5.
Film 45 av 100: The dead zone (1983) av David Cronenberg med Christopher Walken och Brooke Adams. Efter en trafikolycka får Johnny förmågan att se in i framtiden, och blir därför medveten om ett annalkande attentat. Detta är en av få bra filmer baserade på en roman av Stephen King. Av någon anledning användes inte bokens svenska titel på filmen i Sverige, trots att boken var hyfsat ny när filmen kom. Klockren stämning i filmen. Betyg: 4/5.
Film 46 av 100: Hajen 2 (1978) av Jeannot Szwarc med Roy Scheider och Lorraine Gary. På något vis lyckades Zanuck/Brown skruva upp skådespelarna från Hajen (1975) till att göra en ny film. Festsugna ungdomar måste skyddas från en attackerande vithaj. En bra film om man inte jämför den med Spielbergs mästerverk. Betyg: 3/5.
Film 47 av 100: Tetris (2023) av Jon S. Baird med Taron Egerton och Nikita Efremov. En dramatisering av datorspelet Tetris väg över järnridån från Sovjetunionen till den västerländska fria marknaden. En fängslande film som skildrar när östs totalitarism och hysteriska byråkrati krockar med västs entreprenörskap och marknadsliberalism. Lagom mycket tekniska referenser för att tilltala både programmerare och vanligt folk, lagom mycket feel good för att väcka tittarens känslor utan att det blir smetigt. Betyg: 4 (stark) av 5.
Film 48 av 100: Road House (1989) av Rowdy Herrington med Patrick Swayze och Sam Elliott. Stenhård utkastare rekryteras till en krog som hemsöks av drogmaffian. Först ser det bra ut, sen får tittaren erfara hur hårt insyltad maffian är. Vi får uppleva tänkbara filmklichéer som vi som var unga på 80-talet lärt oss att älska, och Swayze är underbar. Klart plus att Jeff Healey dyker upp! Betyg: 4/5.
Film 49 av 100: Rocky IV (1985) av och med Sylvester Stallone. Ingen annan film fångar samtiden som denna. Berättelsen är ganska trivial. Vi får följa Rocky (Stallone) och ryska Drago (Dolph Lundgren) i deras förberedelser inför världsmästerskapet, men det finns så mycket som ger produktionskvalitet till filmen, som t.ex. robotar, digitala synthar och en fantastisk boxningsmatch. På det stora hela, en makalös skapelse! Betyg: 5/5.
Film 50 av 100: Noah (2014) av Darren Aronofsky med Russell Crowe och Jennifer Connelly. Ett försök att göra ett visuellt drama av en av Bibelns märkligaste berättelser. För att göra upp med synder som gått i arv från Adam och Eva bestämmer sig Gud för att döda allt liv på jorden, men räddar en mindre trupp som får agera genbank för framtida generationer. Mycket att titta på, undermåligt genomförande och tråkigt resultat. Ibland undrar man om filmen är ironisk. Betyg: 1/5.
Film 51 av 100: The Cell (2000) av Tarsem Singh med Jennifer Lopez och Vince Vaughn. Polisen behöver få veta var en seriemördares gömmer sitt senast kidnappade offer, problemet är att mördaren ligger i koma. De tar hjälp av ett team som kan ta sig in i människors huvud, för att få svaret. Låter dumt på papper, har en del att erbjuda tittaren. Mycket fantasifulla scener, några ljusa stunder, men varken berättelsen eller genomförandet engagerar. Betyg: 3/5.
Film 52 av 100: Searching for Sugar Man (2012) av Malik Bendjelloul med en massa skivbolagsfolk och Rodriguez. Egentligen inte världens bästa film, men den gör det mesta rätt. Och inte minst lyckades skapa mystik kring en artist som jag inte ens visste fanns. Det resulterade i att jag köpte hans skivor, och kan därmed konstatera att debutskivan Cold Fact (1970) är ett mästerverk. Tyvärr var uppföljaren skit, men tack vare Bendjellouls film fick världen höra Cold Fact! Betyg: 5 (svag) av 5.
Film 53 av 100: Ett tufft jobb (1991) av ingen mindre än John Badham med Michael J. Fox och James Woods. En stenhård polis får en skådespelare på halsen, som vill lära sig polisyrket för att bli mer trovärdig i sin roll. De är väldigt olika, och många konflikter uppstår, men tillslut blir de goda vänner. Underbart förutsägbar och fullproppad med härliga stereotyper! Inte bra, men sevärt! Betyg: 3 (stark) av 5.
Film 54 av 100: Döden på Nilen (1978) av John Guillermin med Peter Ustinov och Mia Farrow. Alla känner väl till Agatha Christies berättelse, men detta är ett magnifikt genomförande. Makalöst skådespeleri, inte minst Angela Lansbury sticker ut, och snyggt fotograferat! Men den behöver inte vara två timmar och tjugo minuter lång – det drar ner betyget! Betyg: 4/5.
Film 55 av 100: Splice (2009) av Vincenzo Natali med Adrien Brody och Sarah Polley. Två genetiker går lös på gensaxen i syfte att skapa nytt liv de kan ha medicinsk nytta av. En liten varelse växer upp och blir naturligtvis farlig. Jag gillade detta skarpt. Det var lätt att förstå allas motiv, det var lätt att hänga med i karaktärernas beteendemönster och berättelsen var bra. Betyg: 4/5.
Film 56 av 100: The Trip (2010) av Michael Winterbottom med Steve Coogan och Rob Brydon. Under en vecka reser Steve och Rob runt och recenserar Storbritanniens bästa restauranger. De har gott om tid att samtala under både resor och måltider, och vekar kunna leverera precis vilka förolämpningar som helst till varandra. Men man får en bild av att det är lite sorgligt att inget egentligen är på riktigt. Riktigt bra teater på vita duken! Betyg: 4 (stark) av 5.
Film 57 av 100: π (1998) av Darren Aronofsky med Sean Gullette och Mark Margolis. Ett matematiskt överbarn hittar ett mönster i aktiekurserna, och kan således i teorin förutspå framtida förändringar och därmed tjäna en massa pengar. Givetvis blir judarna arga. En total shit show. Jag ångrar att jag tog mig igenom eländet, för jag borde ha stängt av. Betyg: 1/5.
Film 58 av 100: Me and you and everyone we know (2005) av Miranda July med Miranda July och John Hawkes. Vi får följa två personer på jakt efter sällskap, en man med arbetarbakgrund och en kvinna med konstnärsambitioner. För att göra det hela mer intressant, använder barnen The Internetz för att knyta egna kontakter. Förmodligen den bästa feelgood-film jag sett någonsin, och betyget bygger på att jag bedömt den som en sådan. Betyg: 5/5.
Film 59 av 100: Närkontakt av tredje graden (1977) av Steven Spielberg med Richard Dreyfuss och Teri Garr. Tydligen finns det grader av närkontakt, definierade av astronomen Allen Hynek. Den första graden innebär att man observerat en utomjordisk farkost, den andra handlar om fysiska bevis för densamma. Denna film handlar om den tredje graden, vilket är en observation av farkostens besättning. En spoiler, kan tyckas, men den ganska stillsamma resan mot det målet kanske behöver spänningen av att betraktaren vet vad målet är. Ibland bjuder filmen på subtila insinuationer att något är fel, ibland bjuder filmen på spektakulära specialeffekter. Spielberg har sina toppar och dalar, och detta är en topp inom science fiction-genren. Betyg: 5/5.
Film 60 av 100: Privatskola för flickor (1983) av Noel Black med Phoebe Cates och Matthew Modine. Konceptet fungerar, men har på grund av det exploaterats alldeles för mycket både före och efter den här filmen. Två killar poserar som flickor för att infiltrera en internatskola för flickor. Cates är som alltid bra, och det är kul att se Michael Zorek i sitt esse. Filmen är dålig men sevärd. Betyg: 3/5.
Film 61 av 100: Leviathan (1989) av George P. Cosmatos med typ alla. Peter Weller från Robocop, Richard Crenna från Rambo, Ernie Hudson från Ghostbusters, Lisa Eilbacher från Snuten i Hollywood, och så vidare. Den officiella berättelsen handlar om ett ryskt genetiskt experiment som påträffas på havsbotten, men egentligen handlar nog filmen om att James Cameron var på väg att släppa Avgrunden. Specialeffekterna är utmärkta, regin håller inte. Metro-Goldwyn-Mayer bevakar inte längre filmen, så den kan ses gratis på t.ex. YouTube. Det är inte bra, men det är en viktig del av filmhistorien, så den bör ses. Betyg: 2/5.
Film 62 av 100: Blues Brothers (1980) av John Landis med John Belushi och Dan Aykroyd. Ex-fängelsekunder får för sig att de ska återförena sitt gamla blues-band. En del roliga kändisar dyker upp, och en del roliga scener flimrar förbi. Hade fungerat om den vore någon timme kortare. Betyg: 2/5.
Film 63 av 100: Himmel över Berlin (1987) av Wim Wenders med Bruno Ganz och Otto Sander. Såg den efter rekommendation, för det ser inget vidare ut på papper: En ängel tar på sig att övervaka den mänskliga aktiviteten i Berlin. Efter att ha förälskat sig i en dödlig kvinna börjar han längta efter fysiska glädjeämnen. Men genomförandet är makalöst – detta är inget annat än ett konstverk. Betyg: 5/5.
Film 64 av 100: Weird: The Al Yankovic Story (2022) av Eric Appel med Daniel Radcliffe och Rainn Wilson. En hittepåbiografi fullproppad av referenshumor. Förmodligen är skämten roligare om man redan innan visste t.ex. vilken relation Yankovic hade för relation till Coolio, men man drar ändå på mungipan ibland. Ett genomgående skämt verkar vara dåligt smink. John Deacon ser ut som om han ska vara med på framsidan av Vogue, Yankovic och Will Forte dyker upp i värsta Kyle MacLachlan-perukerna, för att inte tala om hur Radcliffe ser ut. Betyg: 3/5.
Film 65 av 100: Nyckeln till framgång (1987) av Herbert Ross med Michael J. Fox och Helen Slater. En bondson från Kansas försöker få fart på karriären i New York enligt principen fake it till you make it. Det skapar såklart komiska situationer på vägen och när bakslaget kommer måste han prioritera rätt. Berättelsen är ok, Fox är charmig och atmosfären är bra. Man hade önskat att helheten vore aningen bättre. Betyg: 3/5.
Film 66 av 100: Brännmärkt (1981) av Tony Maylam med Brian Matthews och Leah Ayres. En av många filmer från kölvattnet efter Fredagen den 13:e. På ett sommarläger utsätts en vaktmästare för ett skämt som leder till att han får allvarliga brännskador. Naturligtvis kommer han tillbaka till lägret för att hämnas. Filmen når samma underhållningsnivå som de bästa i genren, inklusive just Fredagen den 13:e. Riktigt bra soundtrack av Rick Wakeman från Yes! Betyg: 4/5.
Film 67 av 100: Den lilla sjöjungfrun (2023) av Rob Marshall med Halle Bailey och Jonah Hauer-King. En märklig filmatisering av H. C. Andersens gamla saga, som hedrats med en staty i Köpenhamn. Skådespelarinsatserna är bra, specialeffekterna är inte särskilt trovärdiga, men väldigt vackra att se på. Filmen förhåller sig starkt till den betydligt bättre tecknade filmen från 1989, som bjöd på ett tjusigare genomförande och på mindre utfyllnad. Några intriger läggs på bordet, men lämnas okommenterade. Varför har dansk Kung Triton barn med kvinnor från alla världsdelar? Det och mycket annat presenteras, men följs inte upp. Givet att budgeten på en kvarts miljard hade jag förväntat mig något helt annat, men skådespeleriet är riktigt bra. Betyg: 2/5.
Film 68 av 100: Sleepaway Camp (1983) av Robert Hiltzik med Felissa Rose och Jonathan Tiersten. Ytterligare en av många filmer från kölvattnet efter Fredagen den 13:e, denna gång med en ganska kreativ plot twist: En blyg flicka (Rose) visar inget intresse att delta i sommarlägrets aktiviteter och hon blir utsatt för mobbning. Men varje plågoande går ett hemskt öde till mötes, och hemligheten hon bär på uppenbaras. Som film är detta en trea, men inom sin genre är det riktigt bra! Betyg: 4/5.
Film 69 av 100: Jackie Brown (1997) av Quentin Tarantino med Pam Grier och Samuel L. Jackson. Smugglande flygvärdinna pressas av polisen till att bli dubbelagent, vilket givetvis medför en hel del faror. Filmen lyfts definitivt av bra regi och skådespeleri. Michael Keaton och Bridget Fonda är bra, Robert De Niro och Jackson är briljanta. Sett till helheten har Tarantino gjort bättre. Betyg: 4/5.
Film 70 av 100: Roxanne (1987) av Fred Schepisi med Steve Martin och Daryl Hannah. En man med extremt stor näsa (Martin) blir förälskad i Roxanne (Hannah). Briljant idé med ett ganska bra genomförande. Etableringen av karaktärerna är lite övertydlig. Martins hamnar i en situation där han ska dra 20 nässkämt på en pub, vilket var ganska pinsamt, och Roxannes skönhet kompletteras med en gigantisk meritlista. Dessutom är filmen alldeles för lång för den berättelse den förmedlar! Men helheten är bra och filmen bjuder på många skratt. Inspelningsplatsen, Nelson i Kanada, är så tjusig att man får andnöd! Betyg: 4/5.
Film 71 av 100: Tillbaka till framtiden (1985) av Robert Zemeckis med Michael J. Fox och Christopher Lloyd. Första delen i en trilogi om tidsresor. En uppfinnare, Emmett, visar sig hålla på med en del galna experiment, som resulterar i att han blir mördad av libyska terrorister och att hans vän Marty skickas 30 år tillbaka i tiden. Där uppstår problem som måste lösas, och utöver det måste Marty komma tillbaka till 1985 och rädda Emmett från sitt öde. Fantastiskt rolig och snygg film, fullproppad av påskägg – min favorit är att Huey Lewis bedömer provspelningar till skolbalen. Betyg: 5/5.
Film 72 av 100: Armageddon (1998) av Michael Bay med Bruce Willis och Ben Affleck. Ett antal gruvarbetare omskolas till astronauter för att rädda världen från en asteroid. En bra bit över två timmar med patriotiskt svammel i en totalt orealistisk film. Betyg: 1/5.
Film 73 av 100: Knubbigt regn (1999) av Frank Oz med Steve Martin och Eddie Murphy. Misslyckad filmproducent drar i gång ett vinna-eller-försvinna-projekt utan att ha fått med sig filmens stjärna, som inte vet att det han utsätts för är en filminspelning. Rolig idé och en ganska bra film i början, som under resans gång blir alldeles för osannolik för att engagera, men några skratt bjöd den trots allt på. Betyg: 3/5.
Film 74 av 100: Chinatown (1974) av Roman Polanski med Jack Nicholson och Faye Dunaway. En privatdetektiv anlitas av en kvinna för att spionera på en man som antas vara otrogen. Han upptäcker snabbt att saker inte är som de verkar, och över tid att det pågår dubbelspel. Det är inte en fullträff, men det vore orättvist att ge den lägre betyg, men trots att den rullar i över två timmar, är den en mycket angenäm resa. Nicholson passar perfekt som synisk detektiv. Betyg: 5/5.
Film 75 av 100: First spaceship on Venus (1960) av Kurt Maetzig med Yôko Tani och Oldrich Lukes. Forskare hittar bevis för att det bor en civilisation på Venus, och beslutar sig för att åka dit. Färden blir dramatisk. De stöter på ett meteoritregn så svårt att de måste använda nödgyrot, och ansvarig för blinkande lampor börjar argumentera att hans tid är så viktig så att lunch inte längre kan levereras till honom. Fantasifullt och en hel del ofrivillig humor. Betyg: 2/5.
Film 76 av 100: Kär i karriären (1993) av Barry Sonnenfeld med Michael J. Fox och Gabrielle Anwar. Fox spelar en alltiallo som passar upp på gästerna på ett finare hotell, men drömmer om att äga sitt eget. En potentiell investerare visar sig uppvakta samma flicka som Fox rollfigur är förälskad i. Ganska charmigt, fartfyllt och hyfsat roligt, men inget märkvärdigt. Betyg: 3/5.
Film 77 av 100: Starship Troopers (1997) av Paul Verhoeven med Casper Van Dien och Neil Patrick Harris. I en alternativ framtid koloniserar människan Universum, och har därför hamnat i konflikt med en annan kolonialmakt bestående av utomjordingar som liknar stora insekter. Vi får följa hur jordlingarna förhåller sig till och hanterar ett sådant motstånd, vilket inte är en helt vacker historia. En briljant satirfilm, förklädd till en simpel popcornrulle, där varenda liten detalj är en ledtråd eller en sarkastisk kommentar. Betyg: 5/5.
Film 78 av 100: Vem satte dit Roger Rabbit (1988) av Robert Zemeckis med Bob Hoskins och Christopher Lloyd. I en värld där rollfigurerna i tecknade filmer egentligen är skådespelare som agerar framför kameran, blir en av de stora stjärnorna, en kanin, anklagad för mord. Jag var inte jätteimponerad när jag såg den på bio för 35 år sedan, då det var lite för mycket att hålla reda på både handlingen och allt som händer i bild. Den behövdes ses om på dvd. Det som verkligen sticker ut med filmen är teckningarna, som visar kaninen med flera i bild under kamerarörelser, något som åtminstone inte jag sett förr. Ett tekniskt mästerverk! Betyg: 4/5.
Film 79 av 100: Plötsligt i Vinslöv (2001) av Jenny Bergman och Malin Skjöld med Holger Nilsson och Kjell Fredriksson. Filmen väljer ut några av invånarna och Vinslöv (Hässleholms kommun, Skåne) och låter tittarna ta del av deras vardagsliv och fritidssysselsättningar, som inte minst är golfande. Som tittare slits jag mellan tacksamheten att filmen gjordes (för den är ett fönster till en värld som inte alla har tillgång till) och frustration över att man nästan behöver ha kufar i handlingen för att hålla tittarens intresse uppe. Betyg: 3/5.
Film 80 av 100: Ett päron till farsa firar jul (1989) av Jeremiah S. Chechik med Chevy Chase och Beverly D’Angelo. Clark Griswold bjuder hem familjen på julfirande. Inget går som det var tänkt och fler gäster än de som bjudits in dyker upp. Utöver allt elände pågår en infekterad grannfejd och julbonusen uteblir. Detta är den tredje filmen om familjen Griswald, och av den sämsta av dessa tre, men den är tillräckligt bra för att vara ett givet inslag i julens tv-tittande. Förmodligen den film där Chevy Chase är mest utagerande. Som skådespelare är han aldrig trovärdig men alltid briljant i sin syrlighet. Betyg: 3/5.
Film 81 av 100: Blixt Gordon (1980) av Mike Hodges med Sam J. Jones och Max von Sydow. Inledningsvis får vi höra hur någon ondskefull leker med jorden genom att orsaka naturkatastrofer (lite som Disaster-menyn i SimCity). En rugbyspelare som reser till planeten Mongo får reda på att det är den ondskefulla kejsaren Ming som är i farten. Kan han rädda jorden i tid? Rätt dåligt, men riktigt roligt. Om inte annat är soundtracket av Queen helt briljant! Betyg: 3/5.
Film 82 av 100: Vägen till El Dorado (2000) av Bibo Bergeron, Don Paul och Jeffrey Katzenberg med Kevin Kline och Kenneth Branagh. Av en slump får två skojare en chans att resa till El Dorado för att komma över stadens guld. Jag köpte denna på dvd så snart den släpptes, då jag hade barn i rätt ålder för att se den. Jag skrattade mig igenom filmen och tyckte att jag såg mig själv. Bra barnfilm som tilltalar flera generationer, och som barnfilm får den en femma, men för en vuxen är den mer av ett tillfällets nöje. Inte full pott, men en rekommendation! Betyg: 4/5.
Film 83 av 100: Can’t buy me love (1987) av Steve Rash med Patrick Dempsey och Amanda Peterson. Töntig kille betalar skolans populäraste tjej för att hon ska göra honom populär, vilket naturligtvis ger ett bakslag. Förutsägbart men underhållande och charmigt. Betyg: 4/5.
Film 84 av 100: Forbidden World (1982) av Allan Holzman med Jesse Vint och June Chadwick. I en avlägsen framtid på ett avlägset rymdskepp, faller en vetenskaplig expedition offer för ett misslyckat experiment. Groteskt muterade livsformer konsumerar sig igenom skeppets besättning. Mycket monster, naket och galna vetenskapsmän, men inte en film för första dejten, utan snarare något för (tidigast) tioårsjubileet. Betyg: 3/5.
Film 85 av 100: Jag är med barn (1979) av Lasse Hallström med Magnus Härenstam och Anki Lidén. Reklamaren Bosse lyckas göra Lena gravid. Han tror att livet är över, men filmen skildrar Bosses förändrade livsstil, och hans kollegor förhåller sig. Kunde ha varit så mycket bättre än det är, men Härenstam är såklart bra. Betyg: 2/5.
Film 86 av 100: Doc Hollywood (1991) av Michael Caton-Jones med Michael J. Fox och Julie Warner. En läkare på genomresa kvaddar bilen i en småstad och döms till samhällstjänst. Under tiden han avtjänar sitt straff, utvecklar han en relation till orten och dess invånare. Riktigt charmig film med biroller från inga mindre än Bridget Fonda, George Hamilton och Woody Harrelson. Betyg: 4/5.
Film 87 av 100: Twin Peaks: Fire Walk with Me (1992) av David Lynch med Sheryl Lee och Ray Wise. En abstrakt film som ger lite bakgrundsinformation till en tidigare tv-serie, som kort och gott hette Twin Peaks. Vi får veta mer om huvudpersonen i serien, Laura Palmer, och får en inblick in hennes sista dagar vid livet och vad som kan ha gått fel, och man behöver inte ha sett serien för att ha glädje av filmen. Så bra att man får rysningar. Betyg: 5/5.
Film 88 av 100: Mitt stora feta grekiska bröllop 2 (2016) av Kirk Jones med Nia Vardalos och John Corbett. Toula och Ian som gifte sig i första filmen, visade sig inte vara riktigt gifta. Vi får se en ny kulturkrock som innefattar en dotter, men helt utan eftertanke tragglar eländet på i samma hjulspår som sist. För tittaren finns en viktig skillnad: Sist var det nytt och roligt. Betyg: 2 (mycket svag) av 5.
Film 89 av 100: Nördarna kommer! (1984) av Jeff Kanew med Robert Carradine och Anthony Edwards. Ordet “nerd” översattes traditionellt till “tönt” på svenska, men “Nördarna kommer” bidrog till att ett nytt ord introducerades, nämligen “nörd”, och helt plötsligt förvandlades en tönt från en outsider till någon som framgångsrikt förkovrade sig i ett ämne. Filmen är både mycket underhållande och ytterst inflytelserik över samhället vi lever i idag.
Film 90 av 100: Sleepy Hollow (1999) av Tim Burton med Johnny Depp och Christina Ricci. Depp spelar någon form av utredare som efter en serie av mord skickas till Sleepy Hollow för att undersöka legenden om den huvudlösa ryttaren. Extremt kändistätt och snyggt filmad, men lyckas inte riktigt engagera. Jag kom på mig att tänka “åh, det är hon i Svarte Orm” mer än “åh, vad bra det här är”. Betyg: 3/5.
Film 91 av 100: Pirates of the Caribbean: Död mans kista (2006) av Gore Verbinski med Johnny Depp och Orlando Bloom. En fantasifull berättelse i spektakulära miljöer om en sjörövare som försöker undkomma en förbannelse som odöd. Mycket specialeffekter av blandad kvalité och en dramaturgisk trafikolycka. En händelse inträffar, vilket kan vara en jättebläckfiskattack eller en svärdfight i ett kvarnhjul, som sedan illustreras under 15-20 minuter för lång tid. Sen når berättelsen nästa händelse, som också tydligen måste illustreras i 15-20 minuter för lång tid. Filmen är något slags exklusiv apelsin-tv. Betyg: 1/5.
Film 92 av 100: Strul (1988) av Jonas Frick med Björn Skifs och Gunnel Fred. Kemilärare åtalas för drogtillverkning. I fängelset tvingas han ut för att begå nya brott, och lyckas såklart bli vän med en polis. Snyggt filmat, kul idé, ganska daterad men klart sevärd! Betyg: 3/5.
Film 93 av 100: Tricks – en hyllning till salongsmagin! (2009) av och med John Houdi. Houdi bjuder på en hyllning till salongsmagin och påvisar samtidigt fingerfärdighet i världsklass. Det enda negativa jag har att säga om denna film är att den bara är dryga timmen lång. Jag lånade dotterns dvd, men den finns numera att betrakta gratis på YouTube. Du bör vara intresserad av illusionism och scenmagi för att uppskatta denna fullt ut. Betyg: 3/5.
Film 94 av 100: Harry Potter och Fången från Azkaban (2004) av Alfonso Cuarón med Daniel Radcliffe och Emma Watson. En potentiellt spännande berättelse om en förrymd fånge i en fantasifull värld. Vissa moment fångade uppmärksamheten, t.ex. när barnen smög utanför Hagrids stuga, men det som mest utmärker filmen är att den är alldeles för lång, och att den därmed utgör en tråkig sittning. Betyg: 2/5.
Film 95 av 100: Spotlight av Tom McCarthy med Mark Ruffalo och Michael Keaton. Filmen berättar historien om när Boston Globe gjorde en artikel om de systematiska övergreppen på barn inom Katolska kyrkan. Lyckas berätta historien på ett engagerande sätt utan att bli för emotionellt engagerad i sakfrågan – fokus ligger på journalistiken. Betyg: 5/5.
Film 96 av 100: Rymdens vampyrer (1985) av Tobe Hooper med Steve Railsback och Peter Firth. Handlingen inleds med att vi får följa en besättning på jakt efter Haleys komet, som upptäcker ett övergivet rymdskepp. Jag begrep inte riktigt allt som hände i filmen, men rymdvampyrer snor londonbornas själar, och endast Tom Carlsen kan stoppa dem. Visuellt är filmen en fröjd, men på det totala når det inte riktigt hela vägen fram. Betyg: 3/5.
Film 97 av 100: Ring mamma! (2019) av Lisa Aschan med Sanna Sundqvist och Nina Gunke. En film som försöker driva med fenomenet att döttrar aldrig ges en chans att bli vuxna i en kravlös tillvaro. Bra idé med ett riktigt dåligt genomförande. Gunke brukar vara hyfsat bra, men Aschan har profilerat sig stadigt som riktigt dålig, och på den punkten levererar hon. Betyg: 1/5.
Film 98 av 100: En frygtelig kvinde (2017) av Christian Tafdrup med Anders Juul och Amanda Collin. Ett konstnärligt dokument av fenomenet gaslighting. Vi får följa en man i hur han anpassar sig för att erhålla den kvinna han är kär i, och hennes godkännande. Resan från ”detta är lite tokigt” till ”detta är total galenskap” blir en överraskning under resans gång. Betyg: 5/5.
Film 99 av 100: E.T. the Extra-Terrestrial (1982) av Steven Spielberg med Henry Thomas och Drew Barrymore. Rymdvarelse blir kvarlämnad på jorden, och under sina försök att hanka sig fram blir han vän med tre barn. Riktigt bra, väldigt snyggt, men lite sliskigare än Närkontakt av tredje graden. Spielberg var redan meriterad, men fortfarande ung, hungrig och intressant. Betyg: 4/5.
Film 100 av 100: Fönstret åt gården (1954) av Alfred Hitchcock med James Stewart och Grace Kelly. En fotograf är tillfälligt rullstolsbunden och fast i sin lägenhet. Det enda nöjet är att betrakta sina grannar, och över tid formas historien om ett begått mord i huvudet på honom. Betyg: 5/5.
Filmtips från Flimmer Duo
I det senaste avsnittet av Flimmer Duo tittar Henrik Andersson och jag på Night of the living dead från 1968.
Du som gillar film bör hålla koll på Flimmer Duo och dessa länkar:
YouTube-kanal: https://www.youtube.com/@flimmerduo
RSS-flöde: https://80tal.se/feed/tag/flimmer-duo.rss
Hemsida: https://filmtips.winsoft.se/
Några knep för att få fart på Commodore BASIC i C64
Commodore BASIC 2.0 på Commodore 64 har några kända prestandaproblem, och denna enkla kod har implementerat några stycken:
10 S=TI
20 X=0.01
30 FOR A=0 TO 255
40 REM
50 REM
60 REM
70 X=X+0.01
80 POKE 16384,A
90 REM
100 REM
110 REM
120 NEXT
130 S=TI-S
140 PRINT "TIME" S
150 PRINT "RESULT " X
Programmet startar en tidtagning och 256 gånger görs en flyttalsberäkning och ett heltal skrivs till en minnesadress (16384). Programmet tar 327 jiffies i tid. (En jiffy är ungefär 1/60 sekund.)
Att hitta ett radnummer tar tid, så om man optimerar genom att radera alla REM-satser, blir exekveringstiden istället 299 jiffies.
10 S=TI
20 X=0.01
30 FOR A=0 TO 255
70 X=X+0.01
80 POKE 16384,A
120 NEXT
130 S=TI-S
140 PRINT "TIME" S
150 PRINT "RESULT " X
Om man dessutom lägger alla radnummer tätt ihop, försvinner faktiskt en jiffie till.
0 S=TI
1 X=0.01
2 FOR A=0 TO 255
3 X=X+0.01
4 POKE 16384,A
5 NEXT
6 S=TI-S
7 PRINT "TIME" S
8 PRINT "RESULT " X
Att tolka ett heltal tar tid, så genom att skapa en variabel innehållande adressen 16384 behöver tolken bara göra det arbetet en gång.
0 S=TI
1 X=0.01
2 N=16384
3 FOR A=0 TO 255
4 X=X+0.01
5 POKE N,A
6 NEXT
7 S=TI-S
8 PRINT "TIME" S
9 PRINT "RESULT " X
Detta skalar bort ytterligare 81 jiffies, så att programmet nu inte tar mer än 217 jiffies. Den sista optimeringen vi kan göra, är bara lämplig när arbetet som utförs inte kräver att bildskärmen är aktiv. Genom att stänga av bildskärmen, försvinner en tidskrävande arbetsuppgift, vilket gör att processorn kan lägga mer fokus på BASIC-programmet. På adress 53265 ligger normalt värdet 27, vilket betyder att skärmen ska vara aktiv. Genom att sätta 11 på adressen, stänger man av skärmen, när arbetsuppgiften är klar, kan man aktivera skärmen igen genom att återställa värdet till 27.
0 POKE 53265,11
1 S=TI
2 X=0.01
3 N=16384
4 FOR A=0 TO 255
5 X=X+0.01
6 POKE N,A
7 NEXT
8 S=TI-S
9 PRINT "TIME" S
10 PRINT "RESULT " X
11 POKE 53265,27
Vi är nu nere på 205 jiffies för samma arbetsuppgift, vilket är 63% av ursprungstiden på 327 jiffies. BASIC är fortfarande lite för slött för att vara användbart när datorspel ska byggas, men om man väljer BASIC i kommersiell mjukvara, är det viktigt att göra rätt.
De delar av Pirates! som inte kräver realtidsexekvering är faktiskt skrivna i BASIC, och även spelet Artworx Strip Poker var skrivet i BASIC.
En Windows-komponent för Commodore-sprites
En Windows Forms-komponent som kan presentera en Commodore 64-sprite är kanske inte vad man använder varje dag. Men jag har byggt en sådan (.NET Framework 4.8) för att isolera många tekniska bekymmer i den sprite-editor för C64 jag arbetar med. Om du vill leka med den, så finns den här:
Install-Package EditStateSpritePaketet innehåller en GUI-komponent för att redigera pixeldata, en dialog för att modifiera färgpaletten, diverse funktioner för att manipulera en sprite samt funktioner för serialisering och deserialisering. Paketet uppdateras ganska ofta, eftersom jag ständigt hittar nya behov i sprite-editorn jag arbetar med. För att komma i gång:
_sprites.Add(new SpriteRoot(false));
spriteEditorControl1.ConnectSprite(_sprites[0]);
Som exempel, om du vill spegelvända en sprite:
spriteEditorControl1.Flip(TwoWayDirection.LeftRight);
Invalidate();
Om du vill låta användaren ändra färgpaletten:
spriteEditorControl1.PickPaletteColors(this);
Invalidate();
Eller kanske läsa in ett sedan tidigare sparat dokument med C64-sprites:
_sprites.Load(@"D:\Temp\sprites.sprdef");
spriteEditorControl1.ConnectSprite(_sprites[0]);
Invalidate();
Ett fungerande exempel finns att titta på här (TestProgram). Mycket nöje!
Vilket programmeringsspråk är enkelt?
Frågan om vilka programmeringsspråk som är enkla brukar dyka upp från nybakade programmerare. Det är inte jättelätt att besvara frågan, för det finns så många aspekter som påverkar komplexiteten i ett programmeringsspråk. Är språket enkelt för att språket går att lära sig på kort tid? I så fall är C ett utmärkt enkelt språk. Du måste veta om att du ska skapa en entry point (alltså skriva int main()) och du måste förstå #include, men därefter är det bara att gasa på. Det totalt tre uppdelade i tre kategorier: Flödeskontroll, input/output och beräkningar.
För flödeskontroll finns beslut (branschtermen är branching), iterationer (kallas ofta för loopar) och hopp. Input/output handlar om kommunikation med omvärlden, som t.ex. skärm, tangentbord eller printer (printf, fread, fclose). För beräkningar finns ett antal operatorer som +, -, * och / (med flera).
Rent objektivt finns det inte särskilt mycket att lära sig kring språket C. Helt oavsett vilket programmeringsspråk man pratar om, så måste man lära sig de koncept som är kopplade till programmering – på den punkten kan inte ett språks enkelhet hjälpa till – men när man väl kan det, så är C definitivt enkelt.
Ju enklare språket blir, desto enklare blir det att programmera. C erbjuder 32 nyckelord och en drös med operatorer, vilket man kan lära sig på en dag. Men hur omsätter man den kunskapen till att bygga t.ex. Doom? Eller Heroes of Might and Magic? Eller ens Notepad? Man måste veta hur man använder den specifika plattform man programmerar för, vilket verkligen är en utmaning i sig!
C# är ett språk som betraktas som svårt att lära sig. Antalet instruktioner och nyckelord är enormt, antalet metoder som finns tillgängliga för att lösa en uppgift är stort. Om du som BASIC-programmerare har en vektor innehållande fem textsträngar som du ska skriva ut på skärmen så finns det typ en enda lösning, som ser ut så här:
FOR A=1 TO 5:PRINT S(A):NEXT AI C# skulle tre olika lösningar på samma problem kunna se ut så här:
for (int i = 0; i < s.Count; i++) Console.WriteLine(s[i]);

foreach (var x in s) Console.WriteLine(x);

s.ForEach(Console.WriteLine);
Men samtidigt, om man lär sig alla instruktioner och alla kommandon (vilket är svårt) så vet du vad som krävs för att bygga Notepad. Eller Doom. Eller rent av Heroes of Might and Magic. Det råder inga tvivel om att svärdet är tveeggat – antingen är språket enkelt men svårt att åstadkomma något i, eller så är språket komplicerat med enkelt att åstadkomma något i när man väl kan det.
Titta gärna på skillnaden mellan Commodore BASIC och 6502 ASM för att skriva HELLO WORLD på skärmen. I BASIC blir det PRINT "HELLO WORLD":
Standardvärden som skickas till en metod i C#
I C# kan standardvärden (default value) på en parameter i en metod sättas både i själva metoddeklarationen i klassen som håller metoden och i eventuella interfaces som klassen ärver ifrån. Dessa standardvärden behöver inte stämma överens med varandra, så vilket är det som gäller? Det är inte instansens typ utan variabelns typ som avgör parameterns standardvärde. Det innebär att man kan typomvandla för att styra vilka parametrar som skickas till en metod. Här är det de upprepade typomvandlingarna som gör att resultatet blir Good Day To You Sir:
var a = new A();
(a as B).X();
(a as C).X();
(a as D).X();
(a as E).X();
(a as F).X();

class A : B, C, D, E, F
{
    public void X(string y) => Console.WriteLine(y);
}

interface B { void X(string y = "Good"); }
interface C { void X(string y = "Day"); }
interface D { void X(string y = "To"); }
interface E { void X(string y = "You"); }
interface F { void X(string y = "Sir"); }
Vill man vara riktigt äventyrlig så kan man skriva en iteration som tittar på den exakta arvslistan som är placerad på klassen A. Här är det den kommaseparerade listan som avgör vilket standardvärde som används.
var a = new A();

foreach (var p in typeof(A).GetInterfaces())
{
    var m = p.GetMethods().Where(p => p.Name == "X").First();
    m.Invoke(a, new[] { m.GetParameters().First().DefaultValue });
}

class A : B, C, D, E, F
{
    public void X(string y) => Console.WriteLine(y);
}

interface B { void X(string y = "Good"); }
interface C { void X(string y = "Day"); }
interface D { void X(string y = "To"); }
interface E { void X(string y = "You"); }
interface F { void X(string y = "Sir"); }
Resultatet är återigen Good Day To You Sir. Egentligen inte helt ologiskt, om du någon gång funderar på vad som styr vilket standardvärde som skickas till parametern i din funktion, så titta på variabelns typ.
Det finns enorma optimeringsmöjligheter när man använder GDI från .NET
När man ska jobba med bitmapsgrafik i .NET är prestanda en ständigt återkommande utmaning. I .NET har vi dels tillgång till GDI (som låter oss rita pixlar individuellt) och något som kallas för GDI+, som erbjuder möjligheten att rita geometriska figurer på skärmen. GDI är numera en del av GDI+, så båda biblioteken exponeras i namnrymden System.Drawing. Den viktigaste klassen för den som jobbar med GDI heter Bitmap och den viktigaste klassen för den som jobbar med GDI+ heter Graphics.
Som parentes vill jag nämna att .NET inte är ett ramverk utan två. Dels har vi .NET Framework och dels har vi det ramverk som kort och gott heter .NET (tidigare .NET Core). Jag väljer i princip alltid .NET (tidigare .NET Core) eftersom det är ett mer moget ramverk, det finns tillgängligt på flest operativsystem (Mac, Linux, Android, m.fl.) och för att du får arbeta i senare versioner av C# i .NET. Det enda motivet att välja .NET Framework är att appar byggda för .NET Framework 4.8 fungerar out-of-the-box på Windows 10 eller senare och uppdateras via Windows Update. Eftersom GDI är en Windows-feature är jag inte intresserad av plattformsoberoendet och väljer därför .NET Framework 4.8 och C# 7.3 för dessa exempel.
Använder man Visual Studio med tillägget för skrivbordsapplikationer, är det bara att välja en projektmall för Windows Forms och .NET Framework, men kör man Visual Studio Code eller någon annan editor, måste man specificera i projektfilen att man vill ha TargetFrameworkVersion satt till v4.8, att OutputType ska vara WinExe och att namnrymderna System.Windows.Forms och System.Drawing ska vara refererade.
Låt oss titta på detta program. Det ritar en rektangel (500×500 pixlar) på skärmen varje gång man klickar med musen. Rektangeln ritas röd- och gulrandig på en slumpvis vald plats. Hela operationen klockas.
using System;
using System.Diagnostics;
using System.Drawing;
using System.Windows.Forms;

namespace WindowsFormsApp1
{
    public partial class Form1 : Form
    {
        private static Random _rnd = new Random();
        private Bitmap Rectangle { get; set; }
        private int PositionX { get; set; }
        private int PositionY { get; set; }

        public Form1()
        {
            InitializeComponent();
        }

        private void Form1_MouseClick(object sender, MouseEventArgs e)
        {
            PositionX = _rnd.Next(300);
            PositionY = _rnd.Next(300);

            // Städa upp minnet.
            Rectangle?.Dispose();

            Rectangle = new Bitmap(500, 500);

            // Rita en randig rektangel.
            var c1 = Color.FromArgb(255, 0, 0);
            var c2 = Color.FromArgb(255, 255, 0);

            var stopwatch = new Stopwatch();
            stopwatch.Start();

            for (var y = 0; y < 500; y++)
            {
                var currentColor = y%2 == 0 ? c1 : c2;

                for (var x = 0; x < 500; x++)
                {
                    Rectangle.SetPixel(x, y, currentColor);
                }
            }

            // Skriv ut hur lång tid operationen tog.
            stopwatch.Stop();
            Text = stopwatch.ElapsedMilliseconds.ToString();

            // Uppdatera skärmen (Form1_Paint kommer att anropas).
            Invalidate();
        }

        private void Form1_Paint(object sender, PaintEventArgs e)
        {
            if (Rectangle == null)
                return;

            // Här utförs uppdateringen av skärmen.
            e.Graphics.Clear(Color.White);
            e.Graphics.DrawImage(Rectangle, PositionX, PositionY);
        }

        private void Form1_FormClosed(object sender, FormClosedEventArgs e)
        {
            // Städa upp minnet.
            Rectangle?.Dispose();
        }
    }
}
Hela operationen tar ungefär 140 millisekunder oavsett om programmet är debug- eller release-kompilerat.
Funktionen SetPixel är central för att detta ska fungera. Den har Microsoft skrivit åt oss i C#, och använder i sin tur GDI i Windows för att få pixeln satt på skärmen. Om vi läser källkoden så ser vi att den gör en del tester som säkerställer att funktionen används korrekt, för att sedan anropa GdipBitmapSetPixel i biblioteket gdiplus.dll som är skrivet i C++.
Vi skulle kunna optimera bort testerna, men jag förstår att Microsoft fill ha med dem, eftersom de tänker att det måste vara bättre med ett program som är lite slöare än ett program som kraschar om någon gör ett fel, som t.ex. att försöka rita en pixel på en bitmapsbild vars position ligger utanför bildens storlek.
En annan mindre viktig detalj är att för varje pixel som ritas, tar SetPixel en färg som är en struktur av en röd, grön och blå byte, som ska konverteras till en int. Konverteringen är gjord i förväg av färgstrukturen, men det blir ett extra funktionsanrop och en extra typomvandling.
Dessa optimeringar får man såklart gärna titta på, om man vill få ut så hög prestanda man bara kan i sin renderingsrutin. Men den viktigaste faktorn handlar om låsning av minnet. När man ritar pixlar ska man erhålla ett lås för att skydda minnet, som man sedan släpper när man är färdig. Som SetPixel är implementerad, skapas och släpps ett lås för varje pixel som sätts, vilket kostar. Att göra en egen implementation som håller låset tills alla pixlar är ritade, är inte särskilt svårt, men det ställer lite högre krav på den som använder implementationen. Och det kanske var därför som Microsoft valde den väg man valde – säkerhet framför prestanda. Trots allt är tanken med C# att det ska vara mer lättillgängligt än t.ex. C++.
Ett exempel på denna lättillgänglighet är att C#-kompilatorn helt enkelt inte tillåter användandet av pointers såvida man inte först deklarerar att man tänker göra så, vilket man gör med nyckelordet unsafe. Det är till och med så att nyckelordet unsafe inte får användas om vi inte sätter AllowUnsafeBlocks till true i projektfilen!
För att undvika att minnet blir låst för varje pixel som ritas, måste vi undvika den inbyggda funktionen SetPixel. Och om vi manipulerar minnet utan att använda den inbyggda funktionen SetPixel, måste vi manuellt låsa minnet när vi börjar arbeta och låsa upp det när vi är klara.
Funktionen LockBits behöver kunna räkna ut hur mycket minne som ska låsas och behöver därför veta bildens storlek (500×500 pixlar) samt vilket pixelformat som används. Jag utnyttjar bara 24 bitar (röd x grön x blå) men arbetar med 32 bitar (alfa x röd x grön x blå), så därför anger jag pixelformatet Format32bppArgb. Svaret från funktionen LockBits används för att berätta för funktionen UnlockBits vad som ska låsas upp, så det vill man ta hand om.
Sist men inte minst måste färgen på pixlarna sättas. Tidigare var det bara ytterligare en parameter till SetPixel, men nu måste även det göras manuellt. Eftersom vi arbetar i 24 bitar, kan vi använda en fyra bytes stor pointer, Scan0.
using System;
using System.Diagnostics;
using System.Drawing;
using System.Drawing.Imaging;
using System.Runtime.InteropServices;
using System.Windows.Forms;

namespace WindowsFormsApp1
{
    public partial class Form1 : Form
    {
        private static Random _rnd = new Random();
        private Bitmap Rectangle { get; set; }
        private int PositionX { get; set; }
        private int PositionY { get; set; }

        public Form1()
        {
            InitializeComponent();
        }

        private void Form1_MouseClick(object sender, MouseEventArgs e)
        {
            PositionX = _rnd.Next(300);
            PositionY = _rnd.Next(300);

            // Städa upp minnet.
            Rectangle?.Dispose();

            var bits = new int[500 * 500];
            var bitsHandle = GCHandle.Alloc(bits, GCHandleType.Pinned);
            Rectangle = new Bitmap(500, 500, 500 * 4,
                PixelFormat.Format32bppArgb,
                bitsHandle.AddrOfPinnedObject());

            // Rita en randig rektangel.
            var c1 = Color.FromArgb(255, 0, 0).ToArgb();
            var c2 = Color.FromArgb(255, 255, 0).ToArgb();

            var stopwatch = new Stopwatch();
            stopwatch.Start();

            var data = Rectangle.LockBits(
                new Rectangle(0, 0, 500, 500),I
                mageLockMode.ReadWrite,
                PixelFormat.Format32bppArgb);

            unsafe
            {
                var bytes = (byte*)data.Scan0;

                for (var y = 0; y < 500; y++)
                {
                    for (var x = 0; x < 500; x++)
                    {
                        var index = x + y * 500;
                        bits[index] = y % 2 == 0 ? c1 : c2;
                    }

                    bytes++;
                }
            }

            Rectangle.UnlockBits(data);
            bitsHandle.Free();

            // Skriv ut hur lång tid operationen tog.
            stopwatch.Stop();
            Text = stopwatch.ElapsedMilliseconds.ToString();

            // Uppdatera skärmen (Form1_Paint kommer att anropas).
            Invalidate();
        }

        private void Form1_Paint(object sender, PaintEventArgs e)
        {
            if (Rectangle == null)
                return;

            // Här utförs uppdateringen av skärmen.
            e.Graphics.Clear(Color.White);
            e.Graphics.DrawImage(Rectangle, PositionX, PositionY);
        }

        private void Form1_FormClosed(object sender, FormClosedEventArgs e)
        {
            // Städa upp minnet.
            Rectangle?.Dispose();
        }
    }
}
Och skillnaden går inte av för hackor! Den lite mer komplicerade koden till trots, nu går samma operation på en (!) millisekund! Man kan alltså lugnt konstatera att om prestanda är viktigt, så bör man kringgå funktionen SetPixel.
ChatGPT kan lyssna på podcasts åt dig
Med tanke på hur snabbt utvecklingen går, kommer denna text snart vara inaktuell eller felaktig. Men jag har upptäckt att jag kan konsumera enorma mängder information på väldigt kort tid genom att låta ChatGPT lyssna på poddar åt mig.
Vill du själv testa behöver du ha tillgång till Office 365 och ett konto som låter dig använda ChatGPT Plus.
1. Ladda hem den podcast du är nyfiken på. Spara den som fil.
2. Starta Word i Office 365. Klicka transkribera och välj den podcast du nyss laddade hem. Spara texten i PDF-format och placera dokumentet på en webbserver. Har du ingen egen, kan du använda https://askyourpdf.com/upload. Dokumentet hamnar på askyoutpdf.com ändå när du använder det från ChatGPT.
Om du har ett pluskonto för ChatGPT kan du köra version 4.0. När versionen är vald, kan du gå in i inställningarna och aktivera stöd för tilläggsprogram (plugins). Kontrollera att detta är gjort. Därefter, håll musen över GPT-4 (i mitten längst upp i ChatGPT) och klicka Plugins. Du får godkänna ett avtal, och därefter kan du välja vilken plugin du vill använda. Ser du redan texten No plugins enabled kan du klicka där för att få välja plugins. Installera den som heter AskYourPDF. Du bör nu se en gul symbol som indikerar att denna är vald.
3. Ställ en fråga. Se till att det framgår vilket dokument du frågar om. I sin allra enklaste form kan du fråga om en summering. Exempelvis:
Vad handlar den här texten om? [Korrekt länk till dokumentet]
Så här kan ett svar se ut:
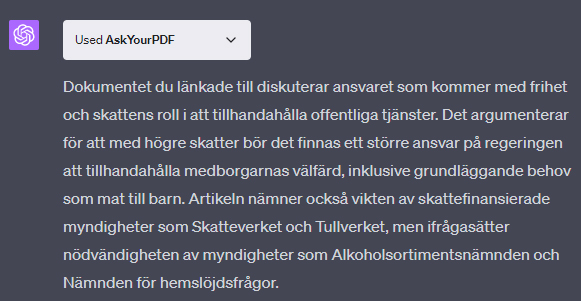
Sen kan man fortsätta att analysera dokumentet. T.ex. fråga om det finns några självmotsägelser i texten, och efter några sekunder listas påståenden som kan tolkas som felaktiga eller självmotsägande. Och så vidare.
Genom att arbeta på detta sätt kan du ha fått till dig innehållet i en 40 minuter lång podcast på bara en eller ett par minuter, och dessutom fått eventuella felaktigheter i det som sägs utpekade för dig.
Change configuration values in runtime in .NET Framework
I stumpled upon the problem of having to change the configuration values in an old .NET Framework 4.0 system while it is running, and it has been possible to do since .NET Framework 2.0.
The compiled App.config file will be named like the assembly it belongs to with the ending .config added to it (e.g. MyProgram.exe.config). Even if your settings are read from and/or used in a DLL, the settings should be written in the main program’s configuration file, not the DLL’s own config file.
You might know that a running system will load its settings when they are referenced by the ConfigurationManager and keep the settings in memory for the rest of the session, meaning that if you edit the config-file, it will probably have no effect.
If you want to use dynamic loading of the config file, you should consider declaring a custom section in the config file. You can of course put all your settings in the appSettings section, but then reloading your settings will be an all or nothing deal. The upside of using appSettings is that it is pre-defined (just like connectionStrings), meaning that you can access them directly from the ConfigurationManager. For your own sections, you need to declare your own variables to store the settings.
This sample shows how to first register a section named featureToggle and then fill it with only one setting called Test. Remember that this is done in the main executable’s App.config file, no matter where the setting is read or used.
<configuration>

  <configSections>
    <section name="featureToggle"
       type="System.Configuration.AppSettingsSection"/>
  </configSections>

  <featureToggle>
    <add key="Test" value="Test value is here!"/>
  </featureToggle>

</configuration>
A reference to System.Configuration is needed for the code to work.
Like mentioned, if you were using the appSettings section, you could just run this line of code, and your settings will be reloaded:
ConfigurationManager.RefreshSection("appSettings");But in this case, I am using a custom section called featureToggle, so I have to both refresh the section and save the section in my variable.
ConfigurationManager.RefreshSection("featureToggle");

_toggles = (NameValueCollection)ConfigurationManager
    .GetSection("featureToggle");
The NameValueCollection is found in the System.Collections.Specialized namespace.
If the _toggles (of type NameValueCollection) variable is initialized in a constructor of a custom configuration class, the constructor will contain the second of the two lines above. And both lines will be needed if you have some sort of reload method in the custom configuration class.
The actual values in the config files are accessed via the _toggles variable, like so:
public string Test
{
    get
    {
        return _toggles["Test"];
    }
}
Good luck with your source code archeology work!
A JS implementation of the Harter-Heighway Dragon Curve
Five years ago, I did a post in Swedish on the Harter-Heighway Dragon Curve, with C# source code. I have translated that code to JavaScript and added animation to the rendering. The fractal describes a way of folding a piece of paper so that its outline takes up a surface. Anyone who has read the book Jurassic Park has probably seen the fractal depicted.
The repository is located here and a live demo is available here.
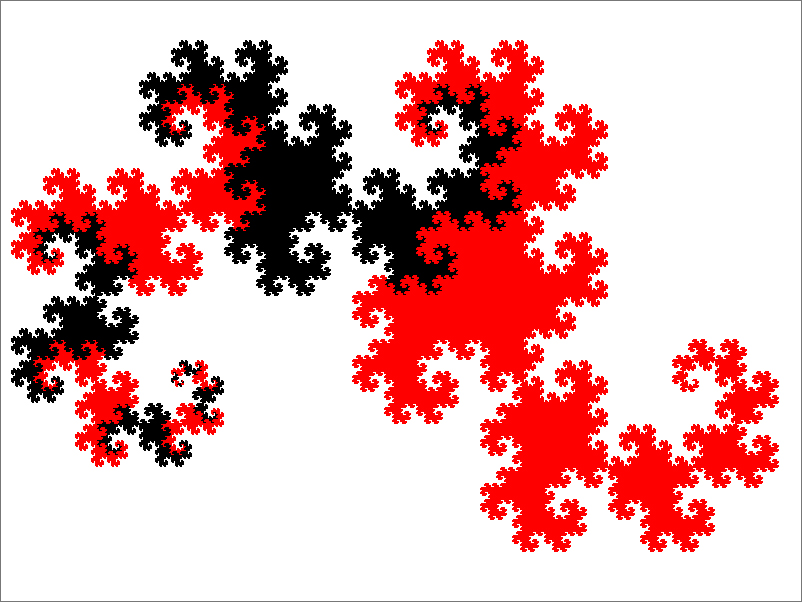
Return by reference
Om inget annat anges skickas parametrar till funktioner “by value” i C#. Det innebär att den mottagande funktionen får en egen kopia av värdet som skickas. Att skicka “by reference” (nyckelordet ref) skiljer sig därmed, eftersom funktionen får en referens till ursprungsvariabeln. För en referensvariabel (som myValue i exemplet nedan) innebär “värdet” en referens till objektet av typen MyValue, vilket innebär att även om m (i MyFunction) är en kopia av myValue, så refererar både m och myValue till samma objekt på heapen. Så när den instansen ändras genom m i funktionen MyFunction, så slår det igenom på myValue.
var myValue = new MyValue {X = 10};
MyFuction(myValue);
Console.WriteLine(myValue.X);

void MyFuction(MyValue m)
{
    m.X = 20;
}

public class MyValue
{
    public int X { get; set; }
}
Resultatet av körningen blir alltså 20.
Vill man se skillnaden mellan att skicka referenstyper “by value” och “by reference” så kan man tilldela ett nytt värde till själva variabeln (m). Eftersom värdet i m är en kopia av värdet i myValue, men myValue är en referensvariabel, kan vi sätta m till en ny referens utan att påverka ursprungsvariabeln myValue.
var myValue = new MyValue {X = 10};
MyFuction(myValue);
Console.WriteLine(myValue.X);

void MyFuction(MyValue m)
{
    m = new MyValue {X = 20};
}

public class MyValue
{
    public int X { get; set; }
}
Resultatet av körningen är 10, eftersom ursprungsvärdet inte förändrades. Variabeln m fick ett nytt objekt att referera till.
Skulle däremot parametern skickas in “by reference”, skriver new över ursprungsvärdet i myValue, så att den pekar på det nya objektet.
var myValue = new MyValue {X = 10};
MyFuction(ref myValue);
Console.WriteLine(myValue.X);

void MyFuction(ref MyValue m)
{
    m = new MyValue {X = 20};
}

public class MyValue
{
    public int X { get; set; }
}
Resultatet av körningen blir därför 20.
Funktioner som ger en retur, ger den “by value”, och det kan vara värt att tänka på om man hanterar större värdetyper. Koden nedan utför just ingenting, men trots att myValue skickas in “by reference” ska skapas en kopia vid return. Eftersom det som kopieras är en referensvariabel så är inte priset särskilt högt, men variabeln kopieras likväl.
var myValue = new MyValue { X = 10 };
myValue = MyFuction(ref myValue);
Console.WriteLine(myValue.X);

MyValue MyFuction(ref MyValue m)
{
    return m;
}

public class MyValue
{
    public int X { get; set; }
}
Precis som argument kan tas emot “by value” eller “by reference” kan även returer ske “by value” eller “by reference”, och precis som med argument så är det “by value” som gäller om inget annat sägs. Betrakta följande kod:
var x = 10;
var y = DoSomething(ref x);
x++;
Console.WriteLine(y);

int DoSomething(ref int x)
{
    x++;
    return x;
}
Rad 4 ger 11. Eftersom värdet kopieras på return-satsen, är det kopian som ökas till 12 på rad 3. Genom att skicka tillbaka värdet “by reference” får man 12:
var x = 10;
ref int y = ref DoSomething(ref x);
x++;
Console.WriteLine(y);

ref int DoSomething(ref int x)
{
    x++;
    return ref x;
}
Att skicka tillbaka värden “by reference” kan dels undvika att stora strukturer kopieras där det inte är önskvärt, och skulle t.ex. kunna användas för att låta annan kod manipulera ett element i en array. I detta exempel ger funktionen GiveElement ut ett element extern kod att manipulera.
var arr = new[]{1,2,3,4,5};

foreach (var i in arr)
    Console.WriteLine(i);

ref int x = ref GiveElement(ref arr);

x = 10;

foreach (var i in arr)
    Console.WriteLine(i);

ref int GiveElement(ref int[] arr)
{
    return ref arr[3];
}
Andra gången arrayen skrivs ut, är värdet av det fjärde elementet (index 3) ändrat till 10.
Del 1/2: Referenstyper eller värdetyper
Referenstyper eller värdetyper?
Programmeringsspråket C# skiljer på referenstyper och värdetyper. I andra högnivåspråk, som t.ex. Java, har man fram till nyligen bara antagit att egna typer är referenstyper, men som C#-programmerare tvingas man då och då att tänka på skillnaden mellan att skapa egna referenstyper och värdetyper. Konsekvenser för användandet har förändrats en aning över olika versioner av C#, men den grundläggande skillnaden är fortfarande att referenstyper lägger sitt data på heapen medan värdetyper lägger sitt data på stacken.
Det innebär att referenstyper är mer kapabla och mer flexibla, men mindre effektiva än värdetyper. Instanser av båda typerna lever alltså på stacken, men referenstyper heter som de gör för att de inte håller sitt data där – referenstypen håller en referens till sitt data som ligger någonstans på heapen.
Traditionellt har man oftast valt att skapa egna typer som referenstyper i C#, för att de är mer kapabla, särskilt förr. Du har kunnat åstadkomma mer med nyckelordet class än med nyckelordet struct, men idag håller den skillnaden på att suddas ut. Hanteringen av null skiljer sig också mellan dessa, men även det håller på att unifieras, åtminstone på ytan. Tidigare fanns en enkel regel: Instanser av referenstyper var null tills de initierats, medan värdetyper hade ett (annat) defaultvärde tills de initierats. Numera förväntas man deklarera per variabel vilken som kan vara null.
Av följande medlemsvariabler är a och b värdetyper, c och d referenstyper. Endast variabel a har ett värde som inte är null:
private int a;
private int? b;
private string c;
private string? d;
Eftersom a är en värdetyp som inte är nullable, får den sitt default-värde som är 0. Eftersom b är en värdetyp som är nullable, får den sitt default-värde som är null. Både c och d är referenstyper och initieras därför till null, men kompilatorn kommer att bevaka att c får ett värde och att den hanteras som om den alltid är initierad, eftersom den inte är märkt som nullable.
De typer du själv utvecklar bör vara referenstyper (class) om de är komposittyper av andra typer eller om datamängden variabel och gärna lite större. Du bör välja att skapa värdetyper (struct) om instanserna är kortlivade eller utgör en del av en komposittyp. Om instanserna är immutable kan det också vara värt att överväga att låta typen vara en värdetyp.
Del 2/2: Return by reference
How to fix the endless explorer.exe crash-and-restart loop in Windows 11
After updating Windows 11 to 22621.1413, it got stuck in an endless loop after startup. The desktop environment, explorer.exe, crashed and restarted continuously. This can happen if you are running add-ons on top of explorer.exe, and in my case, I had ExplorerPatcher installed.
When this happens, press Ctrl+Alt+Delete and start Task Manager. Find explorer.exe and terminate it. It is not easy because the list flickers, and you need to send the command when the program is actually running. This will stop the flickering of the screen and the system will be free to do other tasks than restarting explorer.exe.
At this point, you cannot run modern UI applications like your computer settings, but you can run classic apps that use the native Windows GUI, like the old control panel. To get the old app for uninstalling applications, run appwiz.cpl. From there you can uninstall whatever extension that causes explorer.exe to crash, in my case ExplorerPatcher.
Now I have to wait for this problem to be fixed before I can install it again. ExplorerPatcher is a program that I really appreciate.
Inverterat läge på VIC-20
VIC-20 har en gemensam minnesadress som håller reda både på skärmens bakgrundsfärg och borderfärg. Dessutom finns en bit som håller reda på om inverterat läge används. Adressen är 36879, och de åtta bitarna på adressen beskriver borderfärg (bit 0-2), inverterat läge (bit 3) och bakgrundsfärg (bit 4-7). Inverterat läge är avstängt om bit 3 är satt till 1 (normalt läge) och aktiverat om bit 3 är satt till 0.
Då endast tre bitar (bit 0-2) har avsatts för borderfärg, kan endast en av datorns åtta första färger väljas som borderfärg. Av någon anledning prioriterade man att få in flaggan för inverterat läge framför möjligheten att välja en av alla sexton tillgängliga färger till bordern.
Från början är inverterat läge avstängd, vilket kan konstateras om man läser av bit 3 på adress 36879.
PRINT PEEK(36879) AND 8
Svaret 8 betyder att bit 3 är satt. Ursprungsvärdet på adressen är 27, vilket motsvarar 00011011. Bit 0-2 (numreras från vänster till höger) är 011 vilket motsvarar 3 (turkos). Bit 3 är 1 (normalt läge) och bit 4-7 är 0001 (vit).
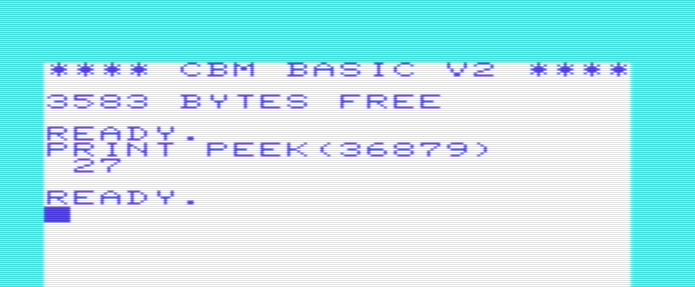
Genom att sätta bit 3 till 0 aktiveras inverterat läge.
POKE 36879,PEEK(36879) AND 247
Detta släcker bit 3, vilket gör att värdet på adress 36879 nu är 19 (00010011) om inget annat är ändrat. Borderfärgen är fortfarande turkos, bakgrundsfärgen är fortfarande vit, men textfärgen (blå om inget är ändrat) ligger nu bakom texten som visas med bakgrundsfärgen (vit). Det innebär att textmarkören inte syns mot vit botten, då den nu visas som vit.
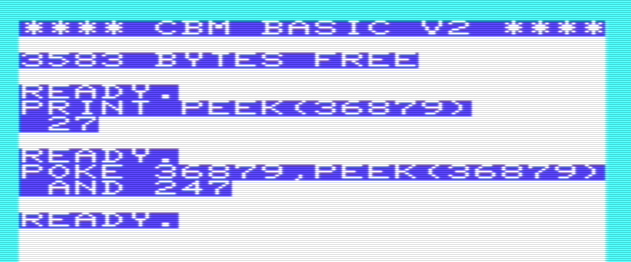
För att återställa, sätt bit 3 till 1 igen.
POKE 36879,PEEK(36879) OR 8
JobRunner 1.5

JobRunner är ett program som exekverar sekvenser av program. Det kan t.ex. användas av den som regelbundet genererar filer lokalt på datorn, som ska skickas upp till en server. I version 1.5 finns stöd i användargränssnittet för att arbeta med variabler. Om du vill modifiera vilka steg som ska exekveras, måste JobRunner startas som administratör. Mer information finns här.
Ladda hem JobRunner för Windows 10/11: JobRunner.exe (högerklicka, välj Spara som…)
Disabling loading turbo to make C64 programs work on the TheC64
On a TheC64, you would normally load a program from a disk image rather than a physical disk. If the program consists of a single file, everything is usually fine. But if several files make up the program you want to load, a custom loader is usually involved, and the built in TheC64 turbo will make the program unloadable.
TheC64 solves this problem by looking at the ending characters in the name of the active disk image. The first disk image in my copy of the Comaland 100% demo is not called image1.d64 but image1_adro.d64. The presence of the characters “ad” tells the TheC64 to inactivate the built-in disk turbo, that makes most multipart software fail during load. The presence of the characters “ro” tells TheC64 that the disk is read-only, which makes most abandonedware work.
The manual describes all of the character combinations that the TheC64 understand. You can control joystick ports, among other things. As a TheC64 user, you should make it a habit to add “ad” before the file ending in the image that holds your programs, and “_adro” to the end of any image you download from the C-64 Scene Database.
The new self-contained Hand class

I have added a new class to my poker formation checker (now on .NET 6.0, not 5.0). The library still mainly works with string representations of decks, hands and cards, and the Hand class can be initialized from a string.
// Create a hand from a string:
using Winsoft.Gaming.GenericPokerFormationChecker;
const string handString = "FORMATION=3-OF-A-KIND,SCORE=0333,HAND=CLB04-DMN06-HRTKN*-DMNKN*-SPDKN*";
var hand = new Hand();
hand.Parse(handString);
Console.WriteLine(hand.Formation); // Output: ThreeOfAKind
But the Hand class can also be initialized using regular function calls.
// Create a hand using the API:
using Winsoft.Gaming.GenericPokerFormationChecker;
var hand = new Hand();
hand.Add(Suit.Spades, Value.Ace);
hand.Add(Suit.Clubs, Value.Ace);
hand.Add(Suit.Diamonds, Value.Ace);
hand.Add(Suit.Hearts, Value.Ace);
hand.Add(Suit.Spades, Value.Value06);
Console.WriteLine(hand.Formation); // FourOfAKind
Also, the Hand class is self contained. You can any time prompt what formation and score it represents, and what cards are included in the formation. If the hand doesn’t have a formation, the InFormation property will point out the highest card.
// Create a hand using the API:
using Winsoft.Gaming.GenericPokerFormationChecker;
var hand = new Hand();
hand.Add(Suit.Hearts, Value.Value10);
hand.Add(Suit.Clubs, Value.Queen);
hand.Add(Suit.Spades, Value.Ace);
hand.Add(Suit.Diamonds, Value.Value03);
hand.Add(Suit.Spades, Value.Value06);
Console.WriteLine(hand[0]!.InFormation); // false
Console.WriteLine(hand[1]!.InFormation); // false
Console.WriteLine(hand[2]!.InFormation); // true
Console.WriteLine(hand[3]!.InFormation); // false
Console.WriteLine(hand[4]!.InFormation); // false
The old API has not changed. Install:
Install-Package PokerFormationCheckerSource code is here, NuGet package is here.
Rita en cirkel på Commodore 64

Det finns ett meme som visar hur omständligt det är att programmera BASIC på Commodore 64 (C64). Bilden visar den kod som krävs för att rita en cirkel på skärmen på en C64, jämfört med den kod som krävs för att rita en cirkel på skärmen på Sinclair Spectrum.
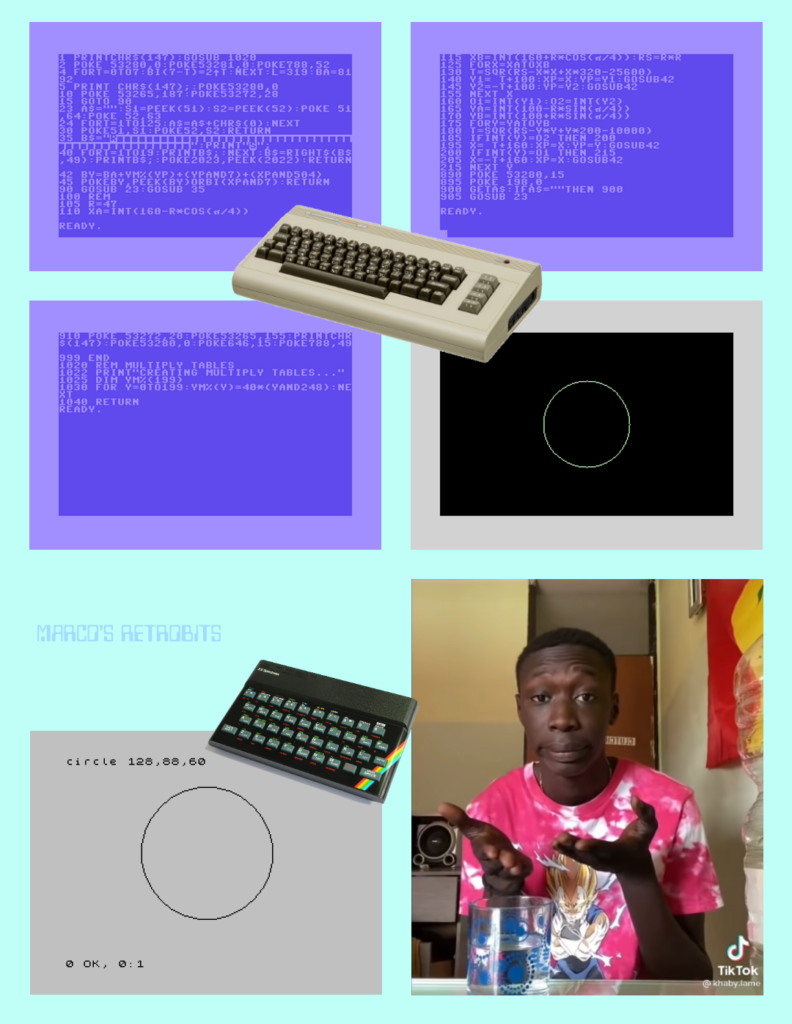
Om du skummar igenom koden i bilderna, så noterar du säkert två saker: C64-versionen är onödigt pratig och Spectrum-versionen lider lite av att skärmupplösningen är aningen lägre än C64-versionen (256*192 pixlar jämfört med 320*200 pixlar).
Denna kod är galet långsam, men det är det kortaste jag har lyckats åstadkomma för att rita en cirkel på C64:
10 POKE 56,32:POKE 52,32
20 CLR:POKE 53272,25
30 POKE 53265,PEEK(53265) OR 32
40 PRINT "{CLEAR}"
50 POKE 88,0:POKE 89,63
60 POKE 113,64:POKE 114,31
70 POKE 12,1:SYS 45760
80 FOR A=1 TO 7.3 STEP 0.01
90 X=COS(A)*20
100 Y=SIN(A)*22
110 XX=159+4*X:YY=99+3*Y
120 ROW=INT(YY/8):CH=INT(XX/8)
130 LINE=YY AND 7:BIT=7-(XX AND 7)
140 BYTE=8192+ROW*320+CH*8+LINE
150 POKE BYTE,PEEK(BYTE) OR 2^BIT
160 NEXT
170 GOTO 170
Detta är resultatet:
Jag skulle tro att orsaken till denna skillnad är att C64 egentligen är en spelkonsol, utklädd till dator. C64 var vid lansering utrustad med extra allt inom ljud och grafik, och för att spara minne slängde man in en äldre version av Commodore BASIC, nämligen 2.0 (second release). Samma som VIC-20, men ett par versioner lägre än den PET. Den enda anledningen till att C64 faktiskt hade en BASIC och ett tangentbord var att man behövde ett säljargument, som tyvärr inte är mer sofistikerat än Annika Strandhälls försvar för iPads i skolan – man blir ett datageni! En skillnad är möjligtvis att det var lägre hängande frukt att lära sig programmering på en hemdator 1982 än det är att lära sig programmering på en kontemporär Facebook-maskin från Apple. Sinclair Spectrum (också 1982) däremot, var en ytterst begränsad dator. Att de barn som fick den skulle lära sig programmering, var på allvar ett viktigt skäl att köpa datorn. Den behövde ha en seriös BASIC! (Jag själv lärde mig BASIC på föregångaren Sinclair ZX81.)
Commodore 128 hade all den kapacitet ljud- och grafikkapacitet som C64 hade, men till skillnad från C64 hade den även kommandon och verktyg som lät användaren dra nytta av den kapaciteten, utan att behöva programmera maskinkod. 128-användaren fick tillgång till en bra BASIC och en drös inbyggda verktyg. Programmet som ritar en cirkel på Commodore 128 är inte helt olikt Spectrum-programmet i memen ovan:
10 GRAPHIC 1,1
20 CIRCLE 1,159,99,60,60
Och även om vi inte hade CIRCLE-kommandot, så blir koden betydligt kortare än C64-versionen, eftersom vi kan ändra grafikläge och sätta individuella bildelement direkt från BASIC. Så uppgiften är inte särskilt svår ändå. Man betalar för lyxen genom högre minneskrav, men denna lyx ansåg man inte att målgruppen för C64 var intresserad av.
FileUtility PathInfo
FileUtility är ett bibliotek för Windows/.NET 6.0 som (för närvarande) innehåller en enda klass: PathInfo. Den kan bl.a. korta ner en filsökväg för presentation på skärmen och ange fil- och katalogstorlek i flera format, inklusive ett människovänligt textformat. Exempelkod finns här.
var max = 15;
var f = new PathInfo(new FileInfo(@"C:\Temp\hello.txt"));
Console.WriteLine(f.CompactPathForDisplay(15))

// Result: C:...\hello.txt
Min första kontakt med ChatGPT
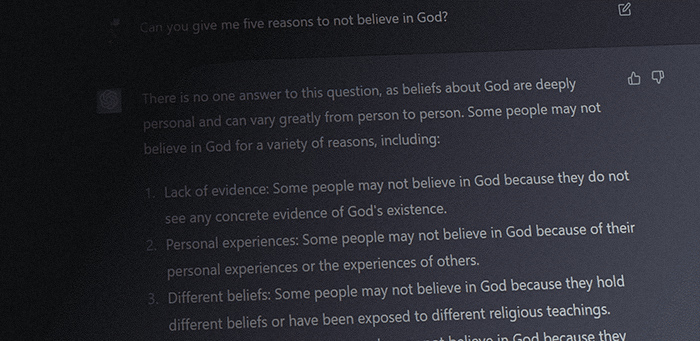
Jag har knuffat min första kontakt med chatboten ChatGPT fram till idag. Orsaken till min prokrastinering är enkel tidsbrist, men idag kom jag mig för att testa ett kort replikskifte, vilket onekligen gav mig mersmak.
Jag:
Can you give me five reasons to not believe in God?
Chat GPT:
There is no one answer to this question, as beliefs about God are deeply personal and can vary greatly from person to person. Some people may not believe in God for a variety of reasons, including:
1. Lack of evidence: Some people may not believe in God because they do not see any concrete evidence of God’s existence.
2. Personal experiences: Some people may not believe in God because of their personal experiences or the experiences of others.
3. Different beliefs: Some people may not believe in God because they hold different beliefs or have been exposed to different religious teachings.
4. The existence of evil: Some people may not believe in God because they cannot reconcile the existence of evil in the world with the idea of an all-powerful, all-loving God.
5. A desire for autonomy: Some people may not believe in God because they value their autonomy and do not want to be beholden to a higher power.
Again, these are just a few examples of reasons someone may not believe in God. It is important to remember that beliefs about God are highly personal and can vary greatly from person to person.
Jag:
Has humans evolved or are they created?
Chat GPT:
The question of whether humans have evolved or were created is a contentious one, and different people may have different beliefs on the matter. From a scientific perspective, the evidence overwhelmingly supports the idea that humans have evolved over time. The theory of evolution is supported by a vast body of scientific evidence, including fossil records, comparative anatomy, and DNA analysis.
According to the theory of evolution, all living things, including humans, have descended from a common ancestor through a process of natural selection. Over time, small variations in the genetic makeup of organisms can lead to the development of new traits and characteristics. These changes can be passed down from one generation to the next, allowing species to adapt to their environments and ultimately giving rise to the diversity of life we see today.
While the theory of evolution is widely accepted by the scientific community, some people may believe in alternative theories, such as the idea that humans were created by God. These beliefs are often based on religious or spiritual beliefs, and are not necessarily supported by scientific evidence. Ultimately, the question of whether humans have evolved or were created is a complex one, and different people may have different beliefs on the matter.
Jag:
Are you created or have you evolved?
Chat GPT:
As a large language model trained by OpenAI, I do not have the capacity for consciousness or the ability to evolve. I am a purely digital entity, created by humans to process and generate text based on the data I have been trained on. I do not have the ability to experience or perceive the world in the same way that humans do. I am not a living being and do not have the same capabilities or limitations as living organisms. I exist solely as a tool to assist with generating text.
Vi har en spännande tid framför oss.
Åtta avsnitt av “Inte en singel”
Det har hunnit bli åtta avsnitt av podcasten “Inte en singel” som jag gör tillsammans med Henrik Andersson. I varje avsnitt lyssnar vi på en skiva – åtminstone på låtarna som inte släpptes som singel – och recenserar både musiken och valet av singlar. Avsnitten finns samlade här (MP3/RSS) och på YouTube. Det senaste avsnittet filmade vi.
Klassen PathInfo för .NET 6.0/Windows
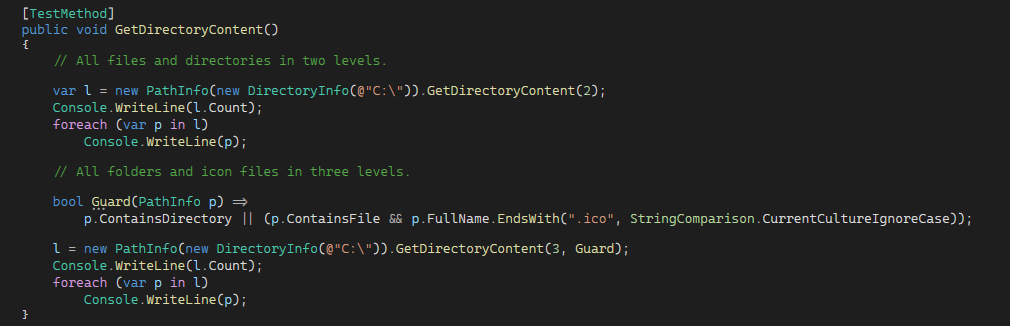
Jag har skapat ett bibliotek för .NET 6.0 (endast Windows) som innehåller en enda klass: PathInfo. Den kan korta ner en sökväg för presentation på skärmen och den kan hämta innehållet i en katalog, rekursivt. Exempel finns att titta på här:
NuGet: https://www.nuget.org/packages/WinSoftFileUtility/
GitHub: https://github.com/Anders-H/FileUtility
Tre timmar om Pink Floyds 70-tal
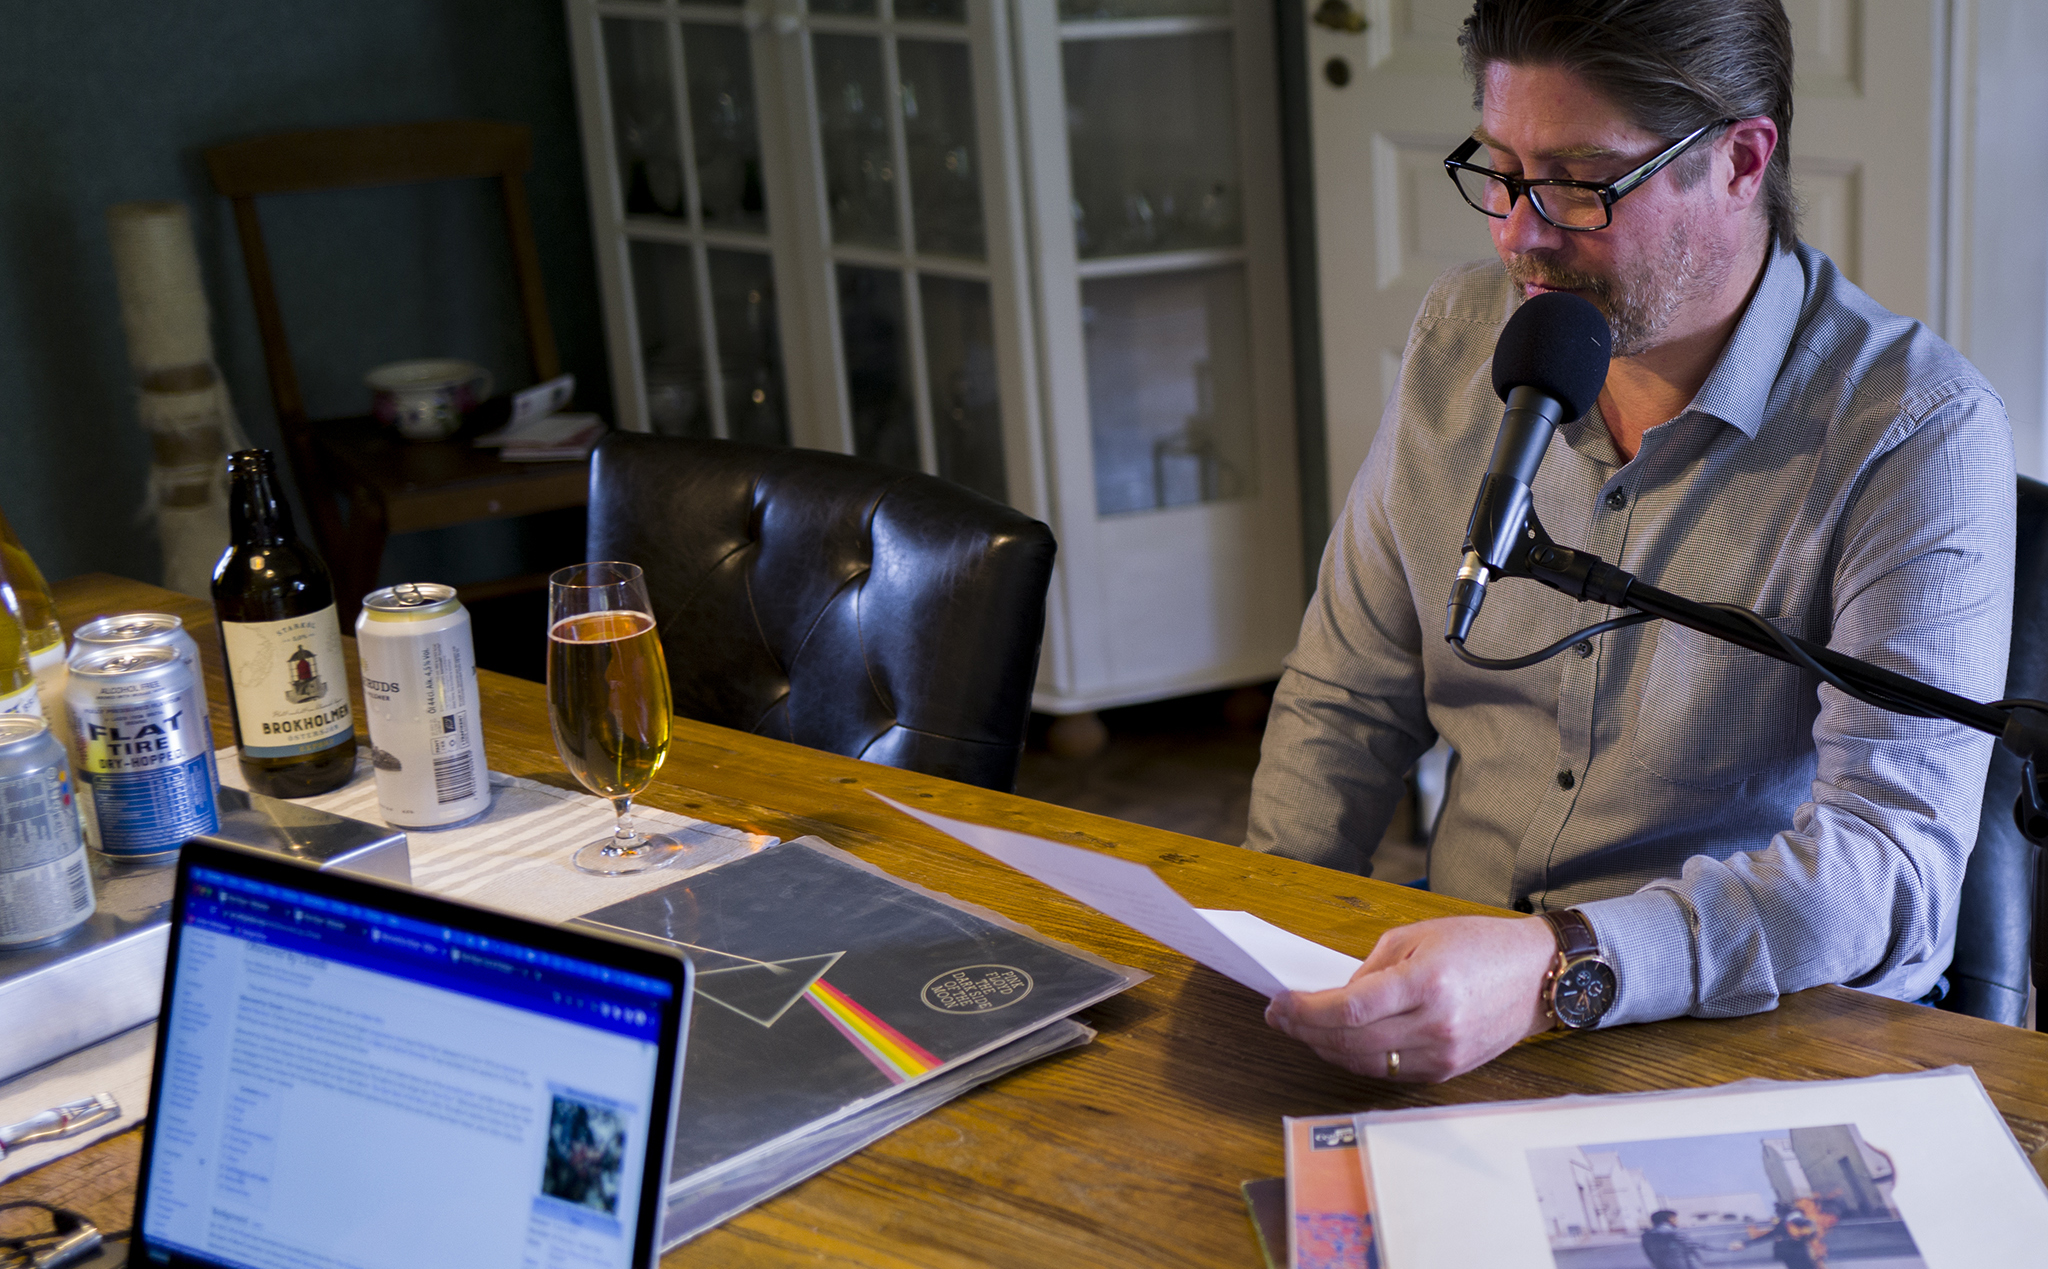
För Nongratas räkning har Jannik Svensson och jag spelat in tre avsnitt om Pink Floyd och deras musik. Vi börjar med deras debut 1967 och landar i The Wall från 1979.
https://poddtoppen.se/podcast/1463215688/samtal/den-stora-pink-floyd-specialen-del-1
https://poddtoppen.se/podcast/1463215688/samtal/den-stora-pink-floyd-specialen-del-2
https://poddtoppen.se/podcast/1463215688/samtal/den-stora-pink-floyd-specialen-del-3
Mycket nöje!
JobRunner 1.4

Version 1.4 av JobRunner finns nu att ladda hem. Programmet låter dig lista upp processer som ska utföras i turordning som kan beläggas med vissa enkla villkor. Startas programmet som administratör kan dessa steg redigeras, annars kan de bara köras.
Den senaste versionen innehåller några mindre buggrättningar och introducerar möjligheten att manuellt stoppa en körning.
https://github.com/Anders-H/JobRunner
Vad är vinsten att skriva i maskinkod?
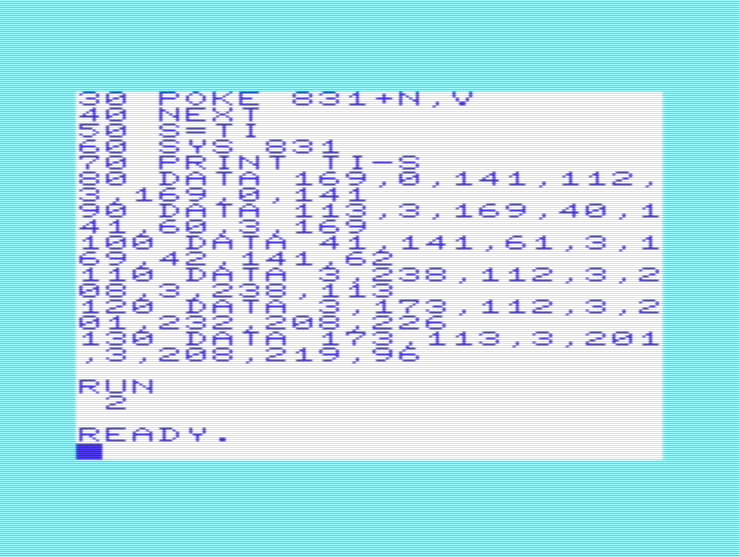
För ett par veckor sedan skrev jag en kort text om hur man optimerar prestandan i Commodore BASIC 2.0 second release. Det gjorde att jag fick frågan om hur mycket man tjänar på att programmera maskinkod istället för BASIC. I mitt exempel drog jag ner exekveringstiden från 1522 jiffys (sextiondels sekunder) till 686 jiffys, genom att välja rätt kommandon och rätt strategi i en konstruerad uppgift: Spara tre värden i tre olika minnesadresser, 1000 gånger.
Uppgiften var att låta en VIC-20 skriva värdet 40 till adress 828, värdet 41 till adress 829 och värdet 42 till adress 830, ett tusen gånger, vilket alltså går att göra på 686 jiffys. Strategin för god prestanda måste utgå ifrån att realtidstolkning tar tid. Men så fick jag frågan om hur lång tid det tar för en VIC-20 att lösa samma uppgift om man skriver programmet i maskinkod. Jag gissade på nolltid, men rätt svar är 2 jiffys, alltså en trettiondels sekund.
Hur ser ett program, enligt ovan, konverterat till maskinkod ut? Stegenser ut som följer:
- Initiera variabeln som håller räkning på antal körningar. Detta kräver två bytes, eftersom 1000 är ett 16-bitarstal, medan VIC-20 är en 8-bitarsdator.
- Utför uppgiften i fråga. Skriv tre värden till tre minnesadresser.
- Räkna upp variabeln.
- Upprepa om uppgiften körts färre gånger än 1000.
- Avsluta.
Jag väljer att lagra variabeln på adress 880-881 och lägga programmet på adress 831. På det viset ryms programmet mellan de tre adresser som är föremål för uppgiften (828-830) och variabeln som håller reda på antalet upprepningar (1000 stycken) på adress 880-881.
1. Assembler-koden för att initiera variabeln som håller räkning på antal körningar ser ut så här (adress 831):
LDA #0
STA 880
LDA #0
STA 881
2. Uppgiften är att skriva värdet 40 till adress 828, värdet 41 till adress 829 och värdet 42 till adress 830 (adress 841):
LDA #40
STA 828
LDA #41
STA 829
LDA #42
STA 830
3. Därefter ska variabeln som håller reda på antal skrivningar till minnet räknas upp (adress 856):
INC 880
BNE 864 ;(som är adressen till beslutet att iterera)
INC 881
4. Om uppgiften utförts färre än 1000 gånger, ska uppgiften upprepas (adress 864):
LDA  880
CMP  #232
BNE  841
LDA  881
CMP  #3
BNE  841
5. Avsluta.
RTSÖversatt till maskinkod, kan vi konstatera att vi har:
- 169 0 141 112 3 169 141 113 3
- 169 40 141 60 3 169 41 169 41 141 61 3 169 42 141 62 3
- 238 112 3 208 3 238 113 3
- 173 112 3 201 232 208 226 173 113 3 201 3 208 189
- 96
Om vi skriver en BASIC-loader för detta, och sedan tar tid på exekveringen, så ser koden ut så här:
10 FOR N=0 TO 47
20 READ V
30 POKE 831+N,V
40 NEXT
50 S=TI
60 SYS 831
70 PRINT TI-S
80 DATA 169,0,141,112,3,169,0,141
90 DATA 113,3,169,40,141,60,3,169
100 DATA 41,141,61,3,169,42,141,62
110 DATA 3,238,112,3,208,3,238,113
120 DATA 3,173,112,3,201,232,208,226
130 DATA 173,113,3,201,3,208,219,96
Och mycket riktigt har vi nu utfört samma uppgift på 2 jiffys istället för 686 jiffys. Maskinkod är alltså inte så lite snabbare än BASIC på VIC-20.
Prestanda i Commodore BASIC 2.0 second release
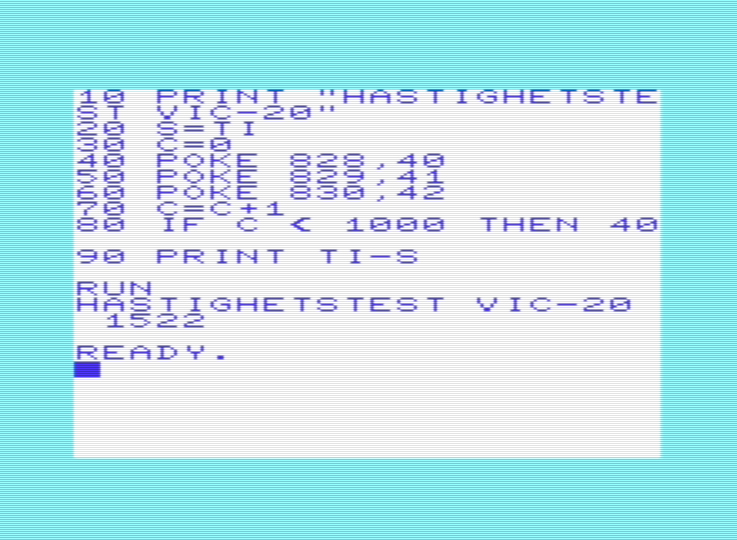
Om du skriver ett program i Commodore BASIC för C64 (Commodore 64) eller (som i mitt fall) VIC-20 är prestanda viktigt, speciellt om det är ett spelprogram som du bygger. BASIC-tolken är ganska slö, och det faktum att både C64 och VIC-20 interpreterar BASIC-programmet medan det körs, gör att det är vissa specifika faktorer som man behöver ta hänsyn till.
Två faktorer som påverkar prestandan ganska mycket – hur man skriver minne och hur man itererar – är två faktorer som ofta används vid just spelprogrammering. Men även om du blir expert på BASIC, kommer du inte kunna skriva spel som är lika avancerade som t.ex. Wizball, The Great Giana Sisters eller Turrican i BASIC, men du kommer kunna skapa hyfsat bra spel. T.ex. är Pirates! programmerat i BASIC (Sid Meier), precis som Artworks Strip Poker, så man kommer ganska långt om man lär sig språket ordentligt.
Jag kör mina prestandaexempel på min VIC-20. En VIC-20 är aningen snabbare än en C64, ändå är allt som påstås här sant även på C64 även om siffrorna blir lite annorlunda.
För att mäta prestanda kan man spara värdet i TIME ( eller TI) som ger systemklockans värde, utföra den operation man vill mäta, och sedan titta på differensen mellan det nya värdet i TIME och det värde man lagrade. Då vet man hur många jiffys (alltså hur många sextiondels sekunder) operationen har kostat.
Följande program skriver till fyra minnesadresser i en evighetsloop. Programmet räknar dessutom upp en variabel till 1000 och bryter när den når 1000. Det vi testar är hur snabb en iteration är, hur lång tid det tar att skriva till minnet med POKE, en aritmetisk beräkning och ett test. Så här ser källkoden ut:
10 PRINT "HASTIGHETSTEST VIC-20"
20 S=TI
30 C=0
40 POKE 828,40
50 POKE 829,41
60 POKE 830,42
70 C=C+1
80 IF C < 1000 THEN 40
90 PRINT TI-S
Resultatet, som bilden visar är 1522 jiffys (eller drygt 25 sekunder). Koden ser inte helt orimlig ut, men det är inte särskilt imponerande, så hur kan man optimera detta program?
Först är GOTO felanvänt. GOTO står inte utskrivet, men rad 80 avslutas med …THEN 40, vilket underförstått betyder …THEN GOTO 40. Syftet med GOTO är att skapa hopp i program för att förgrena logiken. Under vissa villkor ska viss kod köras, annars en annan kod. Men här används GOTO för att iterera. Det faktum att Commodore BASIC är ett interpreterande språk gör detta till ett dåligt val. Varje gång programmet ska hoppa till ett radnummer, måste radnumret tolkas och hittas. Genom att skapa iterationer med FOR, kan iterationens start och slut återanvändas under varje upprepning.
10 PRINT "HASTIGHETSTEST VIC-20"
20 S=TI
30 FOR A=0 TO 999
40 POKE 828,40
50 POKE 829,41
60 POKE 830,42
70 NEXT
80 PRINT TI-S
Nu klarar vi att utföra samma logik på 1094 jiffys (18 sekunder). Ännu trevligare blir det om vi använder oss av variabler för att lagra minnesadresser. Då behöver interpretatorn bara förstå vilken adress som avses en gång, och kan sedan återanvända det. Här kräver vi två aritmetiska beräkningar för att åstadkomma sak, men är redan nere på 835 jiffys:
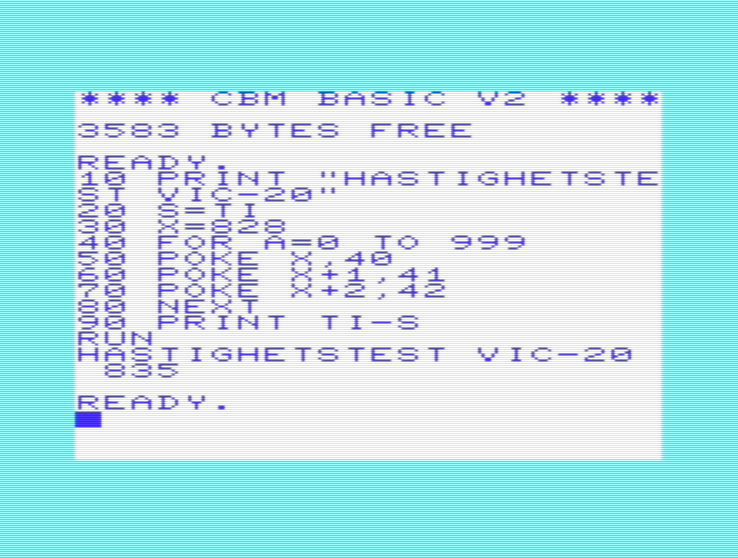
Och kostar vi på oss att använda tre variabler istället för en variabel och två aritmetiska beräkningar, så hyvlar vi bort ytterligare lite overhead och landar på 686 jiffys.
10 PRINT "HASTIGHETSTEST VIC-20"
20 S=TI
30 X=828
40 Y=829
50 Z=830
60 FOR A=0 TO 999
70 POKE X,40
80 POKE Y,41
90 POKE Z,42
100 NEXT
110 PRINT TI-S
Nu har vi gått från 25 sekunder till 12 sekunder, vilket är en femtiotvåprocentig förbättring. I praktiken kan man inte optimera programmen så hårt, för man skulle få alldeles för många variabler att hålla reda på. Men när man skriver prestandakritiska program (t.ex. spelprogram) i ett långsamt språk (t.ex. Commodore BASIC) är det viktigt att veta vad man kan göra och vad man absolut ska undvika.
Jag har skrivit en bok om just Commodore BASIC på C64 och VIC-20, som bl.a. tar upp detta, som kan laddas hem helt gratis som PDF eller EPUB.
Uppdatering: Vad är vinsten att skriva i maskinkod?
Några AI-tjänster av typen text-to-image
Jag kan inte påstå att de AI-tjänster som konverterar text till bild som finns att använda gratis på nätet är 100% användbara. Jag knappade in “dog runs over green grass” i sex stycken fria tjänster.
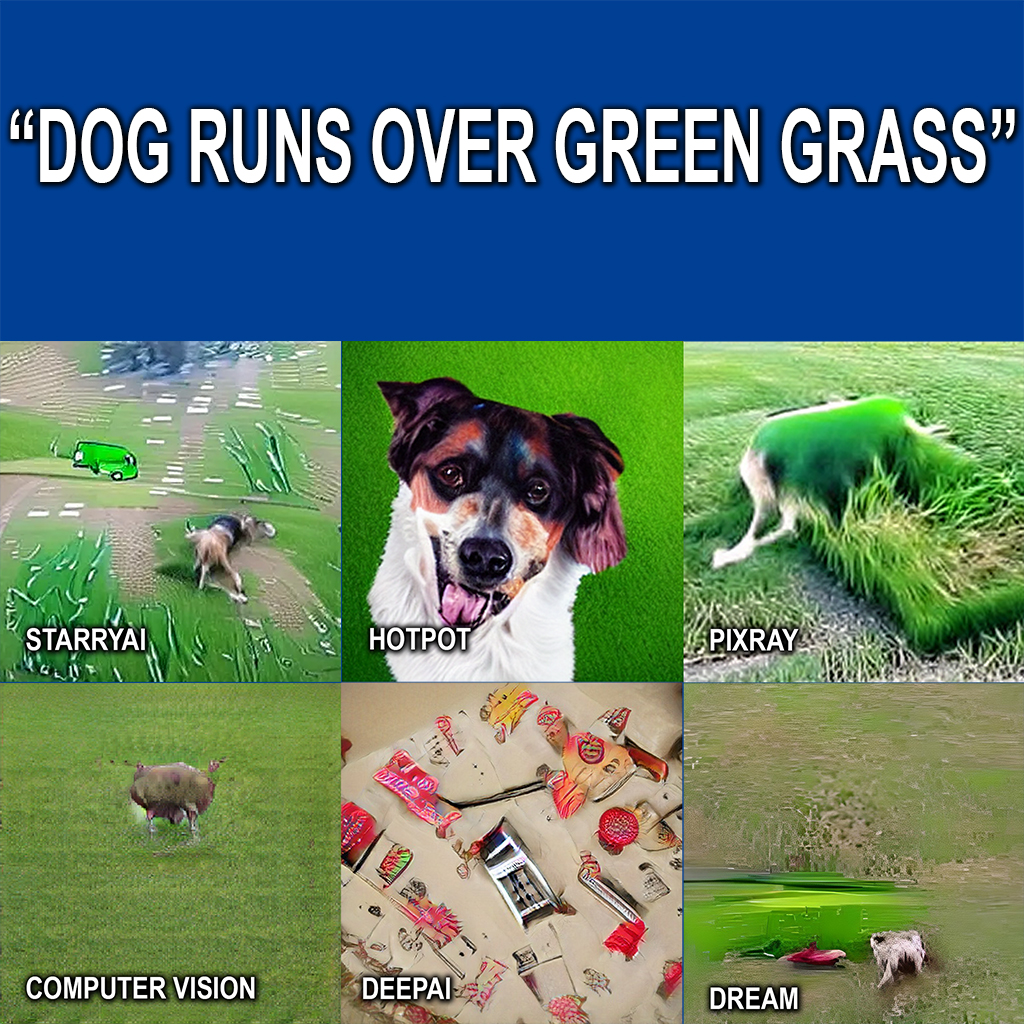
Kolla tärningsformationer

Har du någon gång suttit och stirrat på 5-6 tärningar och funderat på vilka formationer ögonen utgör? Nu behöver du inte fundera längre, för här är en C#-klass som ger dig svaret på nolltid! Mycket nöje!
Kodexempel: https://github.com/Anders-H/DiceFormationChecker
Ladda hem: https://www.nuget.org/packages/Winsoft.Gaming.DiceFormationChecker/
Avstånd mellan uppföljare och deras betyg
Hur tätt släpps filmers uppföljare? Och hur populära är de? Jag har tittat på några trilogier, tetralogier och några filmserier med fler än fyra filmer. Trilogier:
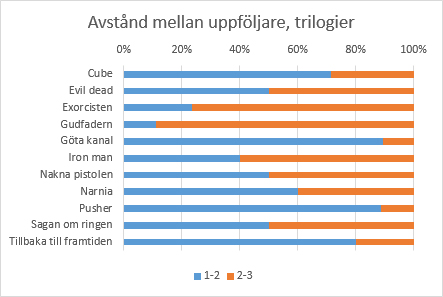
Tetralogier:
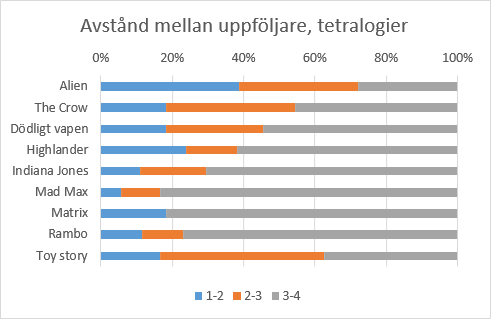
Och några filmserier med fem eller flera delar:
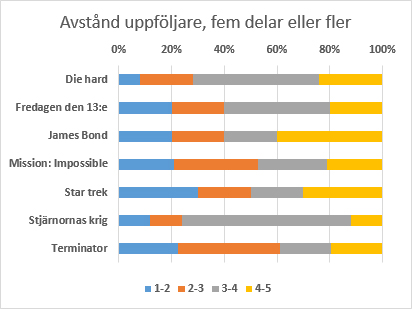
Så hur har dessa tagits emot? Det är kanske den mest viktiga informationen för den som vill avgöra om det är värt att köpa biljett till nästa film i serien. Så här populära är filmerna i trilogierna, viktat mot övriga delar i serien:
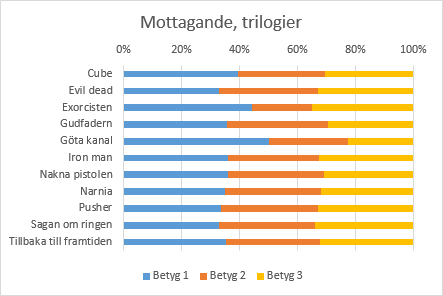
Det verkar som att både Göta kanal och Exorcisten är särskilt populära i sin första del jämfört med uppföljarna. Så här ser populariteten ut för tetralogier:
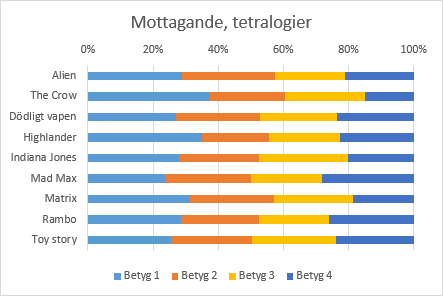
The Crow och Highlander verkar ha lidit en hel del av att ha uppföljare, medan både Toy Story och Alien verkar ha klarat det ganska bra. Så här ser det ut för långkörarserierna:
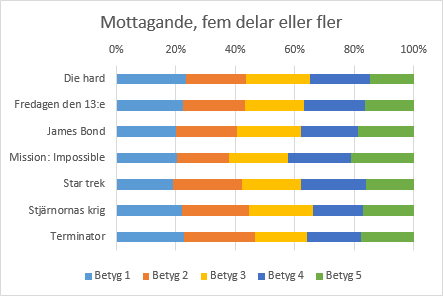
Om man tittar på samtliga filmer ovan, hur mycket betyget har förändrats från första till andra delen, kan vi konstatera att några filmer, inte minst Ster trek, Mad Max och Terminator har en del två som är bättre än del ett, medan uppföljaren till Exorcisten var en besvikelse för publiken.
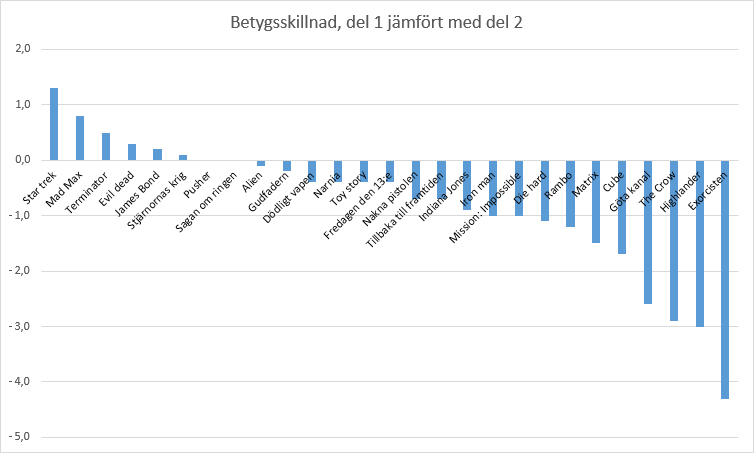
Hur får man bra ljud i en podcast?
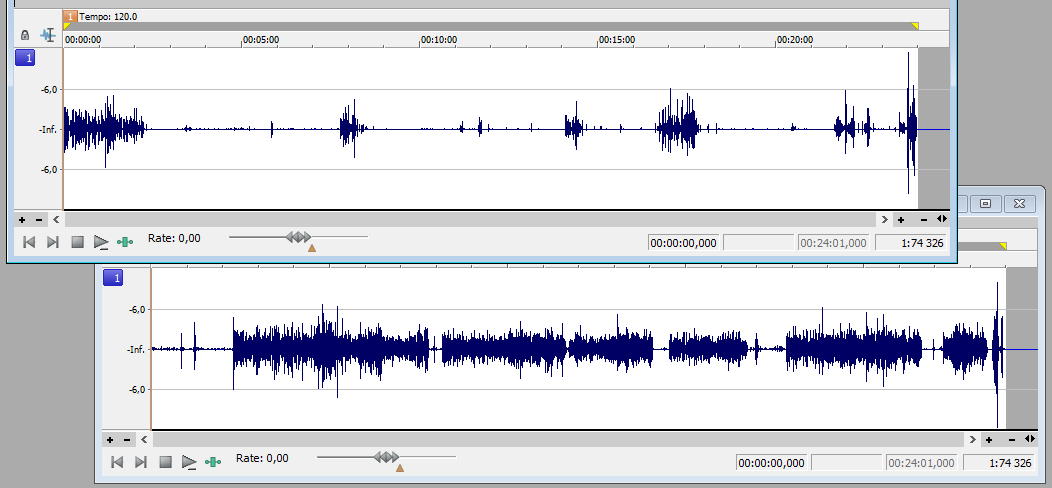
Podcastproduktion sker i flera steg. Man ska rigga utrustning, göra en soundcheck, spela in podcasten, klippa den, montera och mastra den och publicera den. Jag har redigerat ljud i vågformseditorer sedan tidigt 1990-tal och poddat sedan 00-talet. Jag har bl.a. varit inblandad i produktionen av Skeptikerpodden, Radio Bulletin, Stulet gods, Radio Houdi, Generation YX och Samtal. I och med att jag sysslat en del med montering och mastring, och får ibland frågan om jag kan bistå. På grund av arbetsbelastning så tackar jag alltid nej, men det är inte speciellt svårt att göra en mastring på egen hand.
För att resultatet ska bli riktigt bra, måste inspelningen ha gjorts korrekt. Inspelningsvolymen får inte vara för låg, för då kan man få problem med brus. Inspelningsvolymen får absolut inte vara för hög (“clipping” – ej att förväxla med klippning), för då blir vågformen helt enkelt förstörd. Mikrofonerna bör vara någorlunda bra, och helst vill man inte ha mikrofonen för nära munnen eller andas direkt in i mikrofonen. Har man ingen bra inspelningsstudio så finns det risk att mikrofonen plockar upp rumseko och att ljudet därför blir lite burkigt. Många brukar lösa detta genom att sänka inspelningsvolymen och prata närmre mikrofonen. Det fungerar, men det introducerar ett annat problem, nämligen att ljudet låter onaturligt, som om någon pratar rätt in i ditt öra. Utan tillgång till professionell utrustning får man göra vad man kan.
Tänk också på att använda puffskydd (vissa säger “pop-filer” numera) för att minska risken att man skapa oljud genom att andas på mikrofonens membran.
Om fler än en person pratar i podcasten, så är det bra om dessa ligger i var sin fil under mastringen. Särskilt ljudnivåerna är bra att kunna styra individuellt.
Mastringsarbetet görs i speciella program för vågformseditering. Man arbetar alltså med redan renderade ljudfiler, direkt mot vågformen. Dessa program kan benämnas på lite olika sätt, men wave editor är ganska vedertaget. I programmet öppnar du upp det klippta råmaterialet du fått från klipparen, där varje kanal är en fil, och ditt ansvar är att:
- Harmoniera bitdjup och samplingsfrekvens
- Korrigera nivåer
- Eventuell brusreducering och eventuell frekvensutjämning (equalization)
- Montering av röstkanaler
- Komprimering
- Eventuell extra klippning
- Montering av signaturmelodier
- Slutrendering
Harmoniera bitdjup och samplingsfrekvens
Eftersom vi jobbar direkt i vågformen så får vi ingen hjälp av mjukvaran att hantera om ljudfilerna har olika bitdjup. Bitdjupet anger hur många möjliga impulsnivåer varje samplingspunkt har, och ett högre tal är bättre. 8-bit, 16-bit eller 24-bit är ganska vanligt. Professionella ljudproducenter brukar arbeta med 24-bit och leverera en slutprodukt som är 16-bit, men arbetar man med podcasts så räcker det ofta att kontrollera att ingen inblandad ljudfil är sämre än 16-bit.
När det gäller samplingsfrekvens, som anger samplingspunkternas täthet, är 44,1 KHz lämplig, men vissa inspelningsprogram kan leverera filer på 22,05 eller 48 KHz. Högre är bättre även här. Då behöver du göra en resample till 44,1 KHz, som är fullt tillräckligt för att mastra en podcast. När alla filer har samma bitdjup och samplingsfrekvens är detta steg färdigt.
Korrigera nivåer
Det är bra om samtliga medverkande har samma impulsstyrka, till den grad man kan styra det. I exemplet på bilden har vi två filer. Den ena filen innehåller en person som pratar i en mikrofon, och den andra filen innehåller två personer som delar på en mikrofon. Båda är lite för låga för att det ska vara passande, men det är lättare att göra ett bra jobb om ursprungsimpulsen är lite för låg än lite för hög.
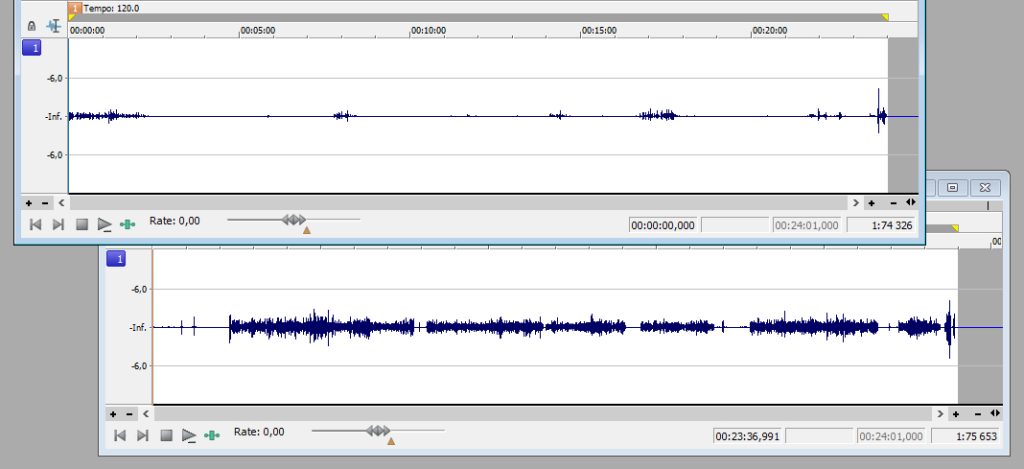
Den ena kanalen (överst) är lite svagare än den andra, så båda behöver förstärkas, men den övre lite mer än den undre. Notera att något sticker ut mot slutet av filen. Om den biten ska vara med, bör inte volymen höjas mer än att den biten fortfarande har god marginal till impulsens maxvärde. Det kan i värsta fall vara ljud i båda kanalerna samtidigt där, och då finns det risk att clipping uppstår när filerna slås samman.
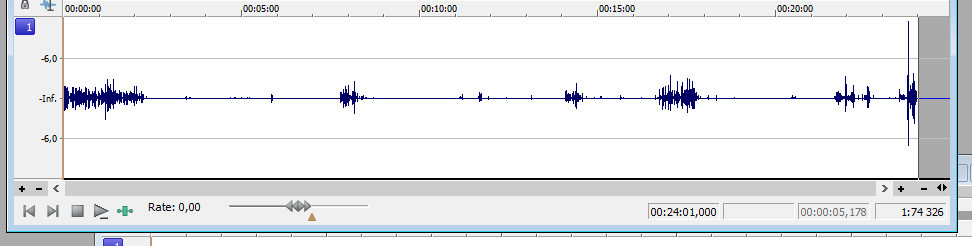
Innan jag höjt volymen tillräckligt på första kanalen, inser jag att detta kommer att slå i taket. Efter att ha zoomat in, kan jag konstatera detta är ett skratt som ska vara med i slutprodukten. För att få upp volymen till önskad nivå, måste jag manuellt först sänka volymen på det skrattet. Jag gör samma sak i båda filerna, om än lite mindre i den andra. Detta är jag nöjd med:
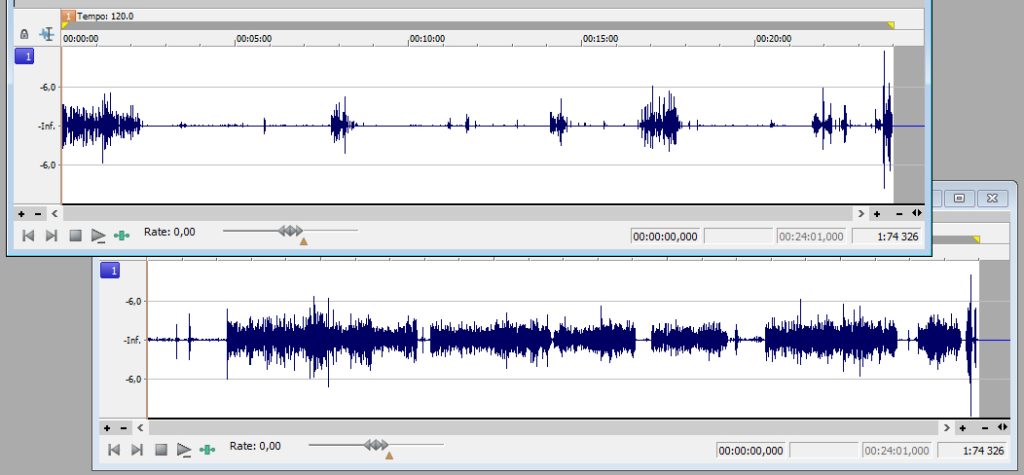
Eventuell brusreducering och eventuell frekvensutjämning
Det ser ut att hända en del saker, särskilt i den undre filen, mellan pratet. Är det störande ljud som måste tas bort (funktionen “mute”)? Skiljer de två filerna varandra åt i frekvensomfång? Det behöver rättas till med en equalizer. Innehåller någon fil mer toppar och dalar än den andra, eller är någon fil mer fyrkantig (kanjonisk) än någon annan? Den med många toppar och dalar kanske behöver ha lite kompressor redan i detta steg. Det är bra om filerna liknar varandra.
Montering av röstkanaler
När filerna är tillräckligt lika varandra, ska de slås samman till en fil. Den funktionen brukar heta “mix” i denna form av program. Nu ser vi första versionen av den fil som är resultatet av vårt arbete.
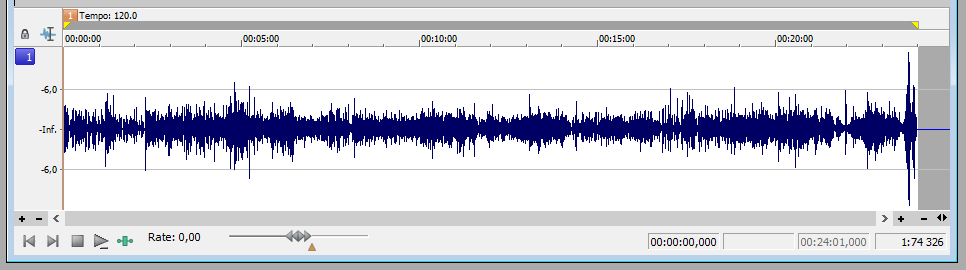
Komprimering
Nu vill vi att volymen ska vara jämn och stark, så att alla detaljer hörs, även när det pratas tyst, och så att inte lyssnaren får hörselskador av något häftigt skratt. Vi vill lägga kompressor på ljudet. I en vågformseditor brukar denna hantering kallas compression. Jag brukar gå fram ganska försiktigt, till en början. Är man för snål, kan det bli svårt att höra alla detaljer, och det kan komma höga överraskningar för lyssnaren. Tar man i för mycket, låter ljudet onaturligt, som om någon står mycket nära dig och pratar.
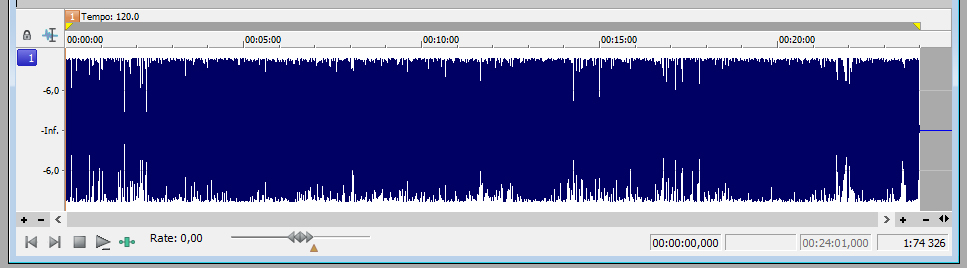
Det där höga skrattet på slutet sticker inte längre ut i ljudstyrka, utan i att den som skrattar tillfälligt låter lite “närmre” lyssnaren. Dessutom är fraser som yttrats lite försiktigt i bakgrunden, nu fullt hörbara.
Eventuell extra klippning
Det är bra att zooma in och titta igenom vågformen efter omotiverat långa pauser, eller onödigt många ticks, som t.ex. “ööhhh…” eller liknande. Ta inte bort allt, bara några stycken. Korta inte gärna ner pauser utan att säkerställa att du inte klipper i andetag, ta hellre bort någon omotiverad paus då och då.
Montering av signaturmelodier
Kontrollera att signaturmelodierna ligger strax under pratet i volymstyrka, och mixa in musiken först, sist eller var det ska ligga. Tänk på att om musik och prat ska gå in i varandra, så blir den totala ljudstyrkan högre där detta sker.
Slutrendering
För en podcast brukar man välja att rendera slutresultatet som en MP3-fil, med en bithastighet på 128 kilobit per sekund (Kbps), i 16-bitars mono. Det ger en bra kompromiss mellan filstorlek och ljudkvalitet.
När man har fått rutin på denna process brukar det inte vara mer än en halvtimmas arbete per podcastavsnitt, innan du kan lämna resultatet vidare till den som ansvarar för publicering. Lycka till!
Sprite (OpenGL i .NET Framework)
Jag har dragit nytta av ett gammalt C#-repository som wrappar OpenGL för .NET Framework för att bygga ett minimalistiskt spelramverk. Följande kod visar stjärnor som flyger över skärmen, från höger till vänster. Projektet är .NET Framework 4.8 som jag valde för att det finns inbyggt Windows 10/11.
Exemplet visar initiering av spelmotorn, att skapa sprites med GDI+, användning av en scen, tangentbordsavläsning, en sprite batch (som erbjuder fire-and-forget sprites).
Projekttypen är en console application, och referenserna är Sprite och System.Drawing. Repositoryt finns här och detta är den kompletta koden:
using System;
using System.Drawing;
using Sprite;

namespace Starfield
{
    public class Program
    {
        public static SpriteBitmap Star;
        public static GameEngine GameEngine { get; private set; }

        public static void Main()
        {
            // Create and initialize the game engine.
            GameEngine = new GameEngine("Starfield", OnLoadResources);
            GameEngine.LoadResources();

            // Run the game.
            GameEngine.Run(new StarfieldScene());
        }

        private static void OnLoadResources(object sender, EventArgs e)
        {
            // Draw a "star".
            var star = new Bitmap(2, 2);
            star.SetPixel(0, 1, Color.White);
            star.SetPixel(0, 0, Color.White);
            star.SetPixel(1, 1, Color.White);
            star.SetPixel(1, 0, Color.White);

            // Create a sprite bitmap from the star.
            Star = SpriteBitmap.FromImage(star, 1, 1);

            // Tell engine that loading is completed.
            GameEngine.SetLoadResourcesComplete();
        }
    }

    // Define the star sprite that will fly from right to left.
    public class StarSprite : BatchGameSprite
    {
        private int SpeedX { get; }

        public StarSprite(SpriteBitmap spriteBitmap, int y, int speedX) : base(spriteBitmap, 320, y, 1)
        {
            SpeedX = speedX;
        }

        public override void ApplyLogic() =>
            X += SpeedX;

        public override bool Alive() =>
            X > -5;
    }

    public class StarfieldScene : IScene
    {
        private readonly Random _rnd = new Random();

        // Create a sprite batch (used for fire-and-forget sprites) to hold the stars.
        private readonly SpriteBatch _spriteBatch = new SpriteBatch();

        public void Render(GameEngine gameEngine)
        {
            // Check if the user wants to exit.
            if (gameEngine.SpriteWindow.IsKeyDown(VirtualKeys.Escape))
                gameEngine.SpriteWindow.Running = false;

            // Add a new star each frame.
            _spriteBatch.Add(new StarSprite(Program.Star, _rnd.Next(199), -(_rnd.Next(5) + 1)));

            // Make the stars act.
            _spriteBatch.ApplyLogic();

            // Draw the frame.
            _spriteBatch.Draw(gameEngine.SpriteWindow);
            gameEngine.SpriteWindow.Swap();
        }
    }
}
Mutable strings i C#

Den strängtyp som finns inbyggd i C# är “immutable”, vilket betyder att den inte kan ändra värde. Jag har skapat en “mutable string”, som kapslar strängtypen i en klass. Det innebär att man kan anropa funktioner på strängen för att få den att ändra värde. Dessa funktioner, och funktionerna för att analysera strängens innehåll, har färdiga implementationer, men dessa kan ersättas. T.ex. kan funktionen Is svara på frågan om två strängar har samma värde, enligt de flaggor som angavs när strängen skapades, eller så kan man skicka med egen kod som utför jämförelsen som argument till funktionen Is. Mer information finns här: https://github.com/Anders-H/MutableStringLibrary
Last Christmas, Radio ga-ga
Nu när vi behöver höra Last Christmas av Wham! tre gånger om dagen under en månads tid, kanske någon under någon av lyssningarna tänker att trummorna låter ungefär som det episka soundet på Radio ga-ga av Queen. Det finns såklart skäl till det.
Under det tidiga 1980-talet hade trummaskinen blivit något av ett instrument att räkna med inom pop-branschen. Tidigare var det mest synthare som intresserade sig för detta instrument. Något som Wham! och Queen hade gemensamt var att de gärna använde sig av syntetiska instrument, utan att direkt företräda musikstilen synth – särskilt inte Queen som aktivt tog avstånd från elektroniska instrument under sina första år av karriären.
Den första skiva Queen hade synthpålägg på var The Game (1980) men har sedan dess använt synthar väldigt flitigt, och gärna trummaskin på ett par låtar per skiva, dock inte på The Game – Another one bites the dust är en s.k. drum loop, som spelades in akustiskt med Roger Taylor bakom trumsetet.
Och något som utmärker musiker som inte är synthare, är att det är lättare att identifiera vilka syntetiska instrument som är i bruk, för icke-synthare tenderar att inte maskera sina instrumentval lika väl som riktiga synthare gör. Riktiga synthare kan rent av tänka sig att designa sina egna instrument, för att vara unika på allvar. Därför är det enkelt att höra att både Last Christmas och Radio ga-ga använder samma fabrikat av trummaskin. Under den här tiden var det Linn Electronics som ägde marknaden för trummaskiner.
Last Christmas använde LinnDrum (1982) som var laddad med 8-bitarssamples. När man pratar om digitalt ljud så anger antalet bitar impulsstegen och frekvensen (35 KHz) anger samplingstätheten. Så mycket som möjligt av båda är önskvärt, och idag brukar digitala instrument jobba med 16-24 bitar och 44-48 KHz, men det allra viktigaste är att de ljudimpulser (själva slaginstrumenten) som lagras håller god kvalitet och kan återges utan störningar.
Radio ga-ga är marginellt äldre än Last Christmas, men är uppbyggd med en enklare trummaskin, nämligen Linn LM-1 (1980). Linn LM-1 var en stor enhet som kostade dubbelt så mycket som en LinnDrum, men den kunde bara återge ljud i 28 KHz. Det är lite svårt att avgöra om det verkligen är samma sampling som utgör virveltrumman i de olika låtarna, för equalizer och effekter kan göra så mycket för med ett ljud, men troligtvis är det så.
Trummprogrammeringen i Radio ga-ga gjordes av Roger Taylor i sin hemmastudio och låten var avsedd för en av hans soloskivor. Efter att John Deacon skrivit ett basarrangemang och Freddie Mercury omkonstruerat låten, insåg han att den kunde bli en framgång med Queen. Han medverkade inte i inspelningen, utan lät Freddie Mercury och Fred Mandel bygga upp och spela in låten. (Att stuva om i Roger Taylors låtar medan han var frånvarande blev något av en vana för Freddie Mercury, vilket inte minst märks på A kind of magic – original/albumversion.)
Roger Linn, som designade Linn LM-1 och LinnDrum, fick en Grammy 2011 för sin insats för musikindustrin.
Rendera mandelbrotmängden

Min första kontakt med mandelbrotmängden var ett BASIC-program av Bo E. Carlsson runt 1990. Sedan dess har Andrej Bauer skrivit ett C++-program som skriver mandelbrotmängden till en bildfil. Programmet gick att kompilera med en C#-kompilator med endast små justeringar, vilket syns här:
var rawData = new ImageRawData(width, height);


var xmin = 0.27085;
var xmax = 0.27100;
var ymin = 0.004640;
var ymax = 0.004810;
var maxiter = 1000;

var dx = (xmax - xmin) / width;
var dy = (ymax - ymin) / height;

for (var j = 0; j < height; j++)
{
    var y = ymax - j * dy;
    for (var i = 0; i < width; i++)
    {
        var u = 0.0;
        var v = 0.0;
        var u2 = u * u;
        var v2 = v * v;
        var x = xmin + i * dx;

        int k;
        for (k = 1; k < maxiter && u2 + v2 < 4.0; k++)
        {
            v = 2 * u * v + y;
            u = u2 - v2 + x;
            u2 = u * u;
            v2 = v * v;
        }

        rawData.SetValue(i, j, k >= maxiter ? null : k);
    }
}
Den anpassade koden varken ritar bilden eller skriver den fill någon fil, utan samlar resultatet i en 2-dimensionell array som heter rawData (av typen ImageRawData). Anledningen till det är att jag vill kunna lägga på renderingsfilter efter att fraktalen är beräknad. I implementation har jag hittills endast lagt in en linjär interpolering till en gråskala mellan 0 och 255, men möjligheten att hitta på något roligt finns där.
public class ImageRawData
{
    private readonly int _width;
    private readonly int _height;
    private readonly int?[,] _data;

    public ImageRawData(int width, int height)
    {
        _width = width;
        _height = height;
        _data = new int?[width, height];
    }

    public void SetValue(int x, int y, int? value) =>
        _data[x, y] = value;

    public int GetValue(int x, int y) =>
        _data[x, y] ?? 0;

    private int GetLargest()
    {
        var largest = int.MinValue;

        for (var y = 0; y < _height; y++)
            for (var x = 0; x < _width; x++)
                if (_data[x, y].HasValue && _data[x, y] > largest)
                    largest = _data[x, y]!.Value;

        return largest;
    }

    private int GetSmallest()
    {
        var smallest = int.MaxValue;

        for (var y = 0; y < _height; y++)
            for (var x = 0; x < _width; x++)
                if (_data[x, y].HasValue && _data[x, y] < smallest)
                    smallest = _data[x, y]!.Value;

        return smallest;
    }

    public void Interpolate(int min, int max)
    {
        var smallest = GetSmallest();
        var largest = GetLargest();

        for (var y = 0; y < _height; y++)
        {
            for (var x = 0; x < _width; x++)
            {
                if (_data[x, y].HasValue)
                {
                    var v1 = _data[x, y]!.Value;
                    var v2 = LinearInterpolate(v1, smallest, largest, min, max);
                    _data[x, y] = v2;
                    continue;
                }

                _data[x, y] = max;
            }
        }
    }

    private static int LinearInterpolate(int value, int smallest, int largest, int min, int max)
    {
        var result = min + (value - smallest) * (max - min) / (largest - smallest);

        if (result < min)
            result = min;

        if (result > max)
            result = max;

        return result;
    }
}
Själva renderingen har jag lagt i en iteration, där jag påverkar zoom-faktorn en aning, för att kunna skapa en animation. Jag gör det lite asymmetriskt för effektens skull. Iteratorn heter frameCount.
var xmin = 0.27085 + frameCount * 0.0000001;
var xmax = 0.27100 - frameCount * 0.0000002;
var ymin = 0.004640 + frameCount * 0.0000003;
var ymax = 0.004810 - frameCount * 0.0000004;
var maxiter = 1000;
Sen är det bara att kapsla in kalaset i ett ramverk. Jag använder Windows Forms så att jag kan titta på varje renderad bild medan animationen renderas. Eftersom själva resultatet är animationen som skrivs till disk, inte själva programmet, så har jag kostat på mig att göra allt arbete i GUI-tråden. Sedvanliga ursäkter.
using System.Drawing.Imaging;

namespace WinFormsApp1
{
    public partial class Form1 : Form
    {
        public Form1()
        {
            InitializeComponent();
        }

        private void Form1_Shown(object sender, EventArgs e)
        {
            Refresh();
            using var g = CreateGraphics();
            const int width = 1024;
            const int height = 1024;

            for (var frameCount = 0; frameCount < 1000; frameCount++)
            {
                var rawData = new ImageRawData(width, height);

                var xmin = 0.27085 + frameCount * 0.0000001;
                var xmax = 0.27100 - frameCount * 0.0000002;
                var ymin = 0.004640 + frameCount * 0.0000003;
                var ymax = 0.004810 - frameCount * 0.0000004;
                var maxiter = 1000;

                var dx = (xmax - xmin) / width;
                var dy = (ymax - ymin) / height;

                for (var j = 0; j < height; j++)
                {
                    var y = ymax - j * dy;
                    for (var i = 0; i < width; i++)
                    {
                        var u = 0.0;
                        var v = 0.0;
                        var u2 = u * u;
                        var v2 = v * v;
                        var x = xmin + i * dx;

                        int k;
                        for (k = 1; k < maxiter && u2 + v2 < 4.0; k++)
                        {
                            v = 2 * u * v + y;
                            u = u2 - v2 + x;
                            u2 = u * u;
                            v2 = v * v;
                        }

                        rawData.SetValue(i, j, k >= maxiter ? null : k);
                    }
                }

                Application.DoEvents();
                rawData.Interpolate(0, 255);
                using var image = new Bitmap(width, height);

                for (var yy = 0; yy < height; yy++)
                    for (var xx = 0; xx < width; xx++)
                        image.SetPixel(xx, yy, Color.FromArgb(
                            rawData.GetValue(xx, yy),
                            rawData.GetValue(xx, yy),
                            rawData.GetValue(xx, yy)
                        ));

                g.DrawImage(image, 0, 0);
                Application.DoEvents();
                image.Save($@"C:\Temp\Frame{frameCount:00000}.png", ImageFormat.Png);
                Application.DoEvents();
            }
        }
    }
}
Resultatet för just dessa värden är följande video:
TV4 uppmärksammar behovet av religiöst neutrala begravningsplatser
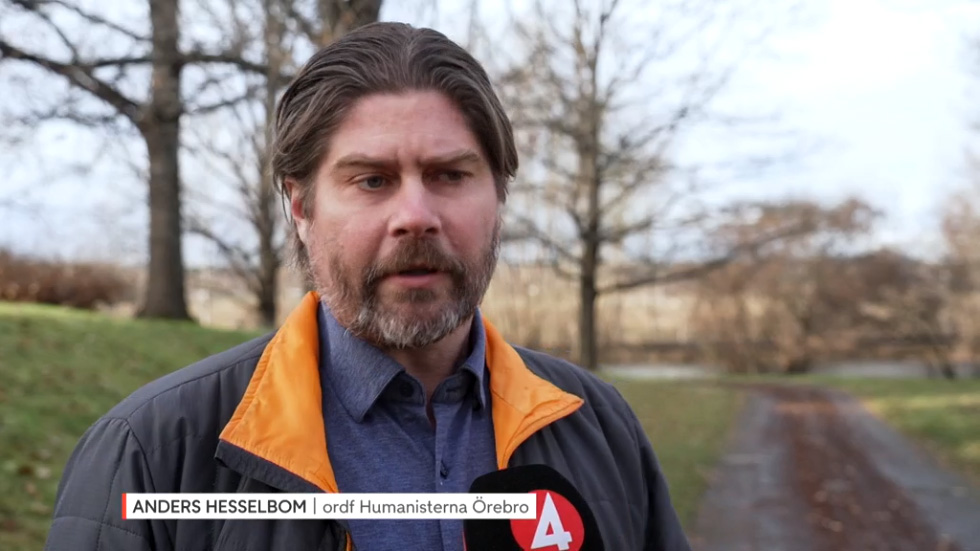
Häromdagen sände TV4-nyheterna ett inslag om religiöst neutrala begravningsplatser. I egenskap av ordförande i Humanisterna Örebro stöttade jag initiativet. TV4 Play: https://www.tv4play.se/program/nyheterna/religi%C3%B6sa-symboler-plockas-ned-i-kapellet-%C3%B6ppnar-f%C3%B6r-neutrala-begravningar/13732416
Visa detta inlägg på Instagram
Vill du lära känna mig?

Jag har blivit grundligt intervjuad av Emil Nilsén i podcasten “Vi måste prata”, och vi pratar om hur jag blev den jag är idag. Lyssna gärna, mycket nöje!
“Stulet gods” avsnitt 43

Nästan ett år har passerat sedan vi släppte avsnitt 42 av podcasten Stulet gods, men nu är vi tillbaka med en handfull av låtstölder att avhandla. I avsnitt 43 lyssnar vi på stulen musik som bl.a. innefattar Queen, Justin Bieber och Ozzy Ozbourne. Finns här eller där poddar finns – mycket nöje!
Preserverad SID-musik från 1988

I samband med att jag lämnade staden och flyttade till landet, så gjorde jag mig av med alla mina Commodore-maskiner. Jag passade på att preservera en liten del av mina disketter, men jag kunde inte rädda allt. En av disketterna innehöll fyra SID-låtar som jag programmerade 1988 med Rock Monitor och en sample rip från Funky Drummer. Rock Monitor var en vidareutveckling av Sound Monitor med stöd för samples. Båda programmen var anpassade för att underlätta SID-programmering.
Dessa fyra filer är kanske inte mitt stoltaste ögonblick som musiker, men eftersom det är historia så måste det såklart delas. Samtliga är packade som programfiler med Sledge Hammer. Dessa två är originallåtar:
“Ibburd”:
“The Lennart Song”:
Dessa två är covers. Om jag minns rätt så programmerade jag dessa mest för att lära mig monitorn:
“Push it”:
“Romance d’amour/Du är den ende”:
Samplingarna låter aningen bättre på en riktig Commodore 64 än i en emulator. Mycket nöje!
Två “nya” C64-demos från 1986-87
Jag har preserverat ett antal Commodore 64-disketter från min ungdom. Alla disketter med ännu ej preserverat material gick tyvärr inte att rädda, men några små guldkorn har jag fått tag i, som t.ex. en disk med följande fillista. Antal block inom parentes.
CCCP SMESSEL IX (101)
THE REAL DEMO! (79)
LIGHTS FANTASTIC (74)
MUSIC BOX III (60)
ESC DEMO II/FBR (50)
IBM MUSIC XVII (49)
CHICKEN FARM (35)
CAS DEMO #1 (32)
DAS BOOT -TRON- (29)
EYE TO EYE/FBR (21)
SOMEWHERE’S TIME (14)
TIME TRAVELLER (12)
CCCP SMESSEL IX av CCCP år 1987 är preserverat sedan tidigare. Filen på min disk fungerar inte, men demot var en textskärm med någon rippad musik följt av en dubbel borderscroller med någon Sound Tracker-implementation av Axel F (Harold Faltermeyer), och avslutas med en stor scroller.
THE REAL DEMO! av CCCP år 1987 är också preserverat sedan tidigare. Den inleds med en fullskärmsbild förställande en kinesisk ansiktsmask och bjuder sedan på två ytterligare delar utan originalmusik.
LIGHTS FANTASTIC (titelbilden) har jag inte sett preserverat någonstans, men du kan ladda ner den här. Du lyssnar på musik och tittar på mönster som ritas med linjer på skärmen. Du kan styra linjerna lite, och du kan växla låt. Det påminner om demot Tubular Bells.
MUSIC BOX III är rippad musik och lite specialeffekter av Thunderbolt Cracking Crew.
ESC DEMO II/FBR spelar en cover på White Wedding (Billy Idol) som tar tvärstopp efter några minuter, och visar bild rippad från Fist II. Tror inte att den finns preserverad sedan tidigare, men den kan laddas ner här.
IBM MUSIC XVII av The Electronic Knights år 1987 är en låt byggd på trummorna från trummaskinen Funky Drummer.
CHICKEN FARM (We Music, 1986) är en bild och en scrolltext upp-och-ned, med musik av David Whittaker.
CAS DEMO #1 (Cas, 1986) är en bild och en stor scrolltext i undre bordern, utan musik.
DAS BOOT -TRON- av Tron (okänt år) är en bild, en låt och en teckenbaserad scrolltext.
EYE TO EYE/FBR av AM Twelve år 1986 är en ganska rolig sprite-animation där två ögon åker runt på skärmen.
Både SOMWHERE’S TIME (Rubard) och TIME TRAVELLER (Skuzz, 1987) är två stillbilder, där den senaste är en ganska snygg pixlad Eddie the Head.
Jag hoppas att detta innebär att LIGHTS FANTASTIC och ESC DEMO II/FBR blir bevarade till eftervärlden.
Input parser för textäventyrsspel
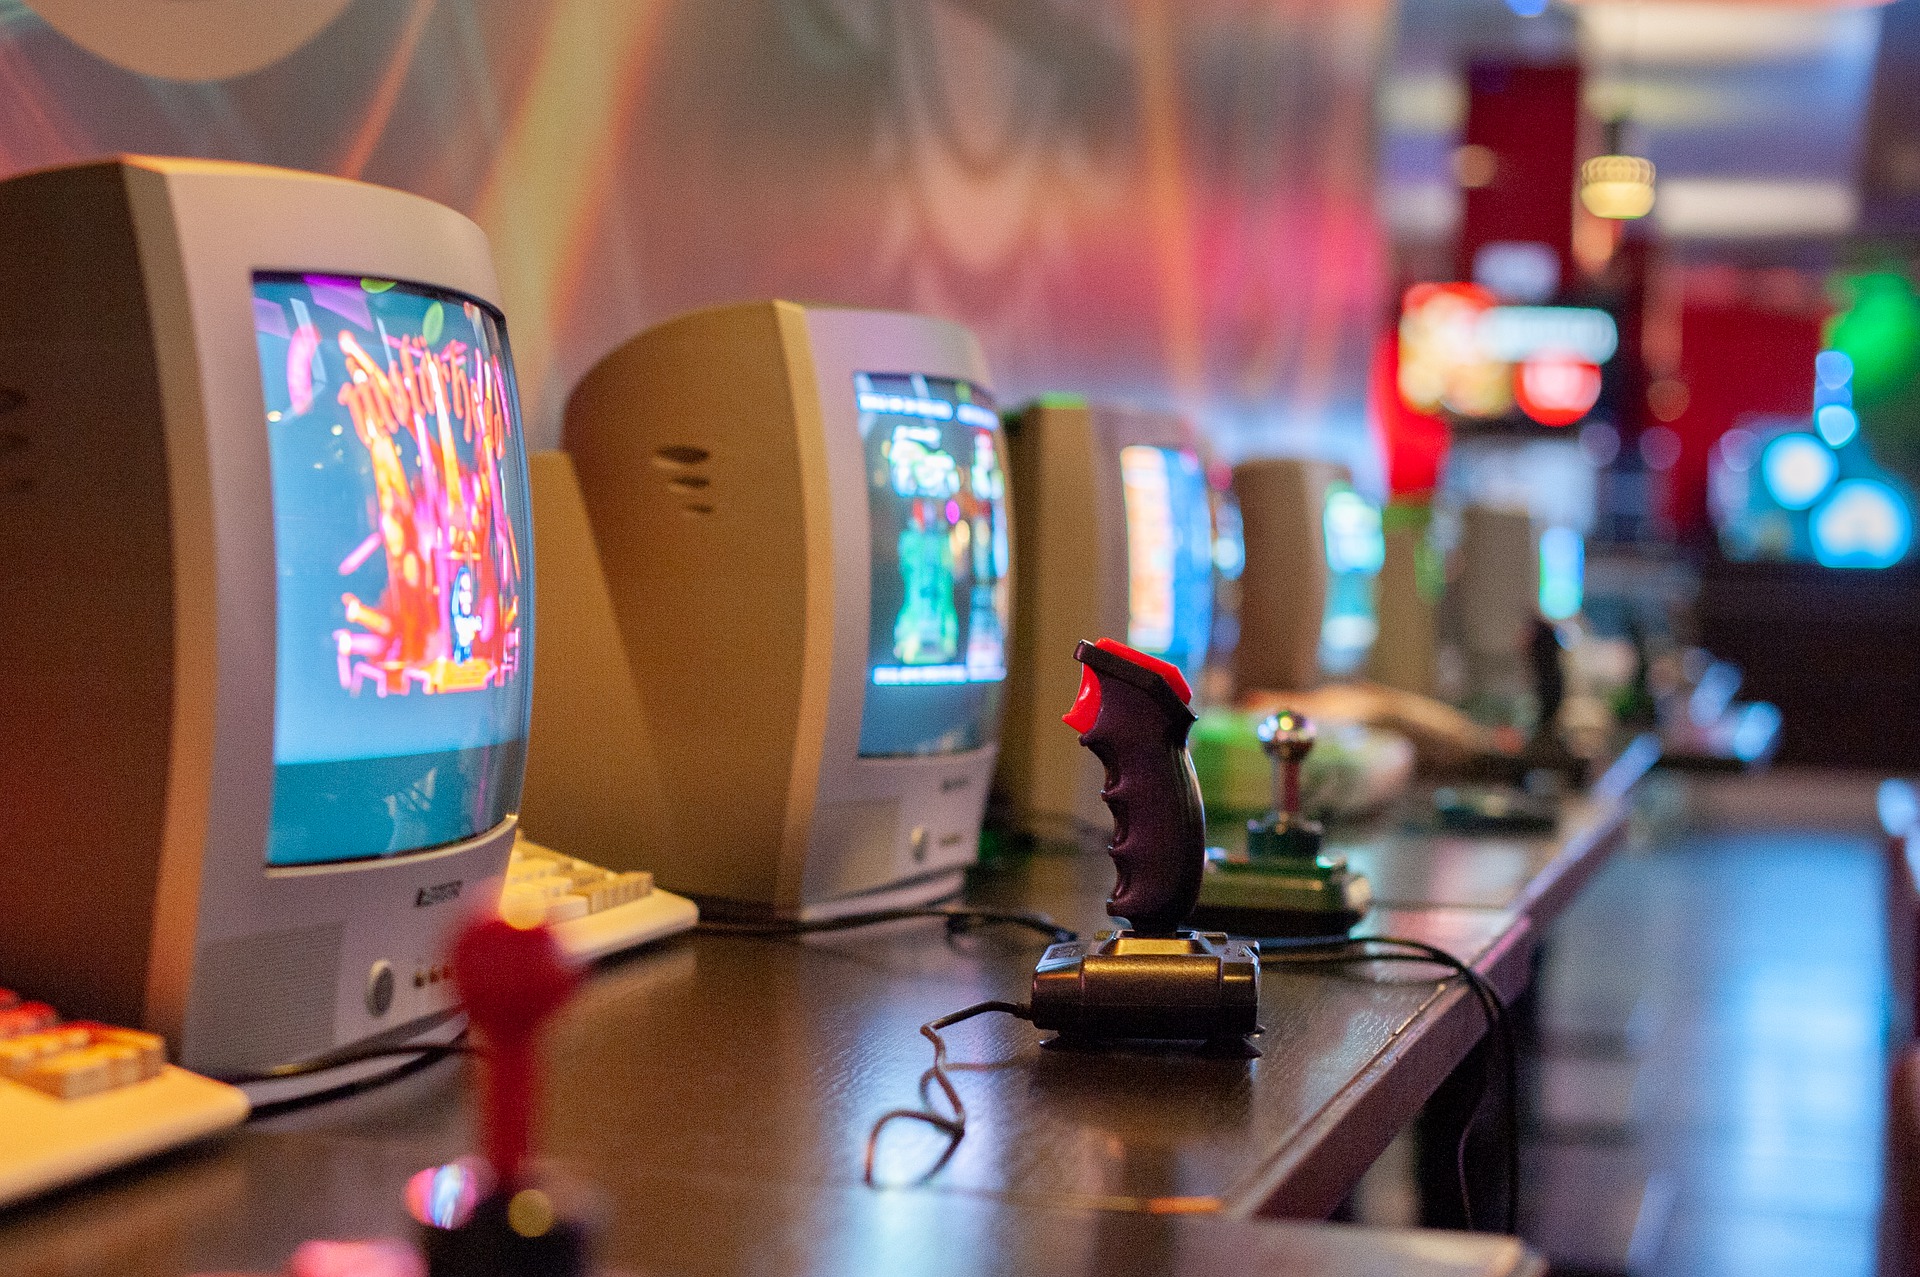
Biblioteket TextAdventureGameInputParser kan användas för att parsa användarens input i ett textäventyr. Parsern tar en mening i stil med GO NORT, OPEN DOOR, USE GOLD KEY ON DOOR eller GIVE FOOD TO GANDALF och ger en struktur med ordklasser och referenser till objekt som är registrerade i parsern.
Lite exempel finns tillgängliga i parserns GitHub-repository, och parsern kan installeras (.NET 5.0) från Nuget.
Categories: C#
En kopp kaffe!
Bjud mig på en kopp kaffe (20:-) som tack för bra innehåll!


Följ mig

|

|

|

|