Anders Hesselbom
Programmerare, skeptiker, sekulärhumanist, antirasist.
Författare till bok om C64 och senbliven lantis.
Röstar pirat.
Rick Beato: Varför gillar inte boomers pop?

Boomers gillar inte pop-musik. Musikern Rick Beato har en YouTube-kanal som han bl.a. använder för att lägga ut listor. Nyligen hade han en live stream där han presenterade en sammanställning (från chatt-diskussioner) om orsakerna bakom boomers ogillande av pop. Här är sexpunktslistan, med mina kommentarer.
- Inga tempovariationer. Modern musik tenderar att hålla ett och samma tempo genom hela stycket, utan accelerationer eller inbromsningar. Det ger inget utrymme för hörsamhet för vad en del behöver, och sänker dynamiken.
- Repetitiva ljud. I princip alla pop-låtar använder ungefär samma uppsättning av fabriksljud. Att vara musikproducent idag är onekligen en lat mans jobb. Förr kom flera ljud från analoga källor, som t.ex. mikrofoner.
- Inga tonartsförändringar. Förutom detta är antalet ackord väldigt lågt (runt fyra), och alla ackord ligger inom tonarten i fråga. Ett bra exempel på enkla tonartsvariationer måste vara vers två i “The show must go on” av Queen, som lyfter låten enormt.
- Ingen dynamisk variation. De amplitudförändringar som hörs i modern musik är en kompressor som låter ett instrument dränka ett annat. Boomers gillar musik där en musiker ibland kan smyga med sitt instrument.
- Enkla melodier. Modern musik tenderar att bygga kring en enkel “hook”, men melodierna är inte särskilt nyskapande, komplicerade eller intressanta. Ofta handlar det om några noter som är staplade på varandra.
- Auto-tune. Rösten blir alldeles för robot-lik och dynamiken som sångaren bidrar med till musiken, försvinner helt. Auto-tune gör ett bra jobb för en dålig sångare, men ett katastrofalt jobb för vem som helst som faktiskt kan sjunga.
Min uppfattning är att en musikkonsument inte nödvändigtvis är en musikintresserad person, och de känslor, det igenkännande, eller vad det nu är som musiken syftar till att försöka sälja, faktiskt fungerar. Om man inte är musikintresserad, vill säga…
Samantha Fox special double-groove multi-play pressing
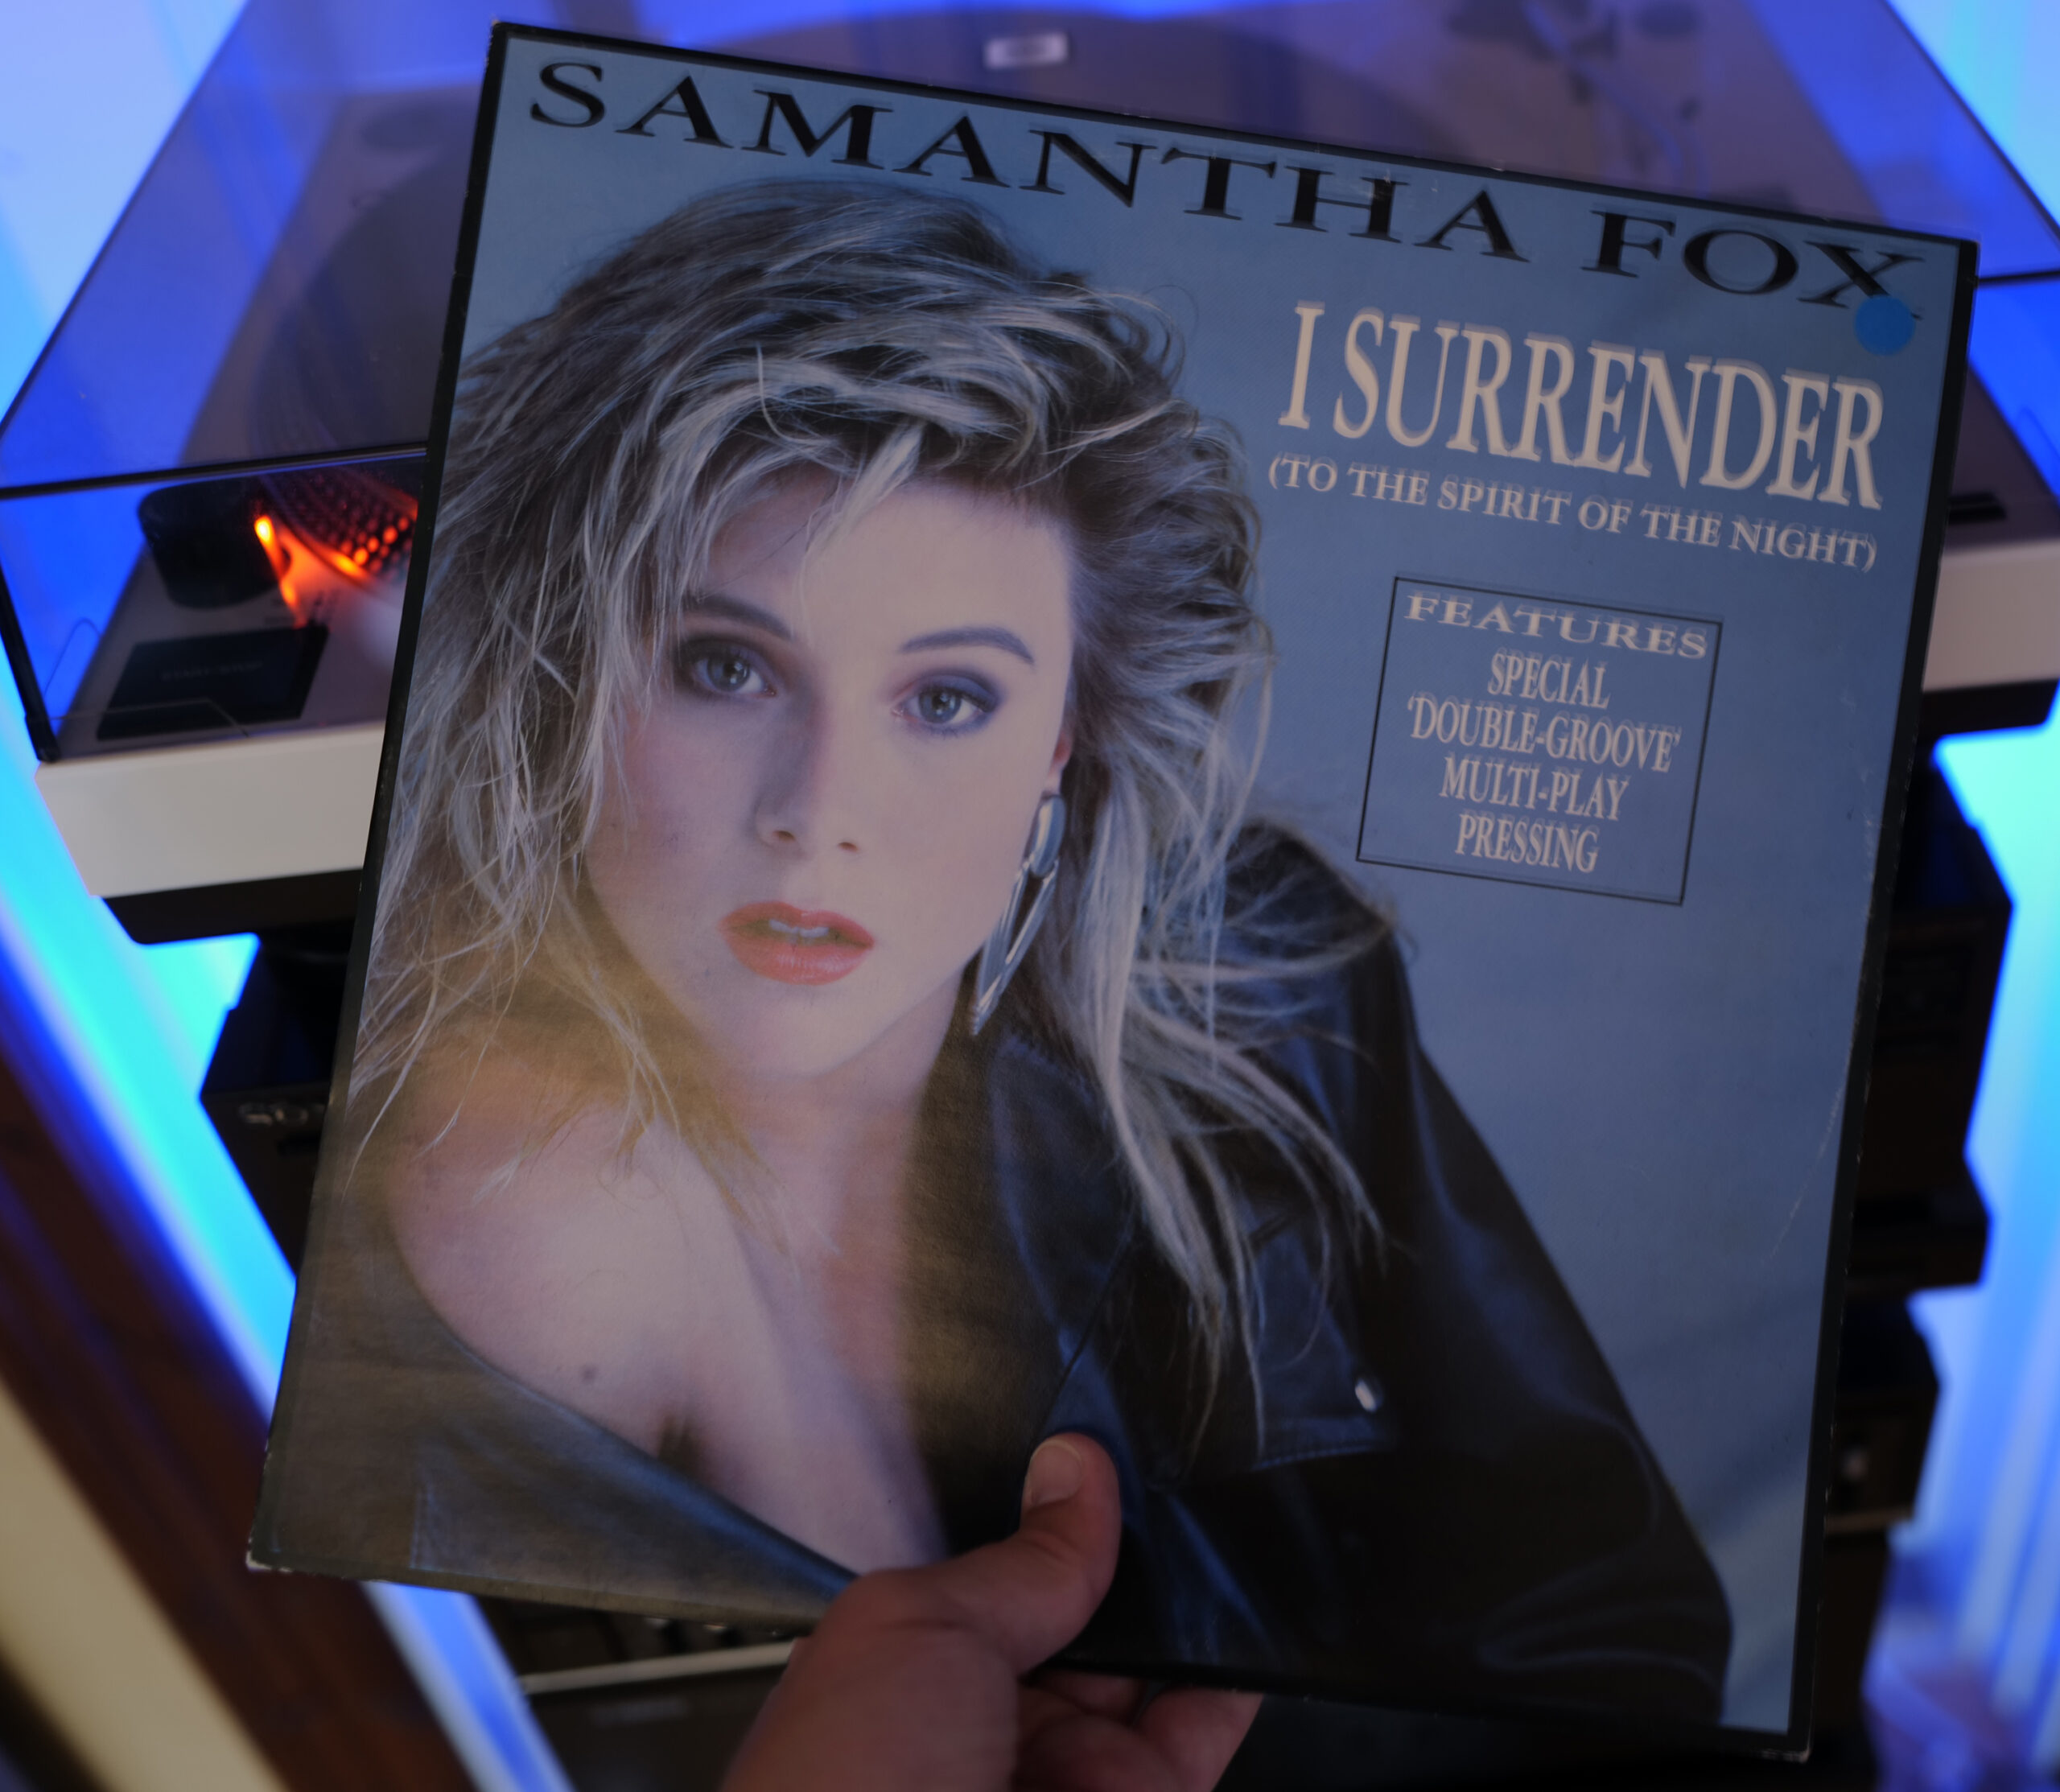
Henrik Andersson har donerat maxisingeln “I surrender (to the spirit of the night)” med Samantha Fox till mig. En 12″-singel med skivnummer FOXY T6. Det som gör denna speciell anges på framsidan: Special double-groove multi-play pressing.
Det är inte helt självklart vad detta betyder, eller ens att det bara är sida två som avses. Det du kommer att märka när du spelar b-sidan av skivan, är att det ser ut som att den snurrar 90 varv per minut, men singlar (som denna) ska spelas upp i 45 varv per minut.
En vanlig LP spelas i 33,3 varv per minut, vilket innebär att det tar knappt två sekunder för nålen att flytta sig från det yttersta varvet till näst yttersta varvet. En singel snurrar 45 varv per minut, vilket innebär att samma förflyttning endast tar 1,3 sekunder för nålen att flytta sig ett varv in.
A-sidan, som är den utökade mixen av “I surrender (to the spirit of the night)”, fungerar som skivor gör mest. Ljudimpulsen ligger lagrad i ett spiralformat spår som rör sig in mot mitten. Oavsett var du lägger på nålen, kommer spiralen att fånga den, och leda den in till mitten. Detta är det normala:

Det special double-groove multi-play pressing betyder, är att det outnyttjade området på en vanlig 45-varvare har, är använt till ett spår till, innehållande samma information. Bilden visar principen. Beroende på var (eller när, eftersom armens position är statisk) du lägger på nålen, kommer antingen det ena (gröna) eller andra (röda) spåret att fånga armen och leda den till mitten. I praktiken är det slumpen som avgör.

Anledningen till att man vill ha det så här, är att slitaget på skivan kommer att vara i snitt hälften av slitaget på en vanlig skiva, eftersom du i det långa loppet kommer att spela det gröna spåret lika många gånger som det röda spåret. För den med en stor skivsamling i sin ägo är detta vanligtvis inte något stort problem, för en livstid räcker inte till särskilt många spelningar per skiva, men för en DJ som sliter på sina skivor, eller för den som råkar ha just denna låt som sin favorit, är detta något bra. (Många 7″-singlar som släppts under 80- och 90-talet har faktiskt varit av så låg kvalité att du endast kan lyssna på dem med full ljudkvalité 2-3 gånger.)
I teorin skulle man kunna ha olika information i de olika spåren, så att slumpen får avgöra vilken låt som spelas när man lägger på nålen, vilket Henrik Andersson (som donerade skivan till mig) faktiskt hävdar har gjorts.
(Jo, jag försökte komma nära med kameran och ta bilder på nålen, men för en sådan närbild har jag varken ljus eller stativ som håller måttet. Det kanske kommer längre fram.)
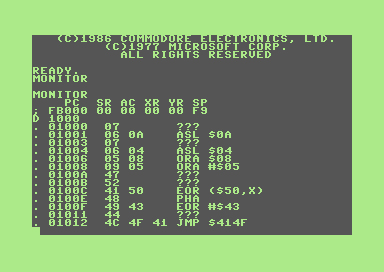
Commodore BASIC 2.0 second release
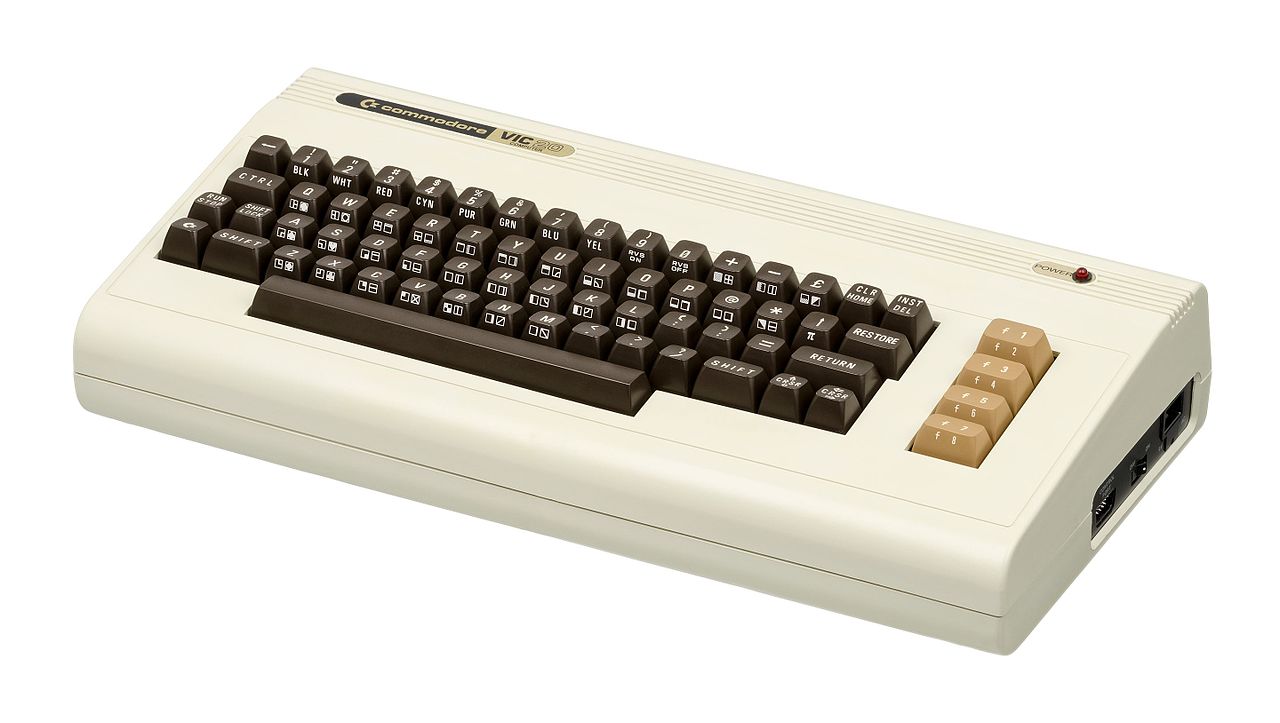
Nu finns hela min bok om Commodore BASIC 2.0 second release för Commodore 64 och VIC-20 att läsa som PDF här. Kontakta mig gärna för rättningar eller tillägg!
Uppdatering 2021-07-25: Även en epub-version finns att ladda hem.
Lorenz vattenhjul
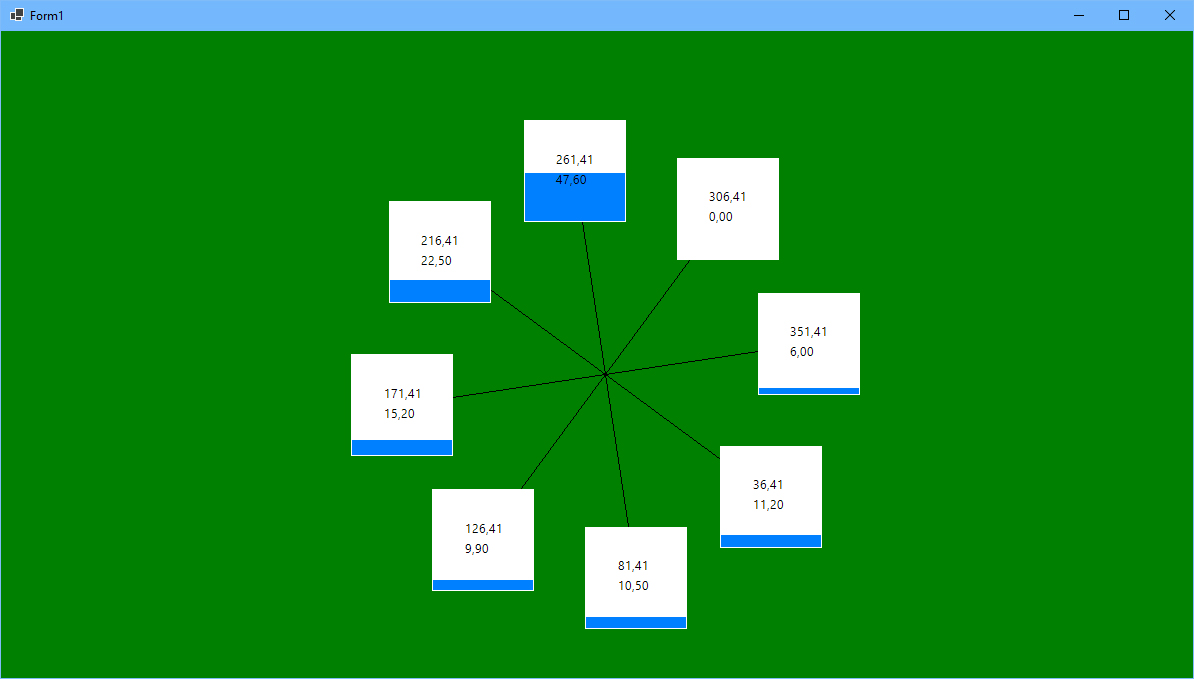
Lorenz-attraktionen är en fraktal vars formel beskriver en rotationshastighet (illustrerat med en radie) och en rotationsriktning. Så här ser den ut, implementerad i Commodore BASIC 7.0:
10 GRAPHIC 1,1
20 X=5
30 Y=5
40 Z=5
50 T=0
60 S=1/200
70 D=10
80 R=28
90 B=8/3
100 T=T+0.1
110 DX=D*(Y-X)
120 X1=X+DX*S
130 DY=(R*X-Y)-X*Z
140 Y1=Y+DY*S
150 DZ=X*Y-B*Z
160 Z1=Z+DZ*S
170 X=X1
180 Y=Y1
190 Z=Z1
200 DRAW 1,150+4*X,20+3*Z
210 IF T<1000 GOTO 100
Det går att bygga ett riktigt vattenhjul som ger samma figur som algoritmen ovan. Tänk dig ett hjul med ett antal hinkar (t.ex. åtta stycken). Den hink som är högst upp fylls på med vatten, och att du ger hjulet en knuff så att det roterar åt höger. På det viset kommer nästa hink strax börja fyllas med vatten, vilket ger en vikt på hjulets högra sida, så att rotationshastigheten ökar. Men alla hinkar har ett hål i botten, så när de inte ökar i vikt för att de fylls med vatten, så minskar de i vikt. När hinkarna når den uppåtgående vänstersidan av hjulet, väger de mycket mindre, vilket bidrar till att rotationshastigheten ökar. Men om rotationshastigheten ökar, så minskar samtidigt mängden vatten som fylls på i hinken högst upp, eftersom hinken befinner sig kortare tid vid positionen för påfyllning. Det innebär att den tyngsta sidan inte alltid kommer vara högersidan, eftersom den höga rotationshastigheten och den låga påfyllningen får vikten att förflytta sig. Ibland roterar alltså hjulet åt höger, ibland åt vänster. Ibland roterar hjulet fort, ibland långsamt.
Centralt i implementationen av denna simulering är en funktion som kan omvandla en vinkel på hjulet till en rotationskraft. Högst upp eller längst ner på hjulet, kommer vikten inte att påverka hjulets vilja att rotera alls. Längst till höger eller längst till vänster är kraften som störst. Vid 0 grader och vid 180 grader ska kraften vara 0, vid 90 och 270 grader är kraften maximal. Följande funktion är central för implementationen. Den beskriver hur starkt grepp gravitationen har över hinken – ingen alls högst upp eller längst ner, väldigt mycket längst till höger eller vänster.
Math.Cos(angle / (180.0 / Math.PI));Implementationen av hjulet har 8 entiteter (“hinkar”) utplacerade med jämna mellanrum. 8 genom 350 ger 45 graders mellanrum. Den lilla knuffen åt höger får ha värdet 0,2 så att rotationen kommer igång.
var angle = 0;
for (var i = 0; i < 8; i++)
{
    Wheel.Buckets.Add(new Bucket(Wheel, angle));
    angle += 45;
}
Wheel.Speed = 0.2;
För hjulets beteende gäller följande: Hastigheten (som är positiv för höger och negativ för vänster) adderas till vinkeln. Därefter kontrollerar vi att vinkeln ligger mellan 0 och 360. Därefter berättar vi för varje hjul vilken vinkel de sitter på, givet hjulets vinkel, och ber samtidigt hjulet att agera (nedan). Sedan räknar vi ut hur hinkkonfigurationen påverkar hastigheten, och kontrollerar samtidigt att maxhastigheten åt höger eller vänster inte överstiger hjulets tänkta maxhastighet.
public void Tick()
{
    Angle += Speed;
    if (Angle < 0.0)
        Angle += 360.0;
    else if (Angle > 360.0)
        Angle -= 360.0;

    var bucketAngle = Angle;

    for (var i = 0; i < 8; i++)
    {
        if (bucketAngle < 0.0)
            bucketAngle += 360.0;
        else if (bucketAngle > 360.0)
            bucketAngle -= 360.0;

        Buckets[i].Tick(bucketAngle);
        bucketAngle += 45.0;
    }
    Speed += SpeedInfluence();
    const double maxSpeed = 7.0;
    if (Speed > maxSpeed)
        Speed = maxSpeed;
    else if (Speed < -maxSpeed)
        Speed = -maxSpeed;
}

public double SpeedInfluence() =>
    Buckets.Sum(x => x.SpeedInfluence());
För varje hinks beteende gäller följande: Om hinken är högst upp, öka vattenmängden, annars minska vattenmängden en aning. Varje hjul måste kunna uppge gravitationens grepp om hinken.
public void Tick(double newAngle)
{
    Angle = newAngle;

    if (Angle >= 255.0 && Angle <= 285.0)
        Full += 2.0;

    Full -= 0.12;

    if (Full < 0.0)
        Full = 0.0;
    else if (Full > 100.0)
        Full = 100.0;
}

public double SpeedInfluence() =>
    Math.Cos(Angle / (180.0 / Math.PI)) * (Full * 0.03);
Endast vattnet har vikt, hinkarna väger ingenting. Eftersom hjulet är balanserat och alla tomma hinkar väger lika mycket, kan vikten lika gärna vara 0.
Resultatet blir ett hjul som ibland snurrar fort, ibland långsamt, ibland åt höger och ibland åt vänster.

Koden körs i ett Windows Forms-fönster med DoubleBuffering aktiverat. Här är hela källkoden:
using System;
using System.Collections.Generic;
using System.Drawing;
using System.Linq;
using System.Windows.Forms;

public partial class Form1 : Form
{
    private Wheel Wheel { get; }

    public Form1()
    {
        InitializeComponent();
        Wheel = new Wheel();
        InitializeWheel();
    }

    private void InitializeWheel()
    {
        var angle = 0;
        for (var i = 0; i < 8; i++)
        {
            Wheel.Buckets.Add(new Bucket(angle));
            angle += 45;
        }
        Wheel.Speed = 0.2;
    }

    private void Form1_Paint(object sender, PaintEventArgs e)
    {
        var g = e.Graphics;
        g.Clear(Color.Green);

        var centerX = (Bounds.Width / 2);
        var centerY = (Bounds.Height / 2);

        var availableSize = Bounds.Width > Bounds.Height
            ? Bounds.Height
            : Bounds.Width;

        var radius = availableSize * 0.3;

        var renderer = new Renderer(centerX, centerY, (float)radius);
        renderer.Draw(g, Wheel, Font);
    }

    private void timer1_Tick(object sender, EventArgs e)
    {
        Wheel.Tick();
        Invalidate();
    }
}

public class Wheel
{
    public List<Bucket> Buckets { get; set; }
    public double Speed { get; set; }
    public double Angle { get; set; }

    public Wheel()
    {
        Buckets = new List<Bucket>();
        Angle = 0.0;
    }

    public void Tick()
    {
        Angle += Speed;
        if (Angle < 0.0)
            Angle += 360.0;
        else if (Angle > 360.0)
            Angle -= 360.0;

        var bucketAngle = Angle;

        for (var i = 0; i < 8; i++)
        {
            if (bucketAngle < 0.0)
                bucketAngle += 360.0;
            else if (bucketAngle > 360.0)
                bucketAngle -= 360.0;

            Buckets[i].Tick(bucketAngle);
            bucketAngle += 45.0;
        }
        Speed += SpeedInfluence();
        const double maxSpeed = 7.0;
        if (Speed > maxSpeed)
            Speed = maxSpeed;
        else if (Speed < -maxSpeed)
            Speed = -maxSpeed;
    }

    public double SpeedInfluence() =>
        Buckets.Sum(x => x.SpeedInfluence());
}

public class Bucket
{
    public double Weight { get; set; }
    public double Angle { get; set; }
    public double Full { get; set; }

    public Bucket(double angle)
    {
        Weight = 0.0;
        Angle = angle;
        Full = 0.0;
    }

    public void Tick(double newAngle)
    {
        Angle = newAngle;

        if (Angle >= 255.0 && Angle <= 285.0)
            Full += 2.0;

        Full -= 0.12;

        if (Full < 0.0)
            Full = 0.0;
        else if (Full > 100.0)
            Full = 100.0;
    }

    public double SpeedInfluence() =>
        Math.Cos(Angle / (180.0 / Math.PI)) * (Full * 0.03);

    public void Draw(Graphics g, PointF location, Font font)
    {
        using var bucketBrush = new SolidBrush(Color.FromArgb(255, 255, 255));
        using var waterBrush = new SolidBrush(Color.FromArgb(0, 128, 255));
        var bucketRectangle = new RectangleF(location.X - 51, location.Y - 51, 102, 102);
        g.FillRectangle(bucketBrush, bucketRectangle);
        if (Full > 0.0)
        {
            var waterRectangle = new RectangleF(location.X - 50, (float)(location.Y - 50 + (100.0 - Full)), 100, (float)Full);
            g.FillRectangle(waterBrush, waterRectangle);
        }
        g.DrawString(Angle.ToString("0.00"), font, Brushes.Black, (float)(location.X - 20), (float)(location.Y - 20));
        g.DrawString(Full.ToString("0.00"), font, Brushes.Black, (float)(location.X - 20), (float)(location.Y));
    }
}

public class Renderer
{
    private readonly PointF _center;
    private readonly float _radius;

    public Renderer(float centerX, float centerY, float radius)
    {
        _center = new PointF(centerX, centerY);
        _radius = radius;
    }

    public void Draw(Graphics g, Wheel wheel, Font font)
    {
        foreach (var bucket in wheel.Buckets)
        {
            var bucketLocation = new PointF(
                (float)(_center.X + Math.Cos(bucket.Angle / (180.0 / Math.PI)) * _radius),
                (float)(_center.Y + Math.Sin(bucket.Angle / (180.0 / Math.PI)) * _radius)
            );
            g.DrawLine(Pens.Black, _center, bucketLocation);
            bucket.Draw(g, bucketLocation, font);
        }
    }
}
Det går garanterat att justera acceleration, gravitation, inflödeshastighet, utflödeshastighet och maximal hastighet för andra (bättre?) resultat.
GetEnumerator extension method
En ganska enkel men ytterst trevligt tillägg i C# version 9 är möjligheten att skapa en extension method av GetEnumerator (som konsulteras när en samling ska enumereras). Betrakta denna lilla lista:
var people = new List<string>
{
    "Sven",
    "Nils",
    "Niklas",
    "Janne"
};
Om jag skulle vilja ha samtliga poster i listan för utskrift på skärmen, kan denna kod användas:
foreach (var p in people)
    Console.WriteLine(p);
GetEnumerator används implicit. Men om jag bara är intresserad av att ha med poster vars förnamn börjar på N, så måste det formuleras någonstans. Jag kan t.ex. kopiera listan och exkludera ointressanta poster, eller så skulle jag kunna iterera genom svaret från LINQ-API:et enligt:
foreach (var p in people.Where(x => x.StartsWith("N")))
    Console.WriteLine(p);
Extension methods har fördelen att de är tillgängliga i filer som läst in dess namnrymd, men är i övrigt otillgängliga. Det innebär att man kan begränsa funktionalitet till vissa filer genom att skapa en extension metod. Om jag generellt sett är intresserad av att ha personerna som börjar på N tillgängliga i den aktuella filen (eller på annat sätt kunna använda manipulerat data) kan jag deklarera en egen GetEnumerator som en extension method. Är den tillgänglig, kommer kompilatorn att välja den. I detta fall kommer man troligtvis att vilja ha full tillgänglighet för metoden.
static class MyEnumerator
{
    public static IEnumerator<T> GetEnumerator<T>(this IEnumerator<T> list) =>
        list;
}
Med denna på plats, öppnas en ny möjlighet. Svaret från den funktionen, kan itereras. Nu kan jag skapa en enumerator som t.ex. skickar tillbaka personerna som börjar på N. Med det gjort, blir iterationen lika enkel som i första exemplet, fast med den skillnaden att jag nu kontrollerar dess innehåll.
var somePeople = people
   .Where(x => x.StartsWith("N"))
   .GetEnumerator();

foreach (var p in somePeople)
    Console.WriteLine(p);
Detta är egentligen inte en stor sak, men det bidrar till kodens elegans – något som har blivit ett av kännetecknen för C#.
Objektnotation: XML, JSON, PSON
Här följer en kort kommentar om tre olika format för textbaserad objektnotation.
XML
Fördelar: Stöd för dokumenttypsdefinitioner (DTD) och scheman. God tillgång på bra API:er.
Nackdelar: Mycket overhead (ett “pratigt” språk), endast Visual Basic har inbyggt stöd för formatet.
Exempel på notation:
<?xml version="1.0" encoding="utf-8" ?>
<customer>
	<id>551</id>
	<account>9153</account>
	<name>
		<firstName>Sven</firstName>
		<lastName>Hedin</lastName>
	</name>
</customer>
Exempel på inläsning (C#, otypat):
var dom = new XmlDocument();
dom.Load("object.xml");
var document = dom.DocumentElement;
var customerId = document!.SelectSingleNode("id")!.InnerText;
Console.WriteLine($"ID={customerId}");
JSON
Fördelar: Liten overhead, god tillgång på bra API:er. Minimal schematisk information (vad som är en array eller ett enskilt objekt) kan anges i formatet.
Nackdelar: Nästan ingen typsäkerhet.
Exempel på notation:
{
  "id": 551,
  "account": 9153,
  "name": {
    "firstName": "Sven",
    "lastName":  "Hedin"
  }
}
Exempel på inläsning (C#, otypat):
using var sr = new StreamReader("object.json", Encoding.UTF8);
var json = sr.ReadToEnd();
dynamic customer = JObject.Parse(json);
Console.WriteLine($"ID={customer!.id}");
Exempel på inläsning (C#, typat):
using var sr = new StreamReader("object.json", Encoding.UTF8);
var json = sr.ReadToEnd();
var customer = JsonSerializer.Deserialize<Customer>(json);
Console.WriteLine($"ID={customer!.Id}");

class Customer
{
    [JsonPropertyName("id")]
    public int Id { get; set; }
    [JsonPropertyName("account")]
    public int Account { get; set; }
    [JsonPropertyName("name")]
    public Name Name { get; set; }
}

class Name
{
    [JsonPropertyName("firstName")]
    public string FirstName { get; set; }
    [JsonPropertyName("lastName")]
    public string LastName { get; set; }
}
PSON
Fördelar: Liten overhead. Viss schematisk information kan anges i formatet, som vad som är en array eller ett enskilt objekt och objekttyp. Kan skrivas typsäkert.
Nackdelar: Kan endast användas från PowerShell.
Exempel på notation:
@{
  Id: 551,
  Account: 9153,
  Name: @{
    FirstName: "Sven"
    FastName:  "Hedin"
  }
}
Inläsning av den filen sker genom PowerShell och kan plockas upp av C# genom det generella gränssnittet Microsoft tillhandahåller för att nå svaret från PowerShell.
Datastorleken för XML är 188 bytes, JSON 110 bytes och PSON 104 bytes.
Allt du behöver veta om Flimmer Duo

Här har du allt du behöver veta om Sveriges bästa filmkrönika Flimmer Duo.
Stötta gärna kanalen på Patreon!
Senaste avsnittet:
Musikdistribution på Rockklassiker år 2012

Jag har tittat på vad radiokanalen Rockklassiker spelade på radio under första kvartalet år 2012, alltså mellan 2012-01-01 och 2012-03-31. Eftersom kanalen spelade musik i princip dygnet runt, med undantag av lite reklampauser och annat, hann man med att spela hela 26510 låtar. Man gick ut starkt genom att spela “800 grader” med Ebba Grön som årets första låt, kl. 00:00 på nyårsdagen, och avslutade kvartalet med att spela “I’m on fire” med Bruce Springsteen strax före midnatt den 31:a mars. Här är lite statistik över de musikval man gjorde då.
Trots att hela 26510 låtar hann spelas, så hade man bara 829 låtar på spellistan under perioden i fråga. Det innebär att många låtar har spelats många gånger. Så här ser listan över de 20 mest spelade låtarna ut:
Artist                   Titel                    Antal
------------------------ ------------------------ -----
Dio                      Rainbow In The Dark        197
Dio                      Holy Diver                 192
Rage Against the Machine Killing in the name of     192
Alice Cooper             Poison                     191
Gary Moore               Out In The Fields          185
DAD                      Laugh 'n' a half           180
W.A.S.P.                 I Wanna Be Somebody        178
Jimi Hendrix             Purple Haze                177
Judas Priest             Breaking The Law           171
Sweet                    Ballroom Blitz             171
Billy Idol               Rebel Yell                 170
Midnight Oil             Beds Are Burning           170
Offspring                Self esteem                170
Ugly Kid Joe             Cats In The Cradle         170
Motorhead                Ace of spades              168
Iggy Pop                 The Passenger              166
Sounds                   Living in America          166
Ram Jam                  Black Betty                164
Red Hot Chili Peppers    Scar Tissue                164
Ebba Grön                800 grader                 162
223 låtar spelades bara en enda gång under perioden. Bland dessa hittar vi ganska prominenta låtar som “Build me up, break me down” med Dream Theater, “Young lust” med Pink Floyd, “Fight fire with fire” med Kansas, sex låtar med Deep Purple och inte mindre än sju låtar med Jimi Hendrix! Snyggt!
Om man tittar på individuella låtar tar Dio hem segern med god marginal, men han har bara sex låtar med på listan, varav i princip alla spelningar är de två som ligger först. Tittar vi på top 20 över mest spelade artister dyker Dio upp först på 19:e plats, helt utklassad av Guns n’ Roses, AC/DC och Metallica.
Artist                   Antal
------------------------ -----
Guns n' Roses             1007
AC/DC                      981
Metallica                  967
Iron Maiden                910
Nirvana                    783
Kiss                       749
Queen                      738
Bon Jovi                   717
Ebba Grön                  677
Ozzy Osbourne              599
U2                         559
Billy Idol                 481
Scorpions                  475
Red Hot Chili Peppers      464
Bruce Springsteen          448
Europe                     441
Rolling Stones             430
Green Day                  418
Dio                        408
Aerosmith                  352
Bland de 20 artister som endast spelades en gång under perioden hittar vi förvånande nog Boston, R.E.O. Speedwaggon och Cheap Trick.
Så hur många låtar var de olika artisterna representerade med på listan? Rockklassikers spellista bestod som sagt av 829 låtar under perioden, och 192 artister var representerade. 87 av artisterna hade en enda låt på listan. Bland dessa hittar vi bl.a. David Lee Roth, Genesis, Yes, Asia, Yngwie Malmsteen, Cream och Helloween. En salig blandning mellan artister som av melodiradion felaktigt betraktas som one hit wonders (t.ex. Blue Öyster Cult) och extremt prominenta artister som av någon anledning inte fick med mer än en enda låt (t.ex. 10cc).
Här är de 20 artister som fick med flest låtar på Rockklassikers spellista:
Artist                   Antal
------------------------ -----
Kiss                        36
AC/DC                       33
Bruce Springsteen           30
Metallica                   30
Van Halen                   29
Guns n' Roses               25
Iron Maiden                 21
Rolling Stones              18
Queen                       17
U2                          16
Deep Purple                 15
Jimi Hendrix                15
Black Sabbath               14
Motley Crue                 14
Motorhead                   14
Ozzy Osbourne               14
Bon Jovi                    13
Def Leppard                 13
Nirvana                     12
Aerosmith                   11
Kiss var alltså representerade med hela 36 låtar, nämligen dessa (sorterat på antal spelningar):
Titel                            Antal
-------------------------------- -----
Heaven's On Fire                   131
I was made for loving you          122
Detroit Rock City                  118
I Love It Loud                     102
Lick It Up                          87
Rock And Roll All Nite              78
God Gave Rock and Roll To You       27
God Of Thunder                       8
Love Gun                             8
Psycho Circus                        8
2,000 Man                            7
Calling Dr. Love                     7
Cold Gin                             4
Creatures Of The Night               4
Unholy                               4
Shout It Out Loud                    3
Strutter                             3
Crazy Crazy Nights                   3
Flaming Youth                        3
Do you love me?                      2
Beth                                 2
King of the night time world         2
Mr Speed                             2
I Love It Loud (Live)                2
I want you                           1
I Was Made For Loving You (Live)     1
Raise Your Glasses                   1
Rock And Roll All Nite (Live)        1
Shout It Loud (Live)                 1
Sure Know Something                  1
Sweet Pain                           1
Creatures Of The Night (Live)        1
Deuce                                1
Hotter Than Hell                     1
Great Expectations                   1
Hard Luck Woman                      1
För att samla ihop underlaget till detta blogginlägg byggde jag en s.k. web scraper i Visual Basic som fick kamma hem texten på Rockklassikers hemsida, som jag startade strax före tolvslaget nyårsafton 2011 och stängde av i början på april 2012.
Poker formation checker for .NET 5.0
I got a mail from an unknown programmer who asked me to port my poker formation checker from .NET Framework to .NET 5.0. Here is the repository and here is the NuGet package. Happy coding!
C# 9 Records

Hur projektmallarna pytsas ut i Visual Studio har verkligen övergått mitt förstånd. Beträffande .NET 5.0 var Windows Forms-mallen tillgänglig långt innan Console Application-mallen, men nu är äntligen allt på plats. Med anledning av det vill jag summera nyheterna i C# version 9 som, för att fungera fullt ut, kräver .NET 5.0. Här är den första:
Records
Records är klasser där man gjort avkall på vissa möjligheter för att komma åt möjligheten skapa objekt med properties på så lite kod som möjligt. Nyckelordet record anger att de medlemmar som följer ska vara publika (vilket inte stämmer enligt nuvarande officiell version) och om de inte ska kunna modifieras i programkoden, kan de nu deklareras som init (vilket faktiskt fungerar), vilket betyder public fram till första tilldelningen, därefter private.
using System;

namespace ConsoleApp1
{
    class Program
    {
        static void Main(string[] args)
        {
            var a = new Something {X = 10, Y = 20};
            Console.WriteLine(a.X);
        }
    }

    public record Something
    {
        public int X { get; init; }
        public int Y { get; init; }
    }
}
Skulle programmet fortsätta med tilldelningen a.X = 30 skulle kompilatorn påpeka att vår enda chans att lagra et värde i a.X är förbrukad.
Flimmer Duo: Future Hunters!

I afton har vi premiär för en ny serie för dig som inte fått nog av att Henrik och jag suttit i radio och hackat på folk som skriver musik: Nu sitter vi på YouTube och hackar på folk som gör film. Det första avsnittet handlar om Future hunters. Mycket nöje!
Slow down (Commodore 64)

En inte helt obetydlig del av min musiksmak kommer från Commodore 64, vars analoga musikkapacitet saknade motstycke. Vissa demos som släpptes var innehöll korta samplingar från kontemporär populärmusik, som t.ex. Slow down. När det handlar om digital musik var C64:an ytterst undermålig – minnet var för litet, antalet bitar per samplingspunkt var får lågt. Men digitala musikdemos släpptes, för att det gick. Ett av dessa var Slow down (länkad ovan) som jag inte hade den blekaste aning om varifrån den kom förrän YouTube dök upp. Nu vet jag att det handlade om ett snävt urval från maxiversionen av gruppen Loose ends singel med samma namn.
Hur svårt är det att gissa ett tal?

En person tänker på ett tal mellan 1 och 100, och en annan ska gissa vilket. Om den som gissar skulle gissa fel, så får han reda på om han har gissat på ett för stort eller för litet tal. Den bästa strategin för att gissa rätt på så få försök som möjligt, är att försöka diskvalificera så många tal som möjligt.
Genom att gissa på 10 och få höra att talet är för stort, är genast 91 tal diskvalificerade, och rätt svar måste vara mellan 1 och 9, men man kan lika gärna (och troligen) få höra att talet är för litet, och då är bara 10 tal (1 till 10) diskvalificerade medan 90 tal fortfarande kan vara aktuella.
Smartast är att gissa på 50. Är det fel svar, diskvalificerar det ändå fler än hälften av alla tal mellan 1 och 100, oberoende av om 50 är för stort eller inte. Skulle det vara för stort gissar man på 25, skulle det vara för litet gissar man på 75, och så vidare. Den vinnande strategin för den som gissar på ett tal är alltså att dra av hälften av talrymdens storlek och addera det till eller dra bort det ifrån senaste gissning.
Eftersom det finns en bästa strategi för den som gissar, så kommer antalet försök att hitta ett tal alltid bli detsamma för ett specifikt tal. Personen tänker på talet 50, kommer den som gissar att hitta talet på första försöket. För att mäta hur lång tid det tar att hitta ett specifikt tal, och för att slippa sitta med en vän och gissa på tal hela veckan, har jag skapat två enkla robotar.
Roboten Conny kan tänka på ett tal och be någon att gissa. Roboten Steven kan gissa på tal, och är dessutom bekant med gissningsstrategin jag beskrev ovan. Detta är Conny:
public class NumberThinkingRobot
{
    private readonly ICanGuess _guesser;
    private readonly int _correct;

    public NumberThinkingRobot(int correct, ICanGuess guesser)
    {
        _correct = correct;
        _guesser = guesser;
    }

    public void Begin()
    {
        var tryCount = 0;
        do
        {
            Console.WriteLine($"Try no. {++tryCount}");

            var guess = _guesser.Guess();

            if (guess < _correct)
                _guesser.TooSmall();
            else if (guess > _correct)
                _guesser.TooLarge();
            else
            {
                Console.WriteLine("Correct!");
                break;
            }
        } while (true);
    }
}
Och detta är Steven:
public class NumberGuessingRobot : ICanGuess
{
    private readonly int _max;
    private int _correct;
    private double _stepSize;

    public NumberGuessingRobot(int max)
    {
        _max = max;
        _correct = _max/2;
        _stepSize = _correct;
    }

    public int Guess()
    {
        Console.WriteLine($"Guess: {_correct}");
        return _correct;
    }

    public void TooSmall()
    {
        Console.WriteLine("Too small!");

        _stepSize /= 2.0;
        _stepSize = _stepSize < 1
            ? 1
            : _stepSize;

        _correct += (int)Math.Round(_stepSize);
        _correct = _correct > _max
            ? _max
            : _correct;
    }

    public void TooLarge()
    {
        Console.WriteLine("Too large!");

        _stepSize /= 2.0;
        _stepSize = _stepSize < 1
            ? 1
            : _stepSize;

        _correct -= (int)Math.Round(_stepSize);
        _correct = _correct < 1
            ? 1
            : _correct;
    }
}
Programmet presenteras i sin helhet sist. Så låt oss instruera Conny att det korrekta talet är 22, och instruera Steven att det högsta tillåtna talet är 100, för att sedan fösa ihop dem.
using System;

const int max = 100;
const int correct = 22;
var steven = new NumberGuessingRobot(max);
var conny = new NumberThinkingRobot(correct, steven);
conny.Begin();
Vi kan konstatera att Steven behöver ha fem försök för att hitta 22. Detta är resultatet av körningen:
Try no. 1
Guess: 50
Too large!
Try no. 2
Guess: 25
Too large!
Try no. 3
Guess: 13
Too small!
Try no. 4
Guess: 19
Too small!
Try no. 5
Guess: 22
Correct!
Så hur svåra är de olika talen mellan 1 och 100 att hitta? 50 hittas direkt och 25 och 75 hittas på två gissningar. 13, 37, 63 och 87 kräver tre gissningar. 7 19, 31, 43, 57, 69, 81 och 93 kräver fyra. För 4, 10, 16, 22, 28, 34, 40, 46, 54, 60, 66, 72, 78, 84, 90 och 96 krävs fem gissningar. Resterande sextionio tal kräver sex gissningar eller fler, vilket innebär att det i snitt tar nästan sex gissningar att hitta rätt med den bästa strategin.
Om man istället ska gissa på ett tal mellan 1 och 1000 så har vi tio gånger så många alternativ till korrekt tal, men strategin kräver bara i snitt nio gissningar. Om vi har hundra gånger så många alternativ (ett tal mellan 1 och 10.000) krävs i snitt ungefär 12 gissningar, och för att gissa ett tal mellan 1 och 100.000 krävs knappt 16 gissningar.
Här är programmet i sin helhet (C#9):
using System;

const int max = 100;
const int correct = 22;
var steven = new NumberGuessingRobot(max);
var conny = new NumberThinkingRobot(correct, steven);
conny.Begin();

public class NumberThinkingRobot
{
    private readonly ICanGuess _guesser;
    private readonly int _correct;

    public NumberThinkingRobot(int correct, ICanGuess guesser)
    {
        _correct = correct;
        _guesser = guesser;
    }

    public void Begin()
    {
        var tryCount = 0;
        do
        {
            Console.WriteLine($"Try no. {++tryCount}");

            var guess = _guesser.Guess();

            if (guess < _correct)
                _guesser.TooSmall();
            else if (guess > _correct)
                _guesser.TooLarge();
            else
            {
                Console.WriteLine("Correct!");
                break;
            }
        } while (true);
    }
}

public class NumberGuessingRobot : ICanGuess
{
    private readonly int _max;
    private int _correct;
    private double _stepSize;

    public NumberGuessingRobot(int max)
    {
        _max = max;
        _correct = _max/2;
        _stepSize = _correct;
    }

    public int Guess()
    {
        Console.WriteLine($"Guess: {_correct}");
        return _correct;
    }

    public void TooSmall()
    {
        Console.WriteLine("Too small!");

        _stepSize /= 2.0;
        _stepSize = _stepSize < 1
            ? 1
            : _stepSize;

        _correct += (int)Math.Round(_stepSize);
        _correct = _correct > _max
            ? _max
            : _correct;
    }

    public void TooLarge()
    {
        Console.WriteLine("Too large!");

        _stepSize /= 2.0;
        _stepSize = _stepSize < 1
            ? 1
            : _stepSize;

        _correct -= (int)Math.Round(_stepSize);
        _correct = _correct < 1
            ? 1
            : _correct;
    }
}

public interface ICanGuess
{
    int Guess();
    void TooSmall();
    void TooLarge();
}
Flytta C64-program till din PC

Det finns en del olika strategier för att bevara (eller preservera) gamla Commodore 64-program för framtiden. Här presenterar jag en snabbguide för den som äger en SD2IEC och ett tomt SD-kort.
Hårdvarukrav:
Du behöver ha en C64 (eller annan 8-bitarsmaskin från Commodore, men jag antar att du har en C64), en diskdrive, en floppydisk du vill bevara (preservera), ett SD-kort att preservera floppydisken på och en SD2IEC-enhet.
Förberedelser av SD-kort (görs på din Windows-dator):
Se till att formatera kortet till FAT32. Placera ut en diskavbildning (D64-fil) innehållande DraCopy och en diskavbildning som är tom (vilket enkelt skapas med t.ex. DirMaster). Du bör nu ha ett FAT32-formaterat SD-kort med två diskavbildningar på (D64-filer).
Mata därefter in SD-kortet i din SD2IEC-enhet som är kopplad till din C64. Notera att det finns en hel drös olika varianter av SD2IEC. Vissa har en serieport för att man ska kunna koppla in en fysisk diskdrive i den, men om det saknas så går det bra att dra en sladd mellan din C64 och din diskdrive, och en sladd mellan din diskdrive och din SD2IEC-enhet.
Val av enhetsbeteckning:
Om inget annat är sagt, kommer både din SD2IEC och din diskdrive att ha enhetsbeteckning 8, vilket innebär att de inte kan användas samtidigt. Har du en SD2IEC med dipomkopplare eller en diskdrive med dipomkopplare kan du enkelt ändra så att den ena enheten har en annan enhetsbeteckning än 8. Jag valde att lägga min diskdrive (Commodore 1571) på enhet 10 och låta min SD2IEC ligga kvar på enhet 8. Se till att dina enheter har olika beteckning, och att du håller koll på vilken enhet som har vilken beteckning – i denna text kommer min enhet 8 vara SD2IEC och enhet 10 vara min diskdrive, men du måste tänka på hur du har konfigurerat hårdvaran.
Om du inte kan ändra enhetsbeteckning med dipomkopplare på någon av enheterna, får du använda ett kommando för att ändra enhetsbeteckning på din SD2IEC. Detta kommando ändrar enhetsbeteckningen från 8 till 9 (vilket jag inte gjort).
OPEN1,8,15,"U0>+CHR$(9)":CLOSE1
Men tänk på att jag har SD2IEC som 8 och min diskdrive som 10.
Därefter är det bara att leta reda på en floppydisk som du vill bevara, och stoppa in den i din diskdrive (som för mig är enhet 10). Ditt SD-kort med DraCopy och den tomma virtuella disken (som jag har valt att kalla för empty.d64) ska matas in i din SD2IEC.
Utför kopieringen:
Välj den virtuella disketten innehållande DraCopy som din diskett på enhet 8 (i mitt fall – tänk på att anpassa efter behov) genom följande kommando:
OPEN1,[enhet],15,"CD:[avbildning innehållande DraCopy]":CLOSE1
I mitt fall:
OPEN1,8,15,"CD:dc10d.d64":CLOSE1
Starta rätt version av DraCopy, beroende på vilken 8-bitarsmaskin du använder. Du kan se de tillgängliga versionerna genom att skriva LOAD"$",8 följt av LIST.
Jag hämtar rätt version för mig genom att skriva LOAD"DC64",8,1 och sedan RUN.
Innan du startar DraCopy, koppla loss diskavbildningen innehållande DraCopy. (Symbolen vänsterpil finns längst uppe till vänster på tangentbordet på din C64:a.)
OPEN1,8,15,"CD:[vänsterpil]":CLOSE1
Mounta sedan tomma virtuella disk.
OPEN1,8,15,"CD:EMPTY.D64":CLOSE1
DraCopy innehåller två fönster. Det ena har titeln S[enhet], t.ex. S08, och det andra har titeln D[enhet], t.ex. D09. Du väljer vilket fönster du ska arbeta i genom att trycka på vänsterpilen, längst uppe till vänster på tangentbordet.
I det ena fönstret, tryck på F2 tills du hittar källdisken (den fysiska) eller destinationsdisken (den virtuella). Tryck sedan F1 och för att visa diskens innehåll och bekräfta att du har valt rätt.
Därefter, tryck på vänsterpilen för att byta fönster och upprepa proceduren. F2 för att välja destinationsdisken eller källdisken och F1 för att visa innehåll.
När det ena fönstret innehåller källan och det andra fönstret innehåller destinationen, tryck på vänsterpilen till dess att källan har ett S framför sig och destinationen har ett D framför sig.
Därefter utför du kopieringen genom att trycka F8.
När kopieringen är klar och du har flyttat SD-kortet tillbaka till din PC, glöm inte att ge diskavbildningen ett vettigare filnamn än EMPTY.D64.
Begränsningar:
DraCopy kan endast kopiera disketter som inte innehåller några läsfel. Om du vill bevara ett program på en diskett som innehåller fel, bör du istället använda ett kopieringsprogram som kopierar individuella filer.
Resultat:
För min del valde hag en diskett innehållande bl.a. en låt som jag vet inte har digitaliserats för, nämligen Slow Down. Diskavbildningen finns att ladda hem här.
(Låten Slow Down är samplad från gruppen Loose Ends, 1986.)
C# from the command window

If you are using .NET Core (or .NET 5.0) you can easily activate the ability to run C# code from the command window (Windows Terminal or the old cmd.exe).
To get started, install dotnet-script by typing:
dotnet tool install --global dotnet-script
Once installed, you can start the dotnet-script program just by typing:
dotnet-script
The prompt now looks like a greater than-sign (>). From here, you can type any C# code and you can reference anything within the System namespace. For example, if you type:
Console.WriteLine("Hello world!");
…you will get the following answer:
Hello world!
A few things to keep in mind: Types you add will be remembered for the whole session. For example, if you type in a class, you can use that class in the session. And if the command windows expect further input, the prompt will change from a greater than-signe to an asterisk sign (*). So if you type in something like class MyClass { and press Enter, nothing will be executed. Instead, the command window will indicate that more input is expected by displaying an asterisk sign. To try this out, type something like this (terminating each statement with Enter):
class MyClass {
public void DoSomething() {
Console.WriteLine("Hello!");
}
}
And then, you can use your new type like this:
new MyClass().DoSomething();
The response will be:
Hello!
The picture shows the different prompts when you type in a simple for loop:
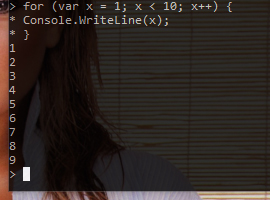
This is a very powerful tool to use when you want to perform tasks that are a bit too complicated for a calculator, but perhaps a bit too simple fore an advanced computer program, or when you want to try out some API you are working on. Happy programming!
DOD är bättre OOD för tidskritiska system
Objektorienterad design (OOD) är ofta ett bra val för att det är relativt enkelt att använda med robusta mönster att följa. Men när man programmerar tidskritiskt, som t.ex. i när man gör spel, kan det vara värt att titta på dataorienterad design (DOD).
DOD handlar om att utnyttja processorns cache. Normalt när man läser och skriver data ber man processorn att läsa och skriva från RAM-minnet. Men när så sker, antar processorn att fler läs- och skrivoperationer kommer att ske med närliggande minneadresser, och cachar således närliggande data. Man kan alltså öka prestandan i sitt program, genom att se till att data som uppdateras ofta ligger nära varandra i minnet.
Jag har en väldigt enkel dator, en liten NUC från ASUS. Jag har skrivit ett litet testprogram i C#/.NET Core 3.1 som skapar 500 rymdskepp och flyttar dessa en halv miljon enheter i sidled, både enligt OOD och DOD.
Den objektorienterade lösningen
Denna kod definierar ett rymdskepp enligt traditionell OOD:
public class Spaceship
{
    public int X { get; set; }
    public int Y { get; set; }
}
Följande lilla kodsnutt skapar 500 rymdskepp i en array (givet att konstanten Ships är satt till 500):
var spaceshipsOop = new Spaceship[Ships];

for (var i = 0; i < Ships; i++)
    spaceshipsOop[i] = new Spaceship
    {
        X = 0,
        Y = i
    };
Och denna kod förflyttar alla 500 skepp en halv miljon enheter åt vänster (eftersom konstanten travelDistance är satt till 500 000):
for (var x = 0; x < travelDistance; x++)
    for (var i = 0; i < Ships; i++)
        spaceshipsOop[i].X++;
Hela kalaset kostar 194 millisekunder (3,124 sekunder i debugläge) för min lilla processor att utföra.
Den dataorienterade lösningen
I den dataorienterade lösningen vill vi försäkra oss om att data som kommer uppdateras samtidigt också finns lagrat tillsammans. Därför skulle definitionen av ett rymdskepp kunna bytas ut mot en definition av samtliga rymdskepp:
public class Spaceships
{
    public int[] X { get; set; }
    public int[] Y { get; set; }
}
Det innebär att koden som skapar 500 rymdskepp istället ser ut så här:
var spaceshipsDoa = new Spaceships
{
    X = new int[Ships], Y = new int[Ships]
};
for (var i = 0; i < Ships; i++)
{
    spaceshipsDoa.X[i] = 0;
    spaceshipsDoa.Y[i] = i;
}
Och slutligen, koden som förflyttar skeppen en halv miljon enheter åt vänster, ser nu ut så här:
for (var x = 0; x < travelDistance; x++)
    for (var i = 0; i < Ships; i++)
        spaceshipsDoa.X[i]++;
På min enhet har processorn fått jobba i 334 millisekunder (1,419 sekunder i debug-läge) för att åstadkomma detta, vilket är en rejäl försämring, men en förbättring på mer än 50 procent i debug-läge.
Vi kan alltså konstatera att man inte har någon automatisk vinst innan man kommer upp i lite tyngre arbeten, och det är därför fördelen med DOD var så tydligt i debug-läge. I release-läge ligger break-even för min del när 500 skepp gör en resa på två miljoner enheter (ungefär 1,2 sekunder oavsett strategi), och vid fem miljoner enheter kostar OOD-lösningen 3,2 sekunder och DOD-lösningen 2,5 sekunder.
Fördelen med DOD minskar ytterligare om antalet rymdskepp som ska förflyttas minskar, men ökar om antalet rymdskepp som ska förflyttas ökar. Med 2000 rymdskepp som ska som ska förflyttas fem miljoner enheter kostar OOD-lösningen 100 sekunder och DOD-lösningen 65 sekunder, vilket är en klart märkbar förbättring. Om en skälig mängd data ska användas väldigt intensivt och prestanda är kritiskt så är DOD att föredra, men i övrigt spelar det ingen större roll
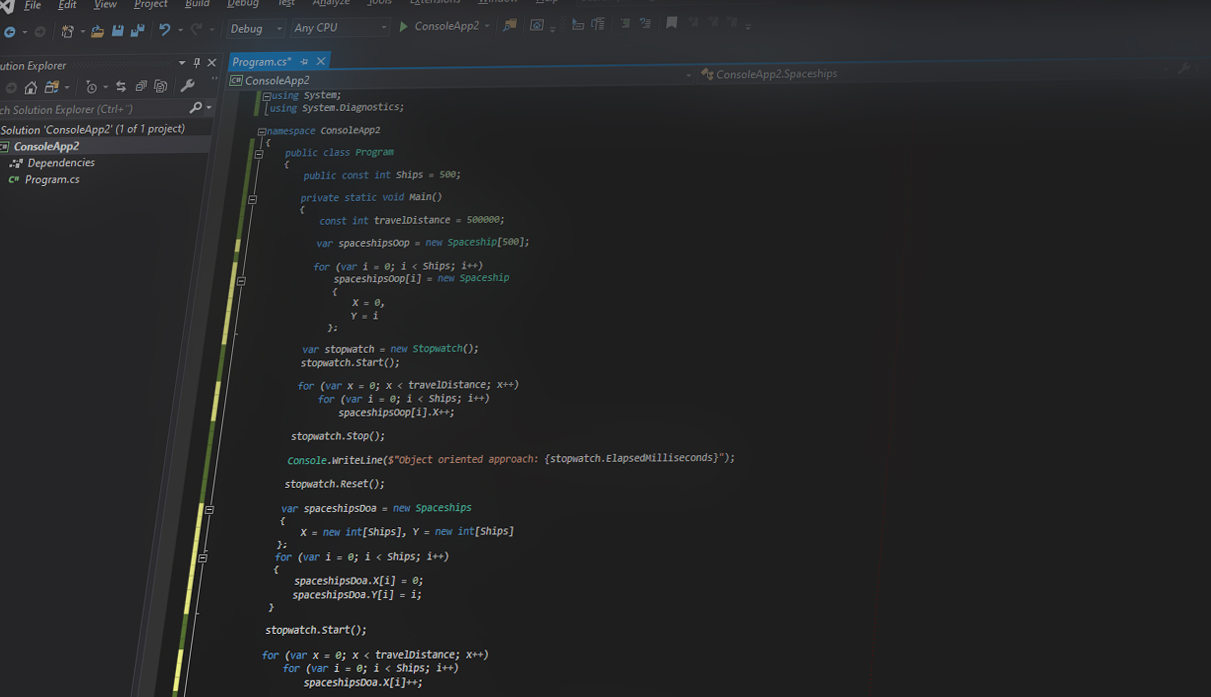
Hela källkoden (C# version 8.0, .NET Core version 3.1):
using System;
using System.Diagnostics;

namespace ConsoleApp2
{
    public class Program
    {
        public const int Ships = 2000;

        private static void Main()
        {
            const int travelDistance = 5000000;

            var spaceshipsOop = new Spaceship[Ships];

            for (var i = 0; i < Ships; i++)
                spaceshipsOop[i] = new Spaceship
                {
                    X = 0,
                    Y = i
                };

            var stopwatch = new Stopwatch();
            stopwatch.Start();

            for (var x = 0; x < travelDistance; x++)
                for (var i = 0; i < Ships; i++)
                    spaceshipsOop[i].X++;

            stopwatch.Stop();

            Console.WriteLine($"Object oriented approach: {stopwatch.ElapsedMilliseconds}");

            stopwatch.Reset();

            var spaceshipsDoa = new Spaceships
            {
                X = new int[Ships], Y = new int[Ships]
            };
            for (var i = 0; i < Ships; i++)
            {
                spaceshipsDoa.X[i] = 0;
                spaceshipsDoa.Y[i] = i;
            }

            stopwatch.Start();

            for (var x = 0; x < travelDistance; x++)
                for (var i = 0; i < Ships; i++)
                    spaceshipsDoa.X[i]++;

            stopwatch.Stop();

            Console.WriteLine($"Data oriented approach: {stopwatch.ElapsedMilliseconds}");
        }
    }

    public class Spaceship
    {
        public int X { get; set; }
        public int Y { get; set; }
    }

    public class Spaceships
    {
        public int[] X { get; set; }
        public int[] Y { get; set; }
    }
}
Podcasts

I afton vill jag tipsa två fenomenala podcasts. I veckans avsnitt av Stulet gods pratar Henrik Andersson och jag om Poison, John Carpenter, Ankie Bagger och Joe Walsh. Avsnittet finns här eller där podcasts finns. Dessutom vill jag verkligen slå ett slag för Generation YX där vi diskuterar allt från den finska tullen till svensk skogsporr. Ingen mindre än Aron Flam närvarar.
Generation YX

Generation YX är en ny poddcast med journalisten Jannik Svensson och mig, där vi diskuterar samhällsaktuella frågor ur ett generationsperspektiv.
All information finns på hemsidan https://genyx.se/ men den finns där poddar finns.
Kategoriska uttalanden om vad datorer kan och inte kan bygger ofta på okunskap
Ibland hör man folk uttala sig vad datorer kan göra, antingen för att beskriva hur man ser på mjukvara eller för att göra en liknelse. Nu senast hörde jag Myra Åhbeck Öhrman berätta att datorer bara gör det man säger åt dem att göra. När hon berättar varför hon inte tror att människan kommer kunna skapa artificiellt intelligent liv säger hon:
En dator kan ju bara göra precis det vi säger åt den att göra.
Det får mig att fundera hur hon resonerar. Allra närmast plåten är detta på sätt och vis sant – en maskinkodsinstruktion som utförs av en mikroprocessor har ett förutsägbar effekt – men vilken kontroll har vi egentligen över vad som sker på den nivån?
Instruktioner som ges till en dator kan komma från en mycket högre nivå. Betrakta detta BASIC-program:
FOR A=1 TO 10
PRINT A
NEXT
I detta fall är Myras påstående princip sant. Denna programkod kommer att översättas till maskinkod av en kompilator, och maskinkoden kommer att matas till processorn som utför instruktionerna. I detta fall ber vi datorn att räkna till 10, och datorn utför exakt det. Vill du testa, kan du köra BASIC-kod i webbläsaren här.
Instruktioner som ges kan bero på kontext. Betrakta följande SQL-program:
SELECT CustomerName
FROM Customers
WHERE CustomerName
LIKE "A%"
Programmet beskriver egentligen inte vad datorn ska göra, utan vad användaren vill ha gjort: Ha tillbaka namnet på alla kunder vars namn börjar på bokstaven A. Exakt vad detta kompileras ner till för instruktioner, beror på lite olika saker. Är det mycket data? Finns det många namn som börjar på A? Finns det ett index att slå i? Och så vidare. Jag som människa har förmodligen lättare överskåda strategier och möjliga val, än vilka val som kommer att göras i en given situation. Det är fortfarande människor som i ett tidigare steg har berättat om de olika strategierna för datorn, men vilka maskinkodsinstruktioner som till slut utförs av processorn för att lösa uppgiften, är inte lika självklart som i BASIC-exemplet. Vill du testa, kan du köra SQL-kod i webbläsaren här.
Och så här rullar det på, från nivå till nivå, ända till oigenkännbarhet. I några steg längre upp har vi den artificiella intelligensen som ska lösa problem åt oss, där programmeraren inte vet hur man löser problemet, och snarare skriver kod som ska leta efter samband i ett dataset. För att producera en lösning kan evolutionära algoritmer användas, och härifrån kan man antingen låta evolvera eller låta en artificiell intelligens producera kod. I framtiden kanske det är en artificiell intelligens som konstruerat den artificiella intelligens som ska producera koden, men redan idag har vi tappat kontrollen över vad som händer på själva plåten. Om gud skapade universum och sedan klev åt sidan, kan man då verkligen säga att det är guds fel att två bilar kolliderade på E4:an i torsdags, eller har han lämnat ifrån sig kommenderingen till någon annan? Att säga att datorer är fastlåsta i bara utföra instruktioner från sin husbonde, är att förneka modern datavetenskap.
JobRunner 1.2

JobRunner är ett klientprogram för att starta, köra och övervaka andra program, typiskt kommandon för att publicera, ladda hem, rendera bilder, texter eller XML-flöden. I version 1.2 finns möjligheten att logga körningen. Programmet (och dess källkod) finns att ladda hem här: https://github.com/Anders-H/JobRunner
Commodore 128 är en schweizisk armékniv
Stulet gods 1/20

Om du vill hålla dig à jour med vad som är stulet och vad som inte är det, är podcasten Stulet gods något för dig. Här avhandlar jag och Henrik Andersson (påstådda) låtstölder genom tiderna.
I det första avsnittet avhandlas Edison Lighthouse och Eiffel 64.
Hemsida: http://stuletgods.80tal.se/
Prenumerera (RSS): http://stuletgods.80tal.se/rss.xml
iTunes: https://podcasts.apple.com/se/podcast/stulet-gods/id1507649534
Spotify: https://open.spotify.com/show/0KcEPjKKZcO8KHh2T8F4eL
Direktlänk, Spotify: https://open.spotify.com/episode/77WKIjpr41E9GYVBVQFd6r
Varför blir datorer mer och mer pålitliga jämfört med experter?

Vi behöver inte backa många år för att hitta forskare som anser att ett parti schack är något som kräver egenskaper som endast människan har, men idag vet vi att datorer lämpar sig ganska väl för den uppgiften. Sedan dess har tilltron till datorers framtida förmåga ökat kraftigt, kanske för att man har sett de senaste 40 årens utvecklingshastighet, från persondatorns födelse till dagens mobila superdatorer i fickformat som ständigt är uppkopplade till enorma datorfarmar som de matar med data, som sedan används i olika mycket sofistikerade analyser. Dagens serverhallar förvaltar och analyserar inte bara data som samlas in från användares datorer och mobiltelefoner, utan även publika dataset som produceras av t.ex. statliga myndigheter och andra kommersiella dataset som skapas av olika branscher. Och när man tittar på vad som kan åstadkommas med data, förstår man varför data är dagens hårdvaluta. Väldigt mycket kan man experimentera med hemma på sin egen dator, utan att det behöva kosta något. Det finns gott om öppna dataset, som t.ex. väderdata från SMHI, brottsstatistik från BRÅ eller befolkningsstatistik från SCB. Själva intelligensen kan sedan erhållas antingen från t.ex. Microsofts publika programmeringsgränssnitt, Cognitive Services, eller TensorFlow som har öppen källkod. Sen finns kommersiella AI-produkter (artificiell intelligens) man också kan köra på sin egen utrustning, som t.ex. Machine Learning Services för Microsoft SQL Server. Idag kommer nästan alla programmerare i kontakt med någon eller flera av dessa.
Artificiell intelligens kan innefatta en hel del olika ting, och för den vanliga programmeraren handlar det oftast om att förstå strukturerat data. Strukturerat data är data som har en formellt beskriven struktur, typiskt en tabell, XML eller JSON. Ostrukturerat data är t.ex. svensk text, ljud, bild eller video. Jag har ingen erfarenhet av att jobba med att tolka ostrukturerat data, men jag visar här hur man kommer igång och leker på egen hand. Det första steget för en självkörande bil är att strukturera det ostrukturerade data som samlas in visa bilens sensorer. Idag har en självkörande bil ungefär dubbelt så många incidenter per hundratusen körtimmar jämfört med en manuellt framförd bil, men även om utvecklingen går fort framåt är det viktigt att tänka på att vissa saker som är enkelt för en människa är svårt för en dator, och vissa saker som är enkelt för en dator är svårt för en människa.
En riktigt intressant hantering av ostrukturerat data är deep dreaming, där datorn kan fylla i med information som skulle kunna vara rimlig. Tänk dig en övervakningskamera med en mycket lågupplöst bild på en inbrottstjuv, som i förstoring rent av ser pixlad ut. Med deep dreaming kan man ersätta pixlarna med en högupplöst bild. Problemet är bara att resultatet förmodligen inte är en högupplöst bild på den som faktiskt fastnat på filmen, utan ett exempel på hur personen som var där skulle ha kunnat se ut, men utan mer data så vet vi egentligen inte. Ett sätt att mäta kvalitén på vad datorn drömmer ihop skulle kunna vara följande: Man kan mata datorn med ett filmklipp föreställande strutsar som springer på ett fält, och begära ut ett filmklipp som visar hur det skulle ha sett ut om det inte vore strutsar som sprang på fältet, utan giraffer. Därefter matar man datorn med det nya klippet på giraffer, och begär ut ett filmklipp som visar hur det skulle ha sett ut om det istället vore strutsar. Därefter kan man titta på skillnaderna mellan de filmade strutsarna (ursprungsklippet) och de framdrömda strutsarna. Att låta datorn fundera ut hur det skulle se ut om en skådespelare istället vore t.ex. en känd politiker kallas för deep fake, vilket du också kan laborera med hemma på kammaren tack vare Python-scriptet DeepFaceLab.
Men med god tillgång till formellt strukturerat data (och en kraftfull dator med snabb processor, stora och snabba hårddiskar och massor av RAM-minne) är det ganska enkelt att se in i framtiden. Låt säga att man har data över låntagare, och frågan är om nästa potentiella låntagare kommer att ha råd med sitt önskade lån. Varje låntagare är en post som håller kolumner med data om ekonomi, tidigare anmärkningar, och framför allt, om lånet som togs var framgångsrikt eller om det genererade en ny missad inbetalning. Machine learning handlar om att låta datorn räkna ut vilka kolumner och vilka värden i dessa som är utmärkande för kunder som klarar av att betala tillbaka sitt lån, och vilka kolumner och värden som är utmärkande för kunder som misslyckas. En skicklig ekonom klarar detta, men en dator som inte kan ett smack om ekonomi skulle i teorin kunna klara det ännu bättre, för en dator kan ta in så oerhört många exempel och söka efter mönster i datamängder som en riktig (mänsklig) ekonom inte skulle kunna behandla på en livstid, än mindre få en överblick över.
Datorer gör såklart fel. Låt säga att en ny kund ser ut att passa in i kategorin av kunder som kommer att sköta sitt nya lån, och inte gör det, så bidrar den kunden till att samma misstag inte begås igen. Ibland måste man till och med medvetet tala om att vissa parametrar ska viktas lite mer eller lite mindre, men generellt sett ger mer data mer kött på benen för nästa förutsägelse. En intressant detalj är att datorn inte behöver bry sig om huruvida korrelationer är kausala eller ej, för fungerar sambanden för att göra förutsägelser, så fungerar sambanden för att göra förutsägelser. Potentiellt sett odlas det alltså en hel del stereotyper ute i våra serverhallar.
När vinner kompetens över AI? När datamängden inte beskriver alla potentiella situationer, eller när felaktiga antaganden har visat sig fungera under den initiala upplärningsfasen och sedan belastar framtida inlärande. En abnormitet som datorn aldrig sett kan inte datorn förutse, och om den sker för sällan kanske datorn inte klarar att förutse när den kommer att inträffa nästa gång. För datorns del är lösningen alltid mera data. Inte alltid bara det, men alltid det. Det kommer alltså säkert alltid att finnas situationer av en sådan karaktär att en akademiker, med sin jämförelsevis lilla rådatakapacitet men jämförelsevis stora hjärnkapacitet, kommer vara överlägsen, och det finns redan idag exempel där akademiker som vigt sitt liv åt att studera ett ämne, blir ifrånsprungen av en cellar dweller med computing power, som inte vet ett smack om ämnet, men som gör körningarna som krävs. Tänk hur många månaders jobb och hur mycket pengar som Lucasfilm lade på låta en ung Carrie Fisher vara med i en ny Star Wars-film, och hur mycket bättre en amatör lyckades göra samma jobb på sin hemdator på ett par timmar.
Othello
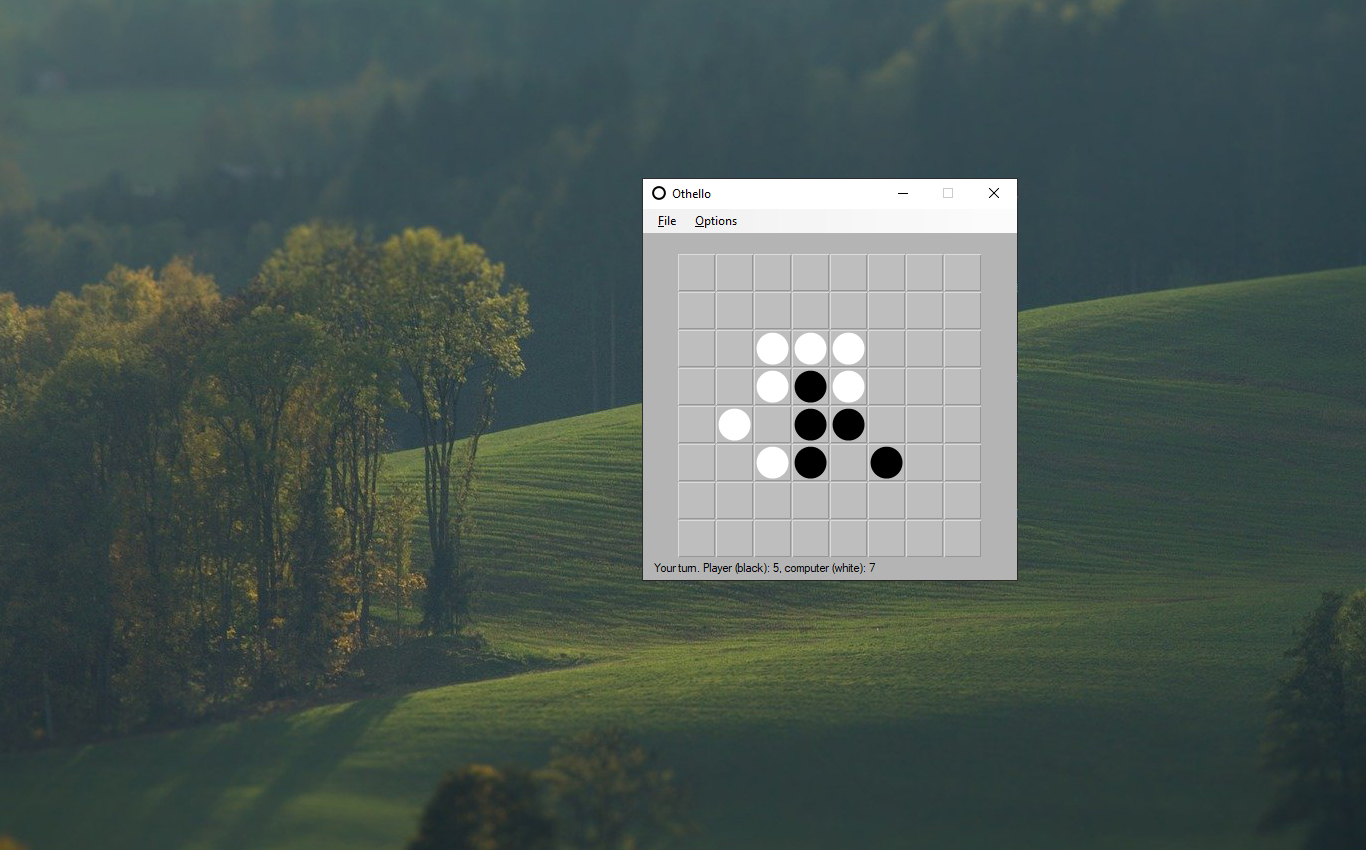
Här är källkoden Othello, till ett enkelt strategispel för Windows-skrivbordet. Du vinner över datorn genom att ha se till att spelplanen innehåller fler svarta brickor än vita. Reglerna finns på Wikipedia.
Uppdatering 2023-02-11: Installationsprogram för Windows 10/11 finns här.
Datorschack

Det är förmodligen möjligt att bygga ett datorchack utan mer kunskap än själva spelreglerna. Man måste veta hur pjäserna får förflytta sig, inklusive specialdragen (uppgradering, passant, rockad), att inte egna kungen får ställas i schack och kriterierna för vinst, förlust eller möjligtvis remi (och kriterierna för remi).
Som mänsklig spelare kan man troligtvis inte analysera alla tänkbara drag speciellt långt in i framtiden (åtminstone kan inte jag göra det) utan får istället jobba med strategier som t.ex. skulle kunna vara att identifiera spelplanskonfigurationer där vissa drag tenderar att vara mer eller mindre lönsamma.
En dator som spelar mot en människa borde kunna göra en grundlig analys av spelplanen för att veta vilket drag som öppnar för ett framtida segerdrag, och tittar man på logiken bakom en sådan implementation så är den inte speciellt avancerad. Men det håller inte.
Låt säga att varje given konfiguration av schackbrädet har 40 rimliga drag. Det innebär att 40 bräden i nästa generation måste analyseras för att se vilket drag som är lönsamt eller ej. Men det ligger också i sakens natur att ett drag som inte direkt ger något, kan vara antingen förödande eller väldigt lönsamt längre fram. Så varför inte kosta på sig att titta på varje drags nästa generation?
I snitt har varje nästa generation 40 rimliga drag, vilket innebär att vi måste analysera ytterligare 40*40 (1600) drag. Men det är förmodligen inte slut där. För att hitta ljuset i tunneln behöver man troligen titta på draget därefter, där varje alternativ i sin tur har 40 rimliga konsekvenser (40 * 1600) vilket ger oss 64 000 spelplaner att analysera. Om matchen sträcker sig över tre drag måste vi titta på (64 000 * 40) 2,5 miljoner drag. Och så håller det på.
Låt oss fortsätta att anta att varje given situation i snitt bjuder 40 rimliga drag, så ger det följande effekt:
1 drag kräver 1 600 analyser.
2 drag kräver 64 tusen analyser.
3 drag kräver 2,6 miljoner analyser.
4 drag kräver 102 miljoner analyser.
5 drag kräver 4 miljarder analyser.
6 drag kräver 164 miljarder analyser.
7 drag kräver 6 554 miljarder analyser.
8 drag kräver 262 144 miljarder analyser.
9 drag kräver 10 485 760 miljarder analyser.
10 drag kräver 419 430 400 miljarder analyser.
Men eftersom vi inte vet vad den mänskliga spelaren tänker göra, måste vi efter varje tänkt drag skapa en gren för varje rimligt motdrag. Så egentligen ser 10 generationer ut så här:
1 drag kräver 1 600 analyser samt ytterligare 64 000 analyser av möjliga motdrag.
2 drag kräver 2,6 miljoner analyser samt ytterligare 102 miljoner analyser av möjliga motdrag.
3 drag kräver 4 miljarder analyser samt ytterligare 164 miljarder analyser av möjliga motdrag.
4 drag kräver 6 553 miljarder analyser samt ytterligare 262 144 miljarder analyser av möjliga motdrag.
5 drag kräver 10 485 760 miljarder analyser samt ytterligare 419 430 400 miljarder analyser av möjliga motdrag.
6 drag kräver 16 777 216 biljoner analyser samt ytterligare 671 088 640 biljoner analyser av möjliga motdrag.
7 drag kräver 26 843 triljoner analyser samt ytterligare 1 073 741 triljoner analyser av möjliga motdrag.
8 drag kräver 42 949 672 triljoner analyser samt ytterligare 1 717 986 918 triljoner analyser av möjliga motdrag.
9 drag kräver 68 719 476 triljarder analyser samt ytterligare 2 748 779 kvadriljoner analyser av möjliga motdrag.
10 drag kräver 109 951 kvadriljarder analyser.
Och eftersom en analys tar några bytes att hålla i datorns arbetsminne, kan man konstatera att det fallerar av den anledningen. Processtiden även på en väldigt stark dator kommer vara ett annat problem.
Genom att lära sig strategier kan man identifiera vilka situationer man bör undvika och vilka situationer man bör premiera, och på så vis reducera antalet analyser som behöver göras. Vilka öppningar är bra? Kanske ungefär 5 över 2 generationer. Då har vi åtminstone i startsituationen reducerat från över hundra miljoner analyser till en handfull. Ju fler sådana strategier man har, desto fler nonsensanalyser skär man bort. Men frågan är hur långt man kan komma genom att slumpa vilka analyser som faktiskt ska göras? Kan ett enkelt C#-program vinna mot en seriös schackdator genom att slumpmässigt välja vilka grenar som ska analyseras på vilket djup?
Ni med näsduk i kavajfickan spottar på vårt kulturarv!
Idag uppmuntrade jag en konstnär att måla en upphittad C64 i en Facebook-grupp.
Jag skrev bl.a. att jag själv lackade min Amiga på 80-talet. Det hela eskalerade ganska fort.

Ok, fel av mig. Givetvis ska man vara rädd om gamla grejer, oavsett om det bara handlar om färgen på ett chassi. Hur som helst så frågade jag vad mer man behöver för att kunna laga den ifall den går sönder.

Och vips spottar man på “vårt gemensamma kulturarv”. Jag skulle kanske ha sagt att den C64 som ligger i en container ska stanna i en container. Eller skippa näsduken nästa gång.
Här tar jag betalt för att spotta på kulturarvet:
Några exponeringar från idag

Idag hälsade jag på hos mitt äldsta barn som, förutom katter och en hund, har en hel del inneboende reptiler. Här är mitt Instagram-inlägg från dagen:
Och här är alla andra exponeringar:
[nggallery id=3]
Produktionskostnad/vinst-förhållandet för misslyckade uppföljare

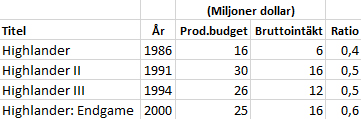
Det är ofta ett säkert kort inom filmindustrin att göra en uppföljare, eftersom man kan spela an på en framgång. Det blir ett slags varumärkesexploatering som inte alltid utnyttjar sin fulla potential. Ibland blir inte uppföljaren lika bra som sin föregångare, och här är tre exempel på hur budget förhåller sig till bruttointäkt i filmserier som inte lyckades följa upp sitt original. De filmer som inte når upp till 1,0 har alltså inte dragit in pengarna de kostade att producera, och här är tre exempel på “dåliga uppföljare”. Så här ser en flopp ut:
Highlander, inspelningsbudget och bruttointäkt (miljoner dollar):
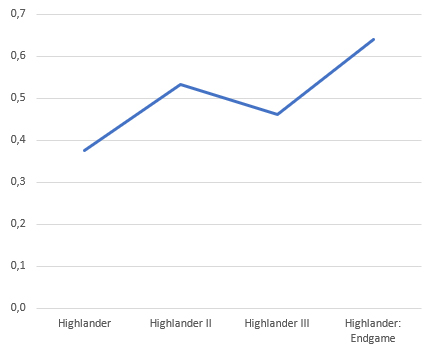
Förhållande, inspelningsbudget och bruttointäkt:
Stålmannen, är en filmserie som varit igång sedan 1940-talet, men för de tidigaste filmerna är det inte riktigt känt vilka pengar som var inblandade, så här är inspelningsbudget och bruttointäkt (miljoner dollar) en bit in i serien, när Christopher Reeve klev in i serien:
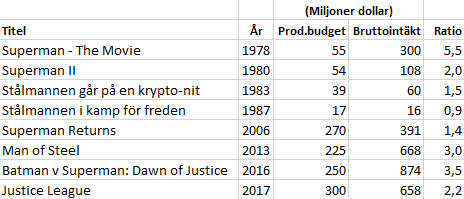
Förhållande, inspelningsbudget och bruttointäkt:
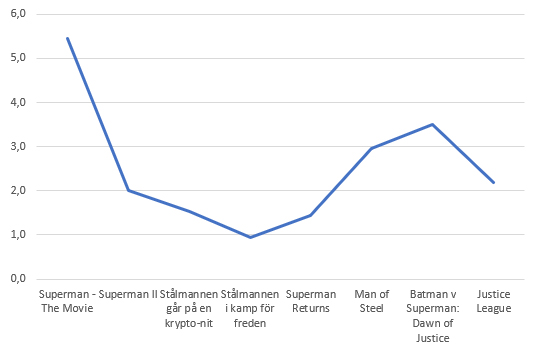
Här ser vi exempel på där pengarna som står på spel varit så extremt framgångsrik i sitt ursprungsförfarande, så att jag var tvungen att introducera en decimal. Och trots att uppföljaren var en total flopp, så har den så pass stöd från sitt varumärke att siffrorna framöver varit svarta. Precis som i fallet med Stjärnornas krig, så har vi inte riktigt facit för filmserien än, för fler filmer är planerade i serien.
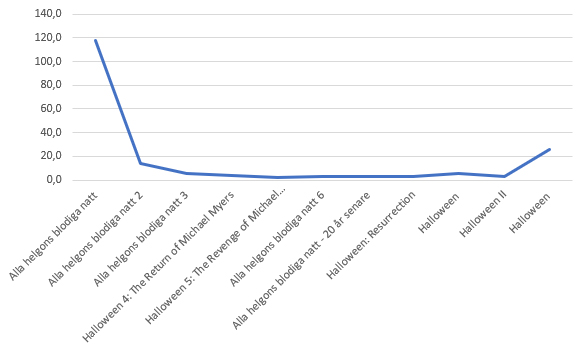
Alla helgons blodiga natt, inspelningsbudget och bruttointäkt (miljoner dollar):
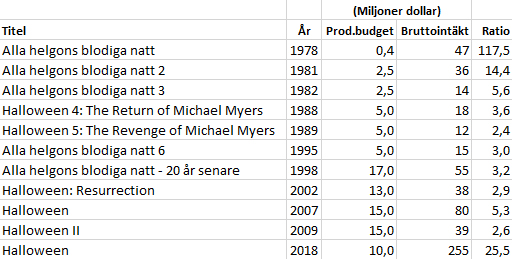
Förhållande, inspelningsbudget och bruttointäkt:
Produktionskostnad/vinst-förhållandet för Star Wars, Elm Street och The Terminator
Vissa filmer får uppföljare och spin offs till synes utan ände. Inte sällan efter en framgångsrik start, verkar bolagen vara redo att skjuta till mer pengar för att krama mer ur det varumärke som utgör en framgångsrik film. Här är pengarna som satsats och spelats in från tre kända filmserier.
Star Wars, inspelningsbudget och bruttointäkt (miljoner dollar):
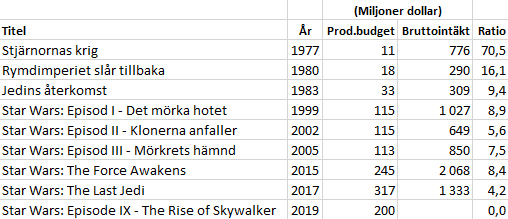
Förhållande, inspelningsbudget och bruttointäkt:
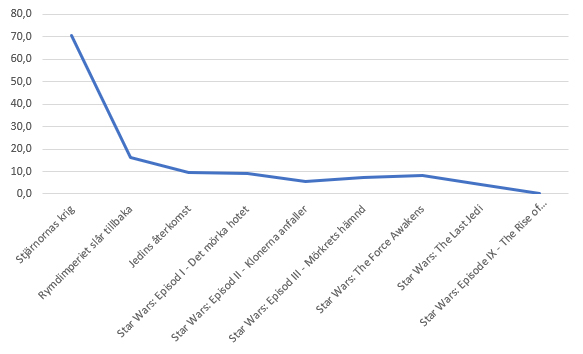
Gissningsvis kommer den näst sista filmen dra in lite mer pengar över åren, och för den sista filmen finns ingen uppgift om intäkter än. Förmodligen kommer den vara mer lönsam i förhållande till vad den kostat än de två tidigare filmerna.
Terror på Elm Street, inspelningsbudget och bruttointäkt (miljoner dollar):
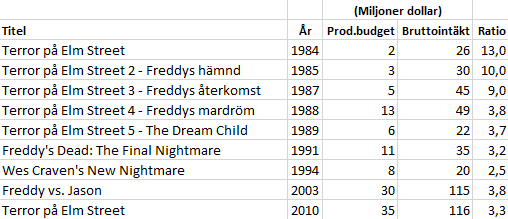
Förhållande, inspelningsbudget och bruttointäkt:
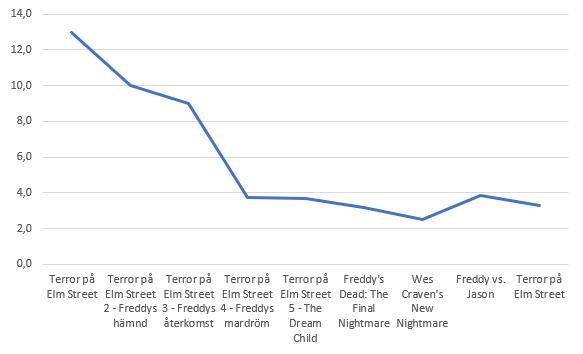
I den sista filmen, som är en nyinspelning av den första, är det inte Robert Englund som spelar Freddy Krueger.
The Terminator, inspelningsbudget och bruttointäkt (miljoner dollar):
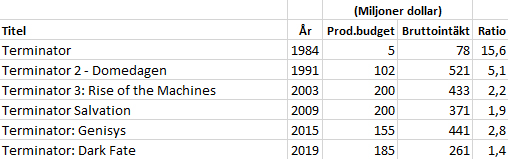
Förhållande, inspelningsbudget och bruttointäkt:
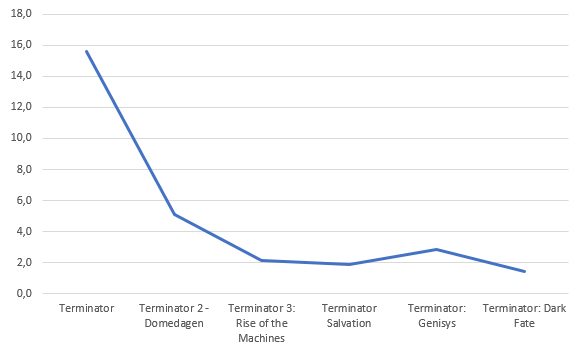
Så troligen är det ett bra förhållande mellan satsade och tjänade pengar som avgör hur många uppföljare en film får.
Metabollar
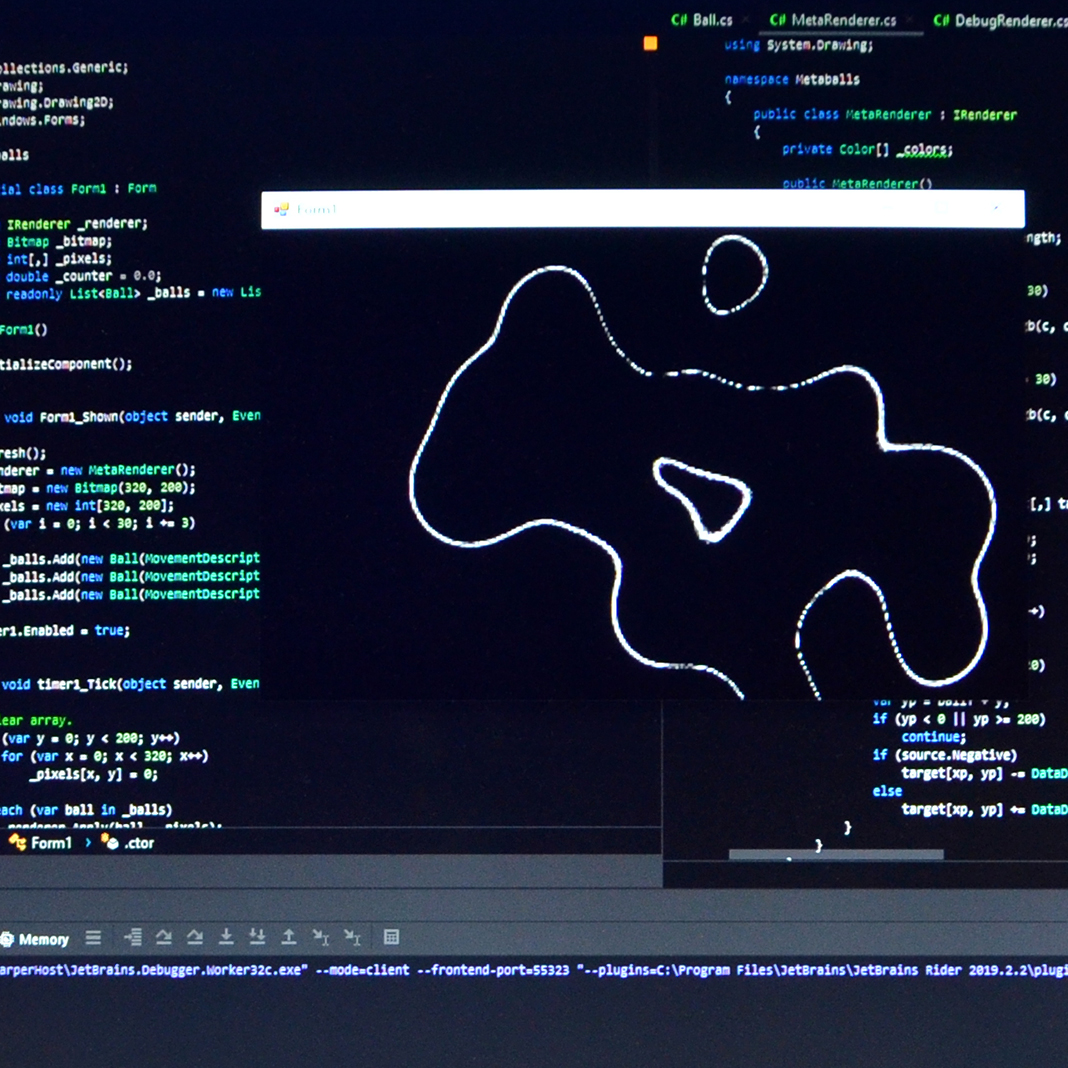
Jag tänkte visa en komplett implementation av 2-dimensionella metabollar i C#. Denna teknik skulle även kunna användas i 3D. Effekten ser ut så här:
Effekten beskrivs här, och denna implementation prioriterar prestanda för att fungera i realtid. I videon ovan används 20 positiva bollar (alltså bollar som tenderar att smeta ihop) och 10 negativa bollar (alltså bollar som tenderar att sluka andra bollar) och samtliga rör sig i sinusbanor på en yta av 320×200 pixlar. Renderingen bygger på Windows Forms och klassen Bitmap.
För att få rörelserna mjuka har jag satt formulärets egenskap DoubleBuffered till true. Dessutom har jag placerat en Timer på formuläret och satt dess Interval till 1 för att få så bra prestanda som möjligt utan att köra dedikerat, men om man ställer ännu högre krav på användarupplevelsen, skulle man välja ett annat bibliotek än Windows Forms. Dessa inställningar har jag ställt in i Visual Studio, så de syns inte i koden.
Här är formulärets kod:
using System;
using System.Collections.Generic;
using System.Drawing;
using System.Drawing.Drawing2D;
using System.Windows.Forms;

namespace Metaballs
{
    public partial class Form1 : Form
    {
        private IRenderer _renderer;
        private Bitmap _bitmap;
        private int[,] _pixels;
        private double _counter = 0.0;
        private readonly List<Ball> _balls = new List<Ball>();

        public Form1()
        {
            InitializeComponent();
        }

        private void Form1_Shown(object sender, EventArgs e)
        {
            Refresh();
            _renderer = new MetaRenderer();
            _bitmap = new Bitmap(320, 200);
            _pixels = new int[320, 200];
            for (var i = 0; i < 30; i += 3)
            {
                _balls.Add(new Ball(MovementDescription.Randomize(), i, false));
                _balls.Add(new Ball(MovementDescription.Randomize(), i + 1, false));
                _balls.Add(new Ball(MovementDescription.Randomize(), i + 2, true));
            }
            timer1.Enabled = true;
        }

        private void timer1_Tick(object sender, EventArgs e)
        {
            //Clear array.
            for (var y = 0; y < 200; y++)
                for (var x = 0; x < 320; x++)
                    _pixels[x, y] = 0;

            foreach (var ball in _balls)
                _renderer.Apply(ball, _pixels);

            //Draw.
            _renderer.Draw(_pixels, _bitmap);
            foreach (var ball in _balls)
                ball.Tick(_counter);

            _counter += 1.0;
            Refresh();
        }

        private void Form1_Paint(object sender, PaintEventArgs e)
        {
            if (_bitmap == null)
                return;
            e.Graphics.InterpolationMode = InterpolationMode.NearestNeighbor;
            e.Graphics.DrawImage(_bitmap, 0, 0, 640, 400);
        }
    }
}
De resurser som används är _renderer som ansvarar för att bestämma hur bollarna påverkar varandra och hur det ska se ut, _bitmap som är ytan jag renderar till, _pixels som är min matris för beräkningar, _counter som används för sinusbanorna och _balls som är mina metabollar. Notera att jag, likt inställningarna jag nämnde tidigare, låtit Visual Studio mappa upp mina events, så dessa syns inte i koden. Men de kan läsas av från namngivningen av procedurerna.
Som synes av den sista kodraden zoomar jag resultatet med 50%. Om man vill se resultatet i naturlig storlek behöver man inte ange InterpolationMode (efter som ingen pixelinterpolering då sker) eller någon ny storlek (640, 400).
Jag har valt att peka ut renderingen med ett interface (IRenderer) eftersom det är mycket troligt att man vill ha olika renderingskod under tiden man designar sitt alster och när man är nöjd. T.ex. är det rimligt att man tydligt vill se sina bollar flytta sig över skärmen när man kalibrerar deras banor, men när det är färdigt vill man självklart se hur de påverkar varandra, eftersom det är det som är syftet (och det som visas i videon ovan). Här är IRenderer:
using System.Drawing;

namespace Metaballs
{
    public interface IRenderer
    {
        void Apply(Ball source, int[,] target);
        void Draw(int[,] source, Bitmap target);
    }
}
En debug-implementation kanske skulle låta Apply färgsätta de individuella bollarna olika och låta Draw visa det. Däremot är en produktionsimplementation av IRenderer hjärtat i programmet. Där skulle Apply addera eller subtrahera en boll på spelplanen, och Draw skulle visa en kontur baserat på det. En boll (Ball) representerar en position och en rörelse för en boll, och för att kunna hitta tröskelvärden när två bollar är nära varandra, består dessa av en cirkel med låga värden nära konturen och höga värden nära centrum. På så vis kan en godtycklig kontur skapas från summan som skapas när bollarna adderats till ytan (eller subtraherats, för de negativa bollarna). I min implementation är varje boll 98×98 pixlar stor, varför deras centrum ligger 49 pixlar i varje riktning från sin position, vilket framgår av Apply:
using System.Drawing;

namespace Metaballs
{
    public class MetaRenderer : IRenderer
    {
        private Color[] _colors;

        public MetaRenderer()
        {
            _colors = new Color[100];
            for (var i = 0; i < _colors.Length; i++)
                _colors[i] = Color.Black;
            var j = 60;
            for (var c = 0; c < 255; c += 30)
            {
                _colors[j] = Color.FromArgb(c, c, c);
                j++;
            }
            for (var c = 255; c >= 0; c -= 30)
            {
                _colors[j] = Color.FromArgb(c, c, c);
                j++;
            }
        }

        public void Apply(Ball source, int[,] target)
        {
            var ballX = (int)source.X - 49;
            var ballY = (int)source.Y - 49;
            for (var y = 0; y < 98; y++)
            {
                for (var x = 0; x < 98; x++)
                {
                    var xp = ballX + x;
                    if (xp < 0 || xp >= 320)
                        continue;
                    var yp = ballY + y;
                    if (yp < 0 || yp >= 200)
                        continue;
                    if (source.Negative)
                        target[xp, yp] -= DataDefinitions.Ball98[x, y];
                    else
                        target[xp, yp] += DataDefinitions.Ball98[x, y];
                }
            }
        }

        public void Draw(int[,] source, Bitmap target)
        {
            for (var y = 0; y < 200; y++)
            {
                for (var x = 0; x < 320; x++)
                {
                    target.SetPixel(x, y,
                        source[x, y] < _colors.Length
                        && source[x, y] >= 0
                            ? _colors[source[x, y]]
                            : Color.Black);
                }
            }
        }
    }
}
(Anti-aliasing-effekten uppnås av den toning som konfigureras i konstruktorn ovan.) Så här ser en boll ut:
using System;

namespace Metaballs
{
    public class Ball
    {
        private const double CenterX = 159.0;
        private const double CenterY = 99.0;
        private readonly MovementDescription _d;
        public double X { get; private set; }
        public double Y { get; private set; }
        public int Index { get; }
        public bool Negative { get; }

        public Ball(MovementDescription movementDescription, int index, bool negative)
        {
            _d = movementDescription;
            Index = index;
            Negative = negative;
            X = 159;
            Y = 99;
        }

        public void Tick(double counter)
        {
            X = CenterX + Math.Sin(counter / _d.SinFactor1) * _d.SinRadius1
                        + Math.Sin(counter / _d.SinFactor2) * _d.SinRadius2;
            Y = CenterY + Math.Cos(counter / _d.CosFactor1) * _d.CosRadius1
                        + Math.Cos(counter / _d.CosFactor2) * _d.CosRadius2;
        }
    }
}
MovementDescription är en struktur som samlar data om hur sinusbanan ska se ut. Som man kunde ana från huvudprogrammet erbjuder strukturen en möjlighet att låta slumpen avgöra hastighet och radie.
using System;

namespace Metaballs
{
    public struct MovementDescription
    {
        private static Random Rnd;
        public double SinFactor1 { get; }
        public double SinFactor2 { get; }
        public double CosFactor1 { get; }
        public double CosFactor2 { get; }
        public double SinRadius1 { get; }
        public double SinRadius2 { get; }
        public double CosRadius1 { get; }
        public double CosRadius2 { get; }

        static MovementDescription()
        {
            Rnd = new Random();
        }

        public MovementDescription(
            double sinFactor1,
            double sinFactor2,
            double cosFactor1,
            double cosFactor2,
            double sinRadius1,
            double sinRadius2,
            double cosRadius1,
            double cosRadius2)
        {
            SinFactor1 = sinFactor1;
            SinFactor2 = sinFactor2;
            CosFactor1 = cosFactor1;
            CosFactor2 = cosFactor2;
            SinRadius1 = sinRadius1;
            SinRadius2 = sinRadius2;
            CosRadius1 = cosRadius1;
            CosRadius2 = cosRadius2;
        }

        public static MovementDescription Randomize() =>
            new MovementDescription(
                Rnd.Next(10, 100),
                Rnd.Next(10, 100),
                Rnd.Next(10, 100),
                Rnd.Next(10, 100),
                Rnd.Next(10, 100),
                Rnd.Next(10, 100),
                Rnd.Next(10, 100),
                Rnd.Next(10, 100)
            );
    }
}
Därmed är det enda som återstår själva bollen som ovan refereras till som Ball98, uppkallad efter sina sidors storlek. För att göra det enkelt, ritade jag boll genom att välja penselverktyget i Photoshop och skrev ett enkelt program som konverterade det hela till en int array i C#, enligt följande:
namespace Metaballs
{
    public class DataDefinitions
    {
        public static int[,] Ball98 = new int[98, 98]
{
{0, 0, 0, 0, 0, 0, 0, 0, 0, 0, 0, 0, 0, 0, 0, 0, 0, 0, 0, 0, 0, 0, 0, 0, 0, 0, 0, 0, 0, 0, 0, 0, 0, 0, 0, 0, 0, 0, 0, 0, 1, 0, 0, 0, 0, 0, 0, 1, 1, 1, 1, 0, 0, 0, 1, 1, 1, 0, 1, 1, 0, 0, 0, 0, 0, 0, 0, 0, 0, 0, 0, 0, 0, 0, 0, 0, 0, 0, 0, 0, 0, 0, 0, 0, 0, 0, 0, 0, 0, 0, 0, 0, 0, 0, 0, 0, 0, 0},
{0, 0, 0, 0, 0, 0, 0, 0, 0, 0, 0, 0, 0, 0, 0, 0, 0, 0, 0, 0, 0, 0, 0, 0, 0, 0, 0, 0, 0, 0, 0, 0, 0, 0, 0, 0, 1, 0, 0, 0, 1, 1, 1, 1, 1, 1, 1, 1, 1, 1, 1, 1, 1, 1, 1, 1, 1, 1, 1, 1, 0, 0, 0, 0, 0, 0, 0, 0, 0, 0, 0, 0, 0, 0, 0, 0, 0, 0, 0, 0, 0, 0, 0, 0, 0, 0, 0, 0, 0, 0, 0, 0, 0, 0, 0, 0, 0, 0},
{0, 0, 0, 0, 0, 0, 0, 0, 0, 0, 0, 0, 0, 0, 0, 0, 0, 0, 0, 0, 0, 0, 0, 0, 0, 0, 0, 0, 0, 0, 0, 0, 0, 0, 0, 0, 1, 1, 1, 1, 1, 1, 1, 1, 1, 1, 1, 1, 1, 1, 1, 1, 1, 1, 1, 1, 1, 1, 1, 1, 1, 0, 0, 0, 0, 0, 0, 0, 0, 0, 0, 0, 0, 0, 0, 0, 0, 0, 0, 0, 0, 0, 0, 0, 0, 0, 0, 0, 0, 0, 0, 0, 0, 0, 0, 0, 0, 0},
{0, 0, 0, 0, 0, 0, 0, 0, 0, 0, 0, 0, 0, 0, 0, 0, 0, 0, 0, 0, 0, 0, 0, 0, 0, 0, 0, 0, 0, 0, 0, 0, 1, 1, 1, 1, 1, 1, 1, 1, 2, 1, 2, 2, 2, 2, 1, 2, 1, 1, 1, 1, 1, 1, 1, 1, 1, 1, 1, 1, 1, 1, 1, 1, 1, 1, 1, 0, 0, 0, 0, 0, 0, 0, 0, 0, 0, 0, 0, 0, 0, 0, 0, 0, 0, 0, 0, 0, 0, 0, 0, 0, 0, 0, 0, 0, 0, 0},
{0, 0, 0, 0, 0, 0, 0, 0, 0, 0, 0, 0, 0, 0, 0, 0, 0, 0, 0, 0, 0, 0, 0, 0, 0, 0, 0, 0, 0, 1, 1, 1, 1, 1, 2, 1, 1, 1, 2, 2, 2, 1, 2, 2, 2, 2, 2, 2, 2, 2, 2, 2, 2, 2, 2, 2, 2, 2, 2, 1, 2, 2, 2, 1, 1, 1, 1, 1, 1, 1, 0, 0, 0, 0, 0, 0, 0, 0, 0, 0, 0, 0, 0, 0, 0, 0, 0, 0, 0, 0, 0, 0, 0, 0, 0, 0, 0, 0},
{0, 0, 0, 0, 0, 0, 0, 0, 0, 0, 0, 0, 0, 0, 0, 0, 0, 0, 0, 0, 0, 0, 0, 0, 0, 0, 0, 0, 0, 1, 1, 1, 1, 1, 1, 2, 2, 2, 2, 2, 2, 2, 2, 2, 2, 2, 3, 3, 2, 2, 2, 2, 2, 2, 2, 2, 2, 2, 2, 2, 2, 2, 2, 1, 1, 1, 1, 1, 1, 1, 1, 1, 0, 0, 0, 0, 0, 0, 0, 0, 0, 0, 0, 0, 0, 0, 0, 0, 0, 0, 0, 0, 0, 0, 0, 0, 0, 0},
{0, 0, 0, 0, 0, 0, 0, 0, 0, 0, 0, 0, 0, 0, 0, 0, 0, 0, 0, 0, 0, 0, 0, 0, 1, 0, 1, 1, 1, 1, 1, 2, 1, 1, 1, 2, 2, 2, 3, 3, 2, 3, 2, 3, 3, 3, 3, 4, 3, 3, 3, 3, 3, 3, 3, 3, 2, 2, 2, 2, 2, 2, 2, 2, 2, 2, 2, 1, 1, 1, 1, 1, 1, 1, 1, 1, 0, 0, 0, 0, 0, 0, 0, 0, 0, 0, 0, 0, 0, 0, 0, 0, 0, 0, 0, 0, 0, 0},
{0, 0, 0, 0, 0, 0, 0, 0, 0, 0, 0, 0, 0, 0, 0, 0, 0, 0, 0, 0, 0, 1, 0, 0, 1, 1, 1, 1, 1, 1, 1, 2, 2, 2, 2, 2, 2, 3, 3, 3, 3, 3, 4, 4, 4, 4, 4, 4, 4, 4, 4, 4, 4, 4, 4, 3, 3, 3, 3, 3, 2, 2, 3, 2, 2, 2, 2, 2, 1, 1, 1, 1, 1, 1, 0, 1, 0, 0, 0, 0, 0, 0, 0, 0, 0, 0, 0, 0, 0, 0, 0, 0, 0, 0, 0, 0, 0, 0},
{0, 0, 0, 0, 0, 0, 0, 0, 0, 0, 0, 0, 0, 0, 0, 0, 0, 0, 0, 0, 0, 0, 1, 1, 1, 1, 1, 1, 1, 2, 2, 2, 3, 3, 3, 3, 3, 3, 3, 3, 4, 4, 4, 4, 4, 4, 4, 4, 5, 5, 4, 4, 4, 4, 5, 4, 4, 4, 3, 3, 3, 3, 3, 2, 2, 2, 2, 2, 2, 2, 1, 1, 2, 1, 0, 1, 0, 0, 0, 0, 0, 0, 0, 0, 0, 0, 0, 0, 0, 0, 0, 0, 0, 0, 0, 0, 0, 0},
{0, 0, 0, 0, 0, 0, 0, 0, 0, 0, 0, 0, 0, 0, 0, 0, 0, 0, 0, 0, 1, 1, 1, 1, 1, 1, 2, 2, 2, 2, 2, 3, 3, 4, 3, 4, 3, 4, 5, 5, 5, 6, 5, 5, 6, 6, 6, 6, 5, 5, 6, 6, 6, 6, 5, 5, 4, 5, 5, 5, 4, 4, 4, 3, 3, 3, 2, 2, 2, 3, 2, 2, 1, 1, 2, 1, 1, 0, 0, 0, 0, 0, 0, 0, 0, 0, 0, 0, 0, 0, 0, 0, 0, 0, 0, 0, 0, 0},
{0, 0, 0, 0, 0, 0, 0, 0, 0, 0, 0, 0, 0, 0, 0, 0, 0, 0, 0, 1, 1, 1, 1, 1, 1, 1, 2, 2, 2, 3, 3, 3, 4, 4, 4, 5, 5, 5, 6, 5, 6, 6, 6, 6, 7, 7, 7, 7, 7, 7, 7, 7, 7, 7, 6, 6, 6, 6, 6, 5, 5, 4, 4, 4, 4, 4, 4, 3, 3, 3, 3, 2, 2, 2, 2, 2, 1, 1, 0, 0, 0, 0, 0, 0, 0, 0, 0, 0, 0, 0, 0, 0, 0, 0, 0, 0, 0, 0},
{0, 0, 0, 0, 0, 0, 0, 0, 0, 0, 0, 0, 0, 0, 0, 0, 0, 1, 1, 1, 1, 1, 1, 1, 2, 2, 2, 2, 2, 3, 3, 3, 5, 5, 5, 5, 6, 6, 6, 6, 7, 7, 7, 7, 8, 7, 8, 8, 8, 8, 8, 8, 8, 8, 7, 7, 7, 7, 6, 6, 6, 5, 5, 5, 4, 4, 4, 3, 3, 3, 3, 2, 2, 2, 2, 1, 1, 1, 1, 1, 0, 0, 0, 0, 0, 0, 0, 0, 0, 0, 0, 0, 0, 0, 0, 0, 0, 0},
{0, 0, 0, 0, 0, 0, 0, 0, 0, 0, 0, 0, 0, 0, 0, 0, 1, 1, 1, 1, 1, 1, 2, 2, 2, 3, 3, 3, 4, 4, 4, 4, 5, 5, 6, 7, 6, 7, 8, 9, 9, 9, 9, 9, 10, 10, 9, 9, 10, 10, 10, 9, 9, 10, 9, 9, 8, 9, 8, 8, 8, 7, 7, 6, 6, 5, 4, 5, 4, 4, 3, 2, 3, 3, 3, 1, 1, 1, 1, 1, 1, 0, 0, 0, 0, 0, 0, 0, 0, 0, 0, 0, 0, 0, 0, 0, 0, 0},
{0, 0, 0, 0, 0, 0, 0, 0, 0, 0, 0, 0, 0, 0, 0, 0, 1, 1, 1, 2, 2, 2, 3, 3, 3, 3, 4, 4, 4, 5, 5, 6, 6, 7, 7, 8, 8, 8, 9, 10, 10, 11, 11, 12, 12, 12, 12, 12, 12, 12, 13, 12, 12, 12, 11, 11, 11, 10, 10, 10, 9, 9, 8, 7, 7, 6, 6, 5, 5, 4, 4, 4, 3, 3, 3, 3, 2, 2, 1, 1, 1, 1, 1, 0, 0, 0, 0, 0, 0, 0, 0, 0, 0, 0, 0, 0, 0, 0},
{0, 0, 0, 0, 0, 0, 0, 0, 0, 0, 0, 0, 0, 0, 0, 1, 1, 1, 1, 2, 2, 2, 3, 3, 3, 3, 4, 5, 5, 6, 6, 6, 8, 8, 9, 9, 10, 10, 11, 12, 12, 13, 13, 14, 14, 14, 15, 15, 14, 14, 15, 15, 14, 14, 13, 13, 13, 12, 11, 12, 11, 10, 9, 8, 8, 7, 6, 6, 5, 5, 4, 5, 3, 3, 3, 3, 2, 2, 2, 1, 1, 1, 1, 0, 0, 0, 0, 0, 0, 0, 0, 0, 0, 0, 0, 0, 0, 0},
{0, 0, 0, 0, 0, 0, 0, 0, 0, 0, 0, 0, 0, 1, 1, 1, 1, 2, 2, 2, 3, 3, 3, 4, 4, 4, 5, 5, 6, 7, 8, 8, 10, 10, 11, 11, 12, 12, 13, 14, 14, 15, 15, 16, 16, 16, 17, 17, 17, 17, 17, 17, 16, 16, 16, 15, 15, 14, 14, 14, 13, 11, 11, 10, 10, 9, 8, 8, 7, 7, 6, 5, 5, 4, 4, 3, 3, 3, 3, 2, 1, 1, 1, 1, 1, 0, 0, 0, 0, 0, 0, 0, 0, 0, 0, 0, 0, 0},
{0, 0, 0, 0, 0, 0, 0, 0, 0, 0, 0, 0, 0, 1, 1, 1, 1, 2, 2, 3, 3, 3, 4, 5, 5, 5, 6, 7, 7, 8, 9, 9, 11, 11, 12, 13, 14, 15, 16, 16, 17, 18, 19, 19, 20, 20, 20, 20, 21, 20, 20, 20, 20, 19, 19, 18, 18, 17, 16, 16, 15, 14, 13, 12, 12, 11, 9, 9, 8, 7, 6, 6, 5, 4, 4, 3, 3, 3, 3, 2, 1, 1, 1, 1, 1, 0, 0, 0, 0, 0, 0, 0, 0, 0, 0, 0, 0, 0},
{0, 0, 0, 0, 0, 0, 0, 0, 0, 0, 1, 1, 1, 1, 1, 2, 1, 2, 2, 2, 3, 4, 4, 5, 5, 6, 7, 8, 8, 9, 10, 11, 13, 13, 14, 15, 16, 16, 17, 19, 21, 21, 22, 22, 22, 22, 23, 23, 24, 24, 24, 23, 23, 22, 21, 21, 21, 19, 19, 19, 18, 17, 14, 15, 14, 12, 11, 10, 9, 8, 7, 7, 5, 5, 5, 4, 4, 3, 2, 2, 2, 2, 1, 1, 1, 0, 0, 0, 0, 0, 0, 0, 0, 0, 0, 0, 0, 0},
{0, 0, 0, 0, 0, 0, 0, 0, 0, 0, 1, 1, 1, 1, 2, 2, 3, 3, 3, 4, 4, 4, 5, 6, 7, 7, 7, 9, 11, 11, 12, 13, 15, 15, 16, 18, 19, 20, 21, 22, 23, 24, 25, 25, 26, 26, 27, 27, 28, 27, 27, 27, 27, 26, 25, 25, 24, 23, 22, 21, 20, 19, 18, 17, 16, 14, 13, 12, 11, 11, 9, 7, 8, 6, 6, 6, 5, 4, 4, 2, 2, 2, 2, 1, 1, 1, 1, 1, 0, 0, 0, 0, 0, 0, 0, 0, 0, 0},
{0, 0, 0, 0, 0, 0, 0, 0, 0, 0, 1, 1, 1, 1, 2, 2, 3, 3, 3, 4, 4, 5, 5, 7, 7, 9, 9, 10, 11, 13, 14, 15, 17, 18, 19, 21, 23, 23, 25, 25, 26, 28, 28, 29, 31, 31, 31, 32, 32, 31, 31, 31, 31, 31, 30, 29, 28, 26, 25, 25, 23, 22, 21, 19, 18, 17, 15, 14, 13, 11, 11, 10, 8, 8, 7, 6, 6, 5, 4, 3, 3, 3, 2, 2, 1, 1, 1, 1, 0, 0, 0, 0, 0, 0, 0, 0, 0, 0},
{0, 0, 0, 0, 0, 0, 0, 0, 0, 0, 1, 1, 1, 2, 2, 2, 3, 3, 4, 5, 5, 5, 6, 7, 8, 9, 11, 12, 13, 15, 16, 18, 20, 20, 21, 23, 26, 26, 28, 29, 30, 32, 33, 33, 35, 35, 36, 36, 36, 36, 36, 36, 35, 35, 34, 33, 32, 30, 29, 28, 27, 25, 23, 21, 21, 20, 18, 16, 15, 13, 12, 11, 9, 8, 8, 6, 6, 5, 4, 4, 3, 3, 2, 2, 2, 1, 1, 1, 0, 0, 0, 0, 0, 0, 0, 0, 0, 0},
{0, 0, 0, 0, 0, 0, 0, 0, 0, 1, 1, 1, 1, 2, 2, 3, 4, 4, 4, 5, 6, 7, 8, 9, 10, 11, 13, 14, 15, 17, 18, 20, 22, 24, 25, 27, 29, 30, 32, 34, 35, 37, 37, 39, 40, 41, 42, 42, 42, 42, 42, 42, 41, 40, 38, 37, 36, 35, 33, 32, 30, 29, 27, 25, 23, 22, 20, 18, 17, 15, 14, 13, 11, 10, 9, 8, 7, 6, 5, 4, 4, 4, 3, 3, 2, 1, 2, 2, 1, 1, 0, 0, 0, 0, 0, 0, 0, 0},
{0, 0, 0, 0, 0, 0, 0, 1, 1, 1, 1, 1, 1, 2, 3, 3, 4, 5, 5, 5, 7, 8, 10, 10, 11, 12, 14, 16, 17, 19, 22, 24, 26, 27, 29, 31, 33, 35, 37, 39, 40, 42, 43, 44, 45, 46, 47, 48, 48, 48, 48, 47, 46, 46, 44, 44, 42, 40, 39, 37, 35, 33, 31, 29, 27, 25, 23, 21, 20, 18, 16, 15, 13, 11, 10, 9, 8, 7, 5, 5, 5, 4, 3, 3, 2, 2, 2, 2, 1, 1, 1, 0, 0, 0, 0, 0, 0, 0},
{0, 0, 0, 0, 0, 0, 0, 1, 1, 1, 1, 2, 2, 2, 3, 3, 4, 5, 5, 7, 7, 8, 9, 11, 13, 14, 16, 18, 20, 22, 25, 27, 29, 30, 33, 35, 37, 40, 42, 43, 45, 47, 49, 50, 52, 53, 53, 54, 54, 54, 54, 53, 52, 52, 50, 49, 47, 45, 44, 41, 39, 38, 35, 33, 30, 29, 27, 25, 22, 20, 18, 16, 14, 13, 11, 9, 8, 7, 7, 5, 5, 5, 4, 3, 2, 2, 2, 2, 1, 1, 1, 0, 0, 0, 0, 0, 0, 0},
{0, 0, 0, 0, 0, 0, 1, 1, 1, 2, 2, 2, 2, 3, 4, 4, 4, 6, 7, 7, 9, 10, 11, 13, 15, 16, 18, 20, 23, 25, 27, 30, 32, 35, 38, 40, 43, 45, 47, 49, 51, 53, 55, 56, 58, 59, 60, 60, 60, 60, 60, 59, 59, 58, 56, 55, 53, 51, 50, 47, 45, 42, 40, 38, 35, 32, 30, 27, 24, 22, 20, 18, 16, 15, 13, 11, 10, 9, 7, 7, 6, 4, 4, 3, 3, 2, 2, 1, 1, 1, 1, 1, 1, 0, 0, 0, 0, 0},
{0, 0, 0, 0, 0, 0, 0, 1, 1, 2, 2, 3, 3, 3, 4, 5, 5, 6, 7, 9, 10, 11, 12, 15, 17, 19, 21, 23, 26, 29, 31, 34, 36, 39, 42, 45, 48, 50, 52, 56, 58, 60, 62, 63, 65, 66, 67, 68, 68, 68, 68, 67, 66, 66, 64, 62, 60, 58, 55, 53, 51, 48, 44, 42, 39, 36, 34, 30, 28, 26, 23, 21, 19, 16, 14, 12, 11, 10, 9, 7, 6, 5, 5, 4, 4, 2, 2, 2, 1, 1, 1, 1, 0, 0, 0, 0, 0, 0},
{0, 0, 0, 0, 0, 0, 0, 1, 1, 1, 2, 3, 3, 4, 4, 5, 6, 7, 8, 10, 11, 12, 15, 16, 18, 21, 24, 26, 29, 32, 34, 37, 40, 43, 47, 49, 53, 56, 59, 62, 65, 67, 69, 71, 73, 74, 75, 76, 76, 76, 76, 75, 74, 73, 71, 69, 67, 65, 62, 59, 55, 53, 50, 47, 43, 40, 37, 34, 32, 29, 26, 24, 21, 18, 17, 14, 12, 11, 9, 7, 7, 6, 5, 4, 4, 3, 2, 2, 1, 1, 1, 1, 0, 0, 0, 0, 0, 0},
{0, 0, 0, 0, 1, 1, 1, 1, 2, 2, 3, 3, 3, 4, 5, 6, 7, 8, 9, 11, 13, 14, 17, 18, 20, 23, 26, 29, 32, 34, 38, 42, 45, 48, 52, 55, 59, 62, 65, 68, 72, 74, 77, 79, 81, 82, 83, 84, 84, 85, 84, 83, 82, 81, 79, 76, 74, 72, 69, 65, 61, 59, 56, 52, 49, 45, 41, 38, 35, 32, 28, 26, 23, 20, 19, 16, 14, 13, 10, 9, 8, 6, 6, 5, 5, 3, 3, 3, 2, 2, 1, 1, 1, 0, 0, 0, 0, 0},
{0, 0, 0, 0, 1, 1, 1, 2, 2, 2, 3, 3, 4, 4, 5, 6, 8, 9, 10, 12, 14, 16, 18, 21, 23, 26, 29, 32, 35, 39, 42, 46, 49, 53, 57, 61, 65, 68, 72, 76, 79, 82, 85, 87, 89, 91, 92, 93, 93, 93, 93, 91, 91, 89, 86, 84, 82, 79, 76, 72, 69, 65, 61, 57, 54, 49, 45, 41, 38, 35, 32, 29, 26, 23, 21, 18, 15, 14, 11, 10, 9, 8, 6, 5, 5, 4, 3, 3, 2, 2, 1, 1, 1, 0, 0, 0, 0, 0},
{0, 0, 0, 0, 1, 1, 2, 2, 2, 2, 3, 3, 4, 5, 6, 7, 9, 9, 11, 12, 15, 17, 20, 23, 25, 28, 32, 35, 39, 42, 46, 50, 54, 59, 63, 67, 71, 75, 80, 84, 87, 90, 93, 96, 98, 99, 100, 102, 102, 103, 102, 100, 99, 98, 96, 93, 90, 87, 83, 79, 75, 71, 67, 63, 59, 54, 51, 46, 42, 38, 35, 32, 28, 25, 23, 20, 17, 15, 12, 11, 10, 8, 7, 6, 5, 4, 4, 3, 3, 2, 2, 1, 1, 1, 0, 0, 0, 0},
{0, 0, 0, 0, 1, 1, 1, 2, 2, 2, 4, 4, 5, 6, 7, 8, 10, 11, 13, 14, 17, 19, 22, 25, 27, 30, 35, 39, 42, 46, 50, 56, 60, 65, 69, 73, 78, 83, 87, 92, 96, 99, 102, 106, 108, 110, 111, 113, 113, 113, 113, 111, 109, 107, 105, 102, 99, 95, 91, 87, 82, 78, 74, 70, 64, 60, 56, 50, 46, 42, 38, 34, 30, 27, 25, 22, 19, 17, 14, 13, 11, 10, 8, 7, 6, 5, 4, 4, 2, 2, 2, 1, 1, 1, 1, 0, 0, 0},
{0, 0, 0, 1, 1, 1, 1, 2, 2, 3, 4, 4, 5, 6, 7, 9, 11, 11, 13, 16, 18, 21, 24, 27, 30, 34, 37, 42, 46, 50, 55, 61, 65, 70, 75, 80, 85, 90, 95, 100, 104, 107, 111, 115, 117, 120, 121, 122, 122, 122, 122, 121, 119, 117, 114, 111, 107, 104, 99, 94, 90, 85, 80, 75, 70, 65, 61, 55, 50, 46, 42, 37, 33, 30, 27, 24, 21, 18, 16, 13, 12, 10, 8, 7, 6, 5, 4, 4, 3, 2, 2, 1, 1, 1, 1, 0, 0, 0},
{0, 0, 1, 1, 1, 1, 1, 2, 2, 3, 4, 5, 6, 7, 8, 9, 11, 13, 15, 17, 20, 23, 26, 29, 33, 37, 40, 45, 50, 54, 60, 65, 70, 76, 83, 88, 92, 98, 103, 108, 112, 117, 121, 125, 127, 130, 131, 132, 133, 133, 132, 131, 130, 127, 125, 121, 117, 112, 108, 103, 97, 92, 87, 81, 77, 72, 66, 59, 54, 50, 45, 42, 37, 33, 30, 26, 23, 20, 17, 14, 12, 11, 9, 8, 7, 5, 5, 4, 3, 2, 2, 2, 1, 1, 1, 0, 0, 0},
{0, 1, 1, 1, 1, 2, 2, 2, 3, 4, 5, 5, 6, 7, 9, 10, 12, 14, 16, 19, 22, 25, 28, 31, 34, 40, 45, 49, 54, 60, 65, 70, 76, 82, 88, 94, 100, 106, 112, 116, 121, 126, 130, 134, 137, 140, 141, 143, 144, 144, 143, 141, 140, 137, 134, 130, 125, 121, 117, 112, 106, 100, 95, 89, 82, 76, 71, 64, 59, 54, 49, 44, 40, 36, 32, 28, 25, 22, 19, 16, 14, 13, 11, 9, 8, 6, 5, 4, 4, 3, 2, 2, 1, 1, 1, 1, 0, 0},
{0, 0, 1, 1, 1, 2, 2, 2, 3, 4, 5, 5, 6, 8, 10, 11, 12, 15, 17, 20, 23, 27, 30, 33, 38, 42, 47, 52, 58, 64, 70, 76, 83, 88, 94, 101, 108, 114, 120, 125, 131, 135, 139, 144, 148, 150, 152, 154, 154, 154, 154, 152, 150, 147, 143, 139, 135, 131, 125, 120, 114, 108, 101, 94, 88, 81, 75, 70, 64, 58, 52, 47, 43, 38, 34, 30, 27, 23, 20, 17, 15, 13, 11, 9, 7, 7, 5, 4, 4, 3, 2, 2, 2, 2, 1, 1, 0, 0},
{0, 0, 1, 1, 1, 2, 2, 3, 3, 4, 4, 5, 7, 9, 10, 11, 13, 16, 18, 22, 25, 28, 33, 37, 41, 46, 51, 56, 62, 68, 74, 81, 89, 94, 101, 108, 115, 121, 127, 134, 139, 144, 150, 154, 158, 160, 162, 164, 164, 164, 164, 162, 160, 157, 154, 150, 144, 139, 134, 129, 121, 115, 108, 101, 95, 89, 81, 74, 68, 62, 56, 51, 46, 41, 37, 33, 29, 25, 21, 18, 16, 13, 11, 10, 8, 7, 5, 4, 4, 4, 3, 2, 2, 1, 1, 1, 0, 0},
{0, 0, 1, 1, 1, 2, 2, 3, 4, 4, 6, 6, 7, 9, 11, 13, 15, 18, 20, 24, 27, 30, 35, 38, 43, 49, 54, 60, 66, 72, 79, 86, 94, 101, 108, 115, 122, 129, 136, 143, 148, 153, 159, 163, 167, 171, 173, 175, 175, 175, 175, 173, 171, 167, 164, 160, 154, 148, 143, 136, 130, 122, 115, 108, 101, 94, 86, 79, 73, 66, 60, 55, 49, 44, 39, 34, 31, 27, 23, 20, 18, 15, 12, 11, 10, 8, 6, 5, 4, 3, 3, 2, 2, 2, 1, 1, 1, 0},
{0, 0, 1, 1, 2, 2, 2, 3, 4, 4, 6, 7, 8, 10, 12, 14, 16, 18, 21, 24, 27, 32, 37, 40, 46, 52, 58, 63, 70, 77, 84, 93, 99, 106, 114, 121, 129, 137, 144, 151, 158, 164, 169, 173, 177, 181, 183, 185, 186, 186, 186, 184, 181, 178, 174, 170, 164, 158, 151, 144, 137, 130, 121, 114, 106, 99, 92, 84, 77, 70, 63, 57, 52, 47, 41, 37, 32, 27, 24, 21, 18, 16, 13, 11, 10, 8, 6, 6, 4, 3, 3, 2, 2, 2, 1, 1, 1, 0},
{0, 0, 1, 1, 2, 2, 2, 4, 4, 4, 6, 7, 8, 10, 13, 14, 16, 19, 22, 26, 29, 33, 38, 43, 48, 54, 61, 67, 73, 80, 88, 96, 104, 112, 120, 128, 136, 144, 152, 159, 165, 173, 178, 183, 187, 191, 193, 195, 196, 196, 195, 193, 190, 187, 183, 178, 173, 167, 160, 152, 144, 136, 128, 120, 112, 104, 96, 88, 80, 74, 68, 61, 55, 49, 43, 38, 34, 30, 26, 22, 19, 17, 15, 12, 10, 8, 7, 6, 5, 4, 3, 2, 2, 2, 1, 1, 1, 1},
{0, 1, 1, 1, 2, 2, 2, 4, 4, 5, 7, 7, 9, 11, 13, 15, 17, 21, 24, 28, 31, 35, 40, 46, 51, 57, 64, 71, 77, 84, 92, 101, 110, 118, 127, 135, 143, 152, 160, 167, 174, 181, 187, 192, 196, 200, 203, 205, 206, 206, 205, 203, 200, 197, 192, 187, 181, 174, 167, 159, 152, 143, 135, 126, 118, 109, 101, 94, 85, 77, 71, 64, 57, 51, 47, 40, 35, 32, 28, 24, 20, 18, 16, 13, 11, 9, 8, 7, 5, 4, 3, 3, 2, 2, 1, 1, 1, 0},
{0, 1, 1, 1, 2, 2, 2, 4, 4, 5, 7, 7, 9, 11, 13, 16, 18, 21, 25, 29, 33, 37, 42, 47, 53, 59, 67, 74, 80, 89, 96, 105, 114, 122, 132, 140, 149, 159, 166, 174, 181, 189, 195, 200, 205, 208, 211, 214, 215, 214, 214, 212, 209, 205, 200, 195, 189, 181, 174, 166, 159, 149, 140, 131, 123, 114, 105, 98, 89, 80, 73, 66, 59, 53, 47, 42, 37, 32, 29, 24, 21, 18, 15, 13, 11, 9, 8, 7, 5, 4, 4, 3, 2, 2, 1, 1, 1, 0},
{0, 1, 1, 1, 2, 2, 3, 4, 4, 5, 7, 8, 10, 12, 14, 16, 18, 22, 26, 28, 33, 38, 44, 49, 55, 62, 69, 76, 84, 93, 100, 109, 118, 127, 136, 146, 155, 164, 173, 181, 188, 195, 202, 208, 213, 217, 220, 222, 223, 223, 222, 220, 217, 213, 208, 202, 195, 188, 181, 173, 164, 155, 146, 136, 127, 118, 109, 100, 93, 84, 76, 69, 61, 56, 49, 43, 38, 33, 29, 25, 22, 18, 16, 14, 12, 10, 8, 7, 5, 5, 4, 3, 2, 2, 1, 1, 1, 1},
{1, 1, 1, 2, 2, 2, 3, 4, 5, 5, 7, 8, 10, 12, 15, 16, 20, 23, 27, 31, 35, 40, 45, 51, 57, 64, 72, 80, 88, 95, 103, 113, 122, 132, 141, 152, 161, 169, 179, 187, 195, 202, 209, 215, 220, 224, 227, 229, 230, 230, 229, 226, 224, 220, 215, 209, 202, 195, 187, 178, 170, 161, 151, 141, 131, 122, 113, 104, 96, 87, 79, 72, 64, 57, 51, 46, 40, 35, 31, 27, 23, 20, 16, 14, 12, 10, 9, 8, 6, 5, 4, 3, 2, 2, 2, 1, 1, 0},
{1, 1, 1, 2, 2, 2, 3, 4, 5, 6, 8, 9, 10, 12, 15, 17, 21, 24, 28, 32, 36, 41, 46, 52, 59, 65, 73, 81, 89, 99, 107, 116, 127, 137, 147, 156, 165, 175, 183, 193, 201, 208, 214, 221, 227, 231, 234, 236, 237, 237, 236, 234, 231, 227, 221, 215, 208, 201, 193, 183, 175, 165, 155, 146, 136, 127, 117, 108, 99, 89, 81, 74, 66, 58, 52, 47, 41, 36, 31, 27, 24, 20, 18, 15, 12, 10, 9, 8, 6, 5, 4, 3, 2, 2, 1, 1, 1, 0},
{0, 1, 1, 1, 2, 3, 3, 4, 5, 6, 8, 9, 10, 12, 15, 18, 21, 24, 28, 32, 36, 42, 47, 54, 60, 67, 76, 84, 92, 101, 110, 120, 130, 140, 150, 159, 169, 178, 188, 198, 206, 213, 220, 226, 232, 236, 240, 242, 243, 243, 242, 240, 236, 232, 226, 220, 213, 206, 198, 188, 178, 168, 160, 149, 139, 130, 120, 111, 101, 91, 83, 76, 67, 60, 54, 47, 43, 38, 33, 29, 24, 21, 17, 15, 13, 11, 9, 8, 6, 5, 4, 3, 2, 2, 1, 1, 1, 1},
{0, 1, 1, 1, 2, 3, 3, 4, 5, 6, 8, 9, 11, 13, 15, 18, 21, 25, 29, 33, 37, 43, 48, 55, 62, 69, 77, 85, 93, 102, 112, 122, 131, 142, 153, 162, 172, 182, 193, 201, 209, 218, 225, 231, 236, 241, 244, 247, 247, 247, 247, 245, 241, 237, 231, 225, 218, 209, 200, 192, 183, 173, 162, 152, 142, 132, 122, 112, 102, 94, 85, 77, 69, 62, 54, 48, 43, 38, 33, 29, 25, 21, 19, 16, 13, 11, 9, 8, 6, 5, 4, 4, 3, 2, 2, 2, 1, 1},
{0, 1, 1, 1, 2, 3, 3, 4, 5, 6, 8, 9, 11, 13, 16, 19, 21, 25, 29, 33, 39, 44, 49, 55, 62, 70, 78, 86, 94, 103, 114, 124, 133, 143, 154, 164, 174, 185, 195, 204, 213, 221, 228, 234, 239, 244, 248, 250, 251, 251, 249, 248, 244, 240, 234, 228, 221, 213, 203, 195, 185, 175, 165, 154, 143, 133, 123, 113, 103, 95, 86, 78, 70, 63, 55, 49, 43, 38, 34, 29, 25, 21, 19, 16, 13, 11, 9, 8, 6, 5, 4, 4, 3, 2, 2, 2, 1, 1},
{1, 1, 1, 2, 2, 3, 3, 4, 5, 6, 8, 10, 12, 14, 16, 19, 21, 25, 29, 34, 38, 44, 50, 56, 62, 70, 78, 87, 96, 105, 115, 125, 136, 145, 156, 167, 177, 187, 197, 206, 214, 223, 230, 236, 243, 247, 249, 252, 253, 253, 252, 250, 246, 242, 236, 230, 223, 215, 206, 197, 187, 177, 167, 156, 145, 135, 125, 115, 105, 96, 87, 79, 71, 63, 56, 49, 44, 38, 34, 30, 26, 22, 19, 16, 13, 11, 10, 8, 6, 5, 5, 3, 3, 2, 2, 1, 1, 1},
{1, 1, 1, 2, 2, 3, 4, 5, 5, 6, 8, 10, 11, 13, 16, 18, 22, 26, 30, 34, 38, 44, 49, 56, 64, 71, 79, 87, 96, 105, 115, 125, 136, 146, 156, 166, 177, 187, 197, 207, 215, 224, 231, 237, 244, 248, 251, 253, 254, 255, 253, 251, 247, 243, 238, 230, 223, 216, 207, 198, 188, 177, 167, 156, 146, 136, 125, 115, 106, 96, 87, 79, 71, 63, 56, 50, 44, 38, 33, 29, 26, 22, 18, 16, 13, 11, 10, 8, 6, 5, 4, 3, 3, 2, 2, 1, 1, 1},
{1, 1, 1, 2, 2, 3, 3, 5, 5, 6, 8, 10, 11, 13, 16, 18, 22, 26, 30, 34, 38, 44, 50, 56, 63, 71, 79, 87, 96, 106, 115, 125, 136, 146, 157, 167, 177, 187, 197, 207, 216, 224, 231, 237, 243, 247, 251, 253, 254, 254, 253, 250, 247, 243, 237, 231, 224, 216, 207, 198, 188, 178, 167, 156, 146, 136, 125, 115, 105, 96, 87, 79, 71, 64, 56, 49, 44, 38, 34, 29, 25, 22, 18, 16, 13, 11, 10, 8, 6, 5, 4, 3, 3, 3, 2, 1, 1, 1},
{1, 1, 1, 2, 2, 3, 3, 4, 5, 8, 8, 9, 11, 13, 16, 19, 22, 26, 29, 33, 38, 44, 50, 55, 62, 71, 79, 87, 96, 105, 114, 124, 135, 145, 156, 166, 177, 187, 197, 206, 215, 223, 230, 236, 242, 246, 250, 252, 253, 253, 253, 251, 247, 242, 236, 230, 223, 215, 206, 197, 187, 177, 167, 156, 145, 135, 125, 115, 105, 96, 87, 79, 71, 63, 56, 49, 44, 39, 34, 29, 26, 22, 18, 16, 14, 12, 9, 8, 6, 5, 5, 4, 3, 3, 2, 1, 1, 1},
{1, 1, 1, 2, 2, 3, 3, 4, 5, 6, 8, 9, 11, 13, 16, 19, 21, 25, 29, 34, 38, 44, 49, 55, 62, 70, 78, 86, 95, 104, 113, 123, 133, 143, 154, 165, 175, 185, 194, 203, 213, 221, 228, 234, 239, 244, 246, 249, 251, 251, 250, 248, 244, 239, 234, 228, 221, 213, 203, 195, 185, 175, 165, 154, 143, 133, 123, 113, 103, 95, 86, 78, 70, 62, 55, 49, 43, 38, 33, 28, 25, 22, 18, 16, 13, 11, 9, 8, 6, 5, 4, 3, 3, 2, 2, 2, 1, 0},
{1, 1, 1, 2, 2, 3, 3, 4, 5, 6, 8, 9, 11, 13, 16, 19, 21, 25, 29, 33, 37, 43, 49, 55, 61, 69, 77, 85, 94, 103, 112, 122, 132, 142, 152, 163, 173, 182, 192, 201, 209, 217, 224, 230, 237, 241, 244, 246, 247, 248, 246, 242, 241, 237, 231, 225, 217, 209, 201, 192, 182, 173, 162, 152, 142, 132, 122, 112, 102, 94, 85, 76, 68, 62, 54, 49, 43, 38, 33, 28, 25, 22, 18, 16, 13, 11, 9, 8, 6, 5, 5, 4, 3, 2, 2, 1, 1, 0},
{1, 1, 2, 2, 2, 3, 3, 4, 5, 6, 8, 9, 10, 12, 15, 18, 21, 25, 28, 32, 36, 42, 48, 53, 61, 68, 76, 84, 91, 100, 109, 119, 130, 140, 149, 159, 169, 179, 189, 198, 206, 214, 221, 227, 232, 236, 240, 242, 243, 243, 242, 240, 236, 232, 226, 220, 213, 206, 198, 188, 179, 170, 160, 149, 139, 130, 119, 109, 101, 92, 83, 74, 69, 61, 53, 47, 43, 38, 32, 28, 25, 20, 18, 15, 13, 11, 9, 8, 6, 5, 5, 3, 2, 2, 2, 1, 1, 0},
{1, 1, 1, 2, 2, 3, 3, 4, 5, 6, 8, 9, 10, 12, 15, 18, 20, 24, 27, 31, 36, 41, 46, 52, 59, 65, 73, 81, 90, 98, 108, 117, 126, 136, 146, 155, 165, 174, 184, 193, 201, 209, 216, 221, 226, 231, 234, 236, 237, 237, 236, 234, 231, 226, 221, 215, 208, 201, 193, 184, 175, 166, 157, 146, 136, 127, 116, 107, 98, 90, 82, 73, 65, 59, 52, 46, 41, 35, 31, 27, 23, 20, 18, 15, 13, 11, 9, 8, 6, 5, 4, 3, 2, 2, 1, 1, 1, 1},
{1, 1, 2, 2, 2, 2, 3, 5, 5, 6, 7, 8, 10, 12, 15, 17, 19, 23, 27, 31, 35, 40, 45, 51, 58, 63, 71, 80, 88, 96, 105, 113, 122, 131, 142, 152, 160, 169, 179, 187, 195, 202, 209, 215, 220, 224, 227, 229, 230, 230, 229, 226, 224, 220, 215, 209, 202, 195, 187, 178, 170, 161, 151, 142, 131, 122, 113, 103, 95, 88, 80, 72, 64, 57, 52, 46, 40, 34, 30, 27, 23, 19, 17, 15, 13, 11, 9, 7, 6, 5, 4, 3, 2, 2, 1, 1, 1, 0},
{0, 1, 1, 1, 2, 2, 3, 4, 4, 5, 7, 8, 10, 12, 15, 17, 19, 23, 26, 29, 33, 38, 44, 49, 55, 61, 69, 77, 85, 93, 100, 109, 118, 127, 137, 147, 155, 164, 172, 180, 188, 195, 202, 208, 213, 217, 220, 222, 223, 223, 222, 220, 217, 213, 208, 202, 195, 188, 181, 173, 163, 155, 146, 136, 127, 118, 109, 101, 93, 84, 75, 69, 62, 55, 49, 44, 38, 34, 29, 25, 22, 18, 16, 14, 12, 9, 8, 7, 5, 4, 4, 3, 3, 2, 1, 1, 1, 1},
{1, 1, 1, 1, 2, 2, 3, 4, 4, 5, 7, 8, 9, 11, 13, 15, 18, 21, 25, 28, 32, 37, 41, 47, 53, 59, 66, 74, 81, 88, 96, 105, 114, 123, 132, 141, 149, 158, 167, 174, 181, 188, 195, 200, 205, 209, 212, 214, 214, 215, 214, 211, 208, 205, 200, 194, 189, 182, 174, 166, 157, 149, 142, 131, 122, 114, 105, 97, 89, 81, 72, 66, 59, 53, 47, 42, 37, 32, 28, 24, 21, 18, 15, 13, 11, 9, 8, 7, 5, 4, 4, 3, 3, 2, 1, 1, 1, 0},
{1, 1, 1, 1, 2, 2, 3, 4, 4, 5, 6, 8, 9, 11, 13, 15, 17, 20, 23, 27, 31, 35, 40, 46, 51, 57, 64, 70, 78, 85, 92, 100, 109, 118, 126, 135, 143, 151, 160, 167, 173, 180, 187, 192, 196, 199, 202, 205, 205, 206, 205, 203, 200, 196, 192, 187, 180, 174, 167, 159, 151, 143, 135, 126, 118, 110, 100, 92, 85, 78, 70, 64, 57, 52, 46, 40, 35, 31, 28, 24, 21, 17, 15, 13, 11, 9, 8, 6, 5, 4, 4, 2, 2, 2, 1, 1, 1, 0},
{0, 1, 1, 1, 1, 2, 2, 3, 4, 5, 6, 8, 8, 10, 13, 14, 16, 19, 23, 26, 28, 34, 39, 43, 48, 54, 60, 66, 74, 81, 88, 96, 104, 112, 120, 129, 136, 144, 152, 160, 166, 172, 178, 183, 187, 190, 193, 195, 196, 196, 195, 193, 191, 187, 183, 178, 172, 166, 160, 152, 144, 136, 128, 121, 113, 104, 96, 88, 81, 74, 66, 61, 55, 49, 43, 38, 33, 29, 26, 22, 19, 16, 15, 13, 10, 8, 7, 6, 4, 4, 4, 2, 2, 2, 2, 1, 1, 0},
{0, 1, 1, 1, 1, 2, 2, 3, 4, 4, 6, 7, 8, 10, 12, 14, 16, 18, 21, 24, 28, 31, 36, 41, 46, 51, 57, 64, 70, 77, 83, 92, 99, 106, 114, 122, 129, 137, 144, 151, 158, 163, 169, 174, 178, 181, 183, 185, 186, 186, 185, 183, 181, 178, 174, 169, 163, 157, 151, 144, 137, 129, 121, 114, 106, 99, 93, 84, 77, 70, 64, 58, 52, 46, 40, 37, 32, 27, 24, 21, 18, 15, 13, 12, 10, 8, 7, 6, 4, 4, 3, 2, 2, 2, 1, 1, 1, 0},
{0, 1, 1, 1, 1, 2, 3, 3, 4, 4, 5, 6, 8, 10, 11, 12, 15, 18, 20, 24, 27, 30, 35, 39, 44, 48, 54, 60, 66, 73, 79, 86, 94, 101, 108, 115, 122, 129, 136, 143, 148, 154, 159, 164, 168, 171, 173, 175, 175, 175, 175, 173, 171, 168, 164, 159, 155, 149, 143, 136, 129, 122, 116, 108, 101, 94, 86, 79, 73, 66, 60, 54, 49, 43, 39, 34, 29, 26, 23, 20, 18, 15, 13, 11, 10, 8, 6, 5, 4, 4, 3, 2, 2, 1, 1, 1, 0, 0},
{0, 0, 1, 1, 1, 2, 2, 3, 3, 3, 5, 6, 7, 9, 10, 11, 13, 16, 18, 22, 25, 28, 33, 36, 41, 46, 51, 56, 62, 68, 75, 80, 87, 94, 101, 108, 115, 121, 127, 134, 139, 145, 150, 154, 157, 160, 162, 164, 165, 165, 164, 163, 160, 157, 154, 150, 146, 140, 134, 127, 121, 115, 108, 102, 94, 88, 81, 74, 68, 62, 56, 51, 46, 41, 37, 32, 27, 24, 21, 18, 16, 14, 12, 10, 8, 6, 6, 5, 4, 3, 3, 2, 2, 2, 1, 1, 0, 0},
{0, 1, 1, 1, 1, 1, 2, 3, 3, 3, 5, 6, 7, 7, 9, 11, 13, 15, 17, 20, 23, 26, 31, 34, 38, 42, 47, 52, 58, 63, 69, 76, 82, 88, 94, 101, 108, 113, 120, 126, 131, 135, 141, 144, 147, 150, 152, 154, 155, 155, 154, 153, 150, 147, 144, 140, 136, 130, 125, 120, 114, 108, 101, 95, 88, 81, 75, 70, 64, 58, 53, 48, 43, 38, 33, 30, 27, 23, 20, 17, 15, 13, 11, 9, 8, 6, 6, 5, 4, 3, 3, 2, 2, 2, 1, 1, 1, 0},
{0, 0, 0, 1, 1, 1, 2, 2, 3, 3, 4, 5, 6, 7, 9, 10, 12, 14, 17, 19, 21, 25, 29, 32, 36, 39, 43, 48, 54, 59, 64, 71, 77, 82, 88, 94, 100, 105, 111, 116, 121, 125, 131, 134, 137, 140, 141, 143, 144, 144, 143, 142, 140, 137, 134, 130, 126, 122, 116, 111, 105, 100, 94, 88, 82, 76, 71, 65, 60, 54, 49, 44, 41, 36, 31, 28, 25, 22, 19, 16, 14, 12, 10, 9, 8, 6, 5, 4, 4, 3, 2, 2, 1, 1, 1, 1, 0, 0},
{0, 1, 0, 0, 1, 1, 1, 2, 3, 3, 4, 5, 6, 7, 8, 9, 11, 12, 14, 17, 20, 23, 26, 29, 33, 37, 41, 44, 50, 55, 59, 65, 72, 76, 81, 87, 93, 98, 103, 108, 112, 116, 121, 125, 127, 130, 131, 133, 133, 133, 132, 131, 130, 127, 124, 121, 117, 113, 108, 103, 98, 93, 88, 82, 76, 71, 65, 59, 55, 50, 45, 41, 36, 33, 29, 26, 23, 20, 17, 15, 13, 11, 10, 8, 7, 5, 5, 4, 3, 2, 2, 1, 1, 1, 1, 0, 0, 0},
{0, 0, 0, 0, 1, 1, 1, 2, 3, 3, 3, 4, 5, 6, 7, 8, 10, 12, 13, 16, 19, 21, 24, 27, 31, 34, 38, 41, 46, 50, 55, 61, 65, 70, 75, 81, 85, 90, 95, 99, 103, 107, 111, 115, 117, 119, 121, 122, 122, 122, 122, 120, 120, 116, 113, 111, 108, 104, 100, 95, 90, 86, 81, 75, 70, 65, 60, 55, 50, 46, 41, 37, 33, 30, 27, 24, 21, 19, 16, 13, 12, 10, 8, 7, 7, 5, 5, 4, 3, 2, 2, 1, 1, 1, 0, 0, 0, 0},
{0, 0, 1, 1, 1, 1, 1, 2, 3, 3, 3, 4, 5, 6, 7, 8, 10, 11, 13, 14, 17, 19, 22, 25, 28, 31, 34, 38, 42, 46, 51, 56, 60, 65, 70, 74, 78, 82, 87, 91, 95, 99, 102, 106, 108, 109, 111, 112, 113, 112, 112, 111, 110, 107, 104, 102, 99, 95, 91, 87, 82, 78, 73, 70, 65, 60, 55, 50, 46, 42, 38, 34, 31, 28, 25, 22, 19, 17, 15, 13, 11, 9, 7, 6, 6, 5, 4, 3, 2, 2, 2, 1, 1, 1, 0, 0, 0, 0},
{0, 0, 0, 0, 1, 1, 1, 1, 2, 2, 3, 4, 4, 6, 6, 7, 9, 10, 11, 13, 15, 17, 20, 23, 26, 29, 32, 35, 38, 42, 46, 50, 54, 59, 63, 67, 72, 76, 80, 83, 87, 90, 94, 95, 97, 99, 100, 102, 102, 102, 102, 101, 99, 98, 96, 93, 90, 87, 83, 80, 76, 72, 67, 63, 58, 55, 51, 46, 42, 39, 36, 32, 28, 25, 23, 20, 17, 15, 13, 11, 10, 8, 6, 6, 6, 4, 3, 3, 2, 2, 2, 1, 1, 1, 0, 0, 0, 0},
{0, 0, 0, 0, 1, 1, 1, 1, 1, 2, 3, 3, 4, 5, 6, 6, 8, 9, 10, 12, 14, 16, 18, 21, 23, 26, 29, 32, 35, 38, 42, 45, 49, 53, 57, 60, 65, 69, 72, 76, 79, 81, 85, 87, 89, 91, 92, 93, 93, 93, 93, 92, 91, 89, 87, 85, 81, 79, 76, 72, 69, 65, 61, 57, 53, 49, 45, 42, 39, 35, 31, 28, 26, 23, 21, 18, 15, 14, 12, 10, 9, 8, 6, 6, 5, 4, 3, 3, 2, 2, 2, 1, 1, 1, 0, 0, 0, 0},
{0, 0, 0, 0, 0, 1, 1, 1, 1, 2, 3, 3, 3, 5, 6, 6, 7, 8, 10, 12, 13, 14, 17, 18, 20, 23, 26, 28, 31, 35, 38, 41, 45, 48, 52, 55, 59, 62, 65, 68, 72, 74, 76, 79, 81, 82, 83, 84, 84, 85, 84, 83, 83, 81, 79, 77, 73, 71, 69, 65, 62, 59, 55, 52, 48, 45, 41, 38, 35, 32, 28, 25, 23, 21, 19, 16, 14, 13, 11, 9, 8, 7, 5, 5, 5, 4, 3, 3, 2, 2, 1, 1, 1, 1, 0, 0, 0, 0},
{0, 0, 0, 0, 0, 0, 1, 1, 2, 2, 2, 2, 3, 4, 5, 5, 7, 7, 8, 10, 11, 12, 15, 16, 18, 21, 24, 26, 29, 32, 34, 37, 40, 43, 47, 50, 53, 56, 59, 62, 65, 67, 69, 71, 73, 74, 75, 76, 76, 77, 76, 75, 74, 73, 71, 69, 66, 64, 62, 59, 56, 53, 49, 47, 43, 40, 37, 34, 32, 29, 26, 24, 21, 19, 17, 14, 12, 11, 10, 8, 7, 5, 5, 4, 4, 3, 3, 2, 2, 2, 1, 1, 1, 0, 0, 0, 0, 0},
{0, 0, 0, 0, 0, 0, 1, 1, 1, 1, 2, 2, 3, 4, 4, 5, 6, 6, 7, 9, 10, 11, 13, 15, 16, 19, 21, 23, 26, 29, 30, 33, 37, 39, 42, 44, 47, 51, 53, 55, 58, 60, 62, 63, 65, 66, 67, 68, 69, 69, 68, 67, 66, 65, 63, 61, 60, 58, 55, 53, 51, 47, 44, 42, 39, 36, 34, 30, 28, 26, 23, 21, 19, 16, 14, 12, 11, 10, 9, 7, 7, 6, 4, 4, 3, 3, 3, 2, 2, 1, 1, 1, 1, 0, 0, 0, 0, 0},
{0, 0, 0, 0, 0, 0, 1, 1, 1, 1, 2, 2, 2, 3, 4, 4, 5, 5, 6, 8, 9, 10, 11, 14, 15, 16, 18, 20, 22, 24, 27, 30, 32, 34, 38, 40, 43, 46, 48, 49, 51, 53, 55, 56, 58, 59, 59, 61, 61, 61, 60, 59, 59, 58, 56, 55, 53, 51, 50, 47, 45, 43, 40, 38, 34, 32, 30, 27, 25, 23, 20, 19, 17, 15, 13, 11, 10, 9, 8, 7, 6, 5, 4, 4, 3, 3, 2, 2, 2, 1, 1, 1, 0, 0, 0, 0, 0, 0},
{0, 0, 0, 0, 0, 0, 0, 1, 1, 1, 1, 2, 2, 3, 3, 3, 3, 5, 6, 7, 8, 8, 9, 12, 13, 14, 16, 18, 20, 22, 24, 27, 29, 31, 33, 35, 37, 40, 42, 43, 45, 47, 49, 50, 51, 53, 54, 54, 53, 53, 54, 53, 52, 51, 50, 49, 47, 45, 44, 41, 39, 37, 35, 33, 31, 28, 26, 25, 22, 20, 18, 17, 15, 13, 11, 9, 8, 7, 7, 5, 5, 4, 4, 3, 3, 2, 1, 1, 1, 1, 1, 0, 0, 0, 0, 0, 0, 0},
{0, 0, 0, 0, 0, 0, 0, 0, 1, 1, 1, 1, 2, 3, 3, 3, 4, 4, 5, 6, 7, 7, 8, 10, 11, 12, 15, 16, 18, 20, 21, 23, 25, 27, 29, 31, 33, 35, 37, 38, 40, 42, 44, 44, 46, 46, 46, 47, 47, 47, 48, 47, 46, 46, 44, 43, 42, 40, 39, 37, 35, 33, 31, 29, 27, 25, 23, 21, 20, 18, 16, 14, 14, 11, 10, 9, 7, 6, 6, 5, 4, 4, 3, 3, 3, 2, 1, 1, 1, 1, 1, 0, 0, 0, 0, 0, 0, 0},
{0, 0, 0, 0, 0, 0, 0, 0, 1, 1, 1, 1, 2, 2, 2, 3, 4, 4, 4, 6, 6, 7, 8, 9, 10, 11, 13, 14, 15, 17, 18, 20, 22, 24, 25, 27, 29, 31, 33, 34, 35, 37, 38, 39, 41, 41, 41, 42, 42, 42, 42, 42, 40, 39, 40, 38, 37, 35, 34, 33, 31, 29, 27, 25, 23, 22, 20, 19, 17, 15, 14, 12, 11, 10, 9, 8, 7, 6, 5, 4, 4, 3, 3, 2, 2, 1, 1, 1, 1, 1, 0, 0, 0, 0, 0, 0, 0, 0},
{0, 0, 0, 0, 0, 0, 0, 0, 0, 1, 1, 1, 1, 2, 2, 2, 3, 3, 3, 5, 5, 5, 7, 7, 8, 9, 11, 12, 13, 15, 16, 18, 20, 20, 21, 24, 25, 26, 28, 29, 30, 32, 33, 34, 35, 35, 36, 36, 36, 36, 36, 36, 36, 35, 33, 32, 31, 31, 30, 28, 26, 25, 24, 22, 21, 20, 18, 17, 15, 13, 12, 11, 9, 8, 7, 7, 5, 5, 4, 4, 3, 3, 2, 2, 1, 1, 1, 1, 1, 0, 0, 0, 0, 0, 0, 0, 0, 0},
{0, 0, 0, 0, 0, 0, 0, 0, 0, 1, 1, 1, 1, 2, 2, 2, 3, 3, 3, 5, 5, 5, 5, 6, 7, 9, 10, 10, 11, 13, 14, 15, 17, 18, 19, 21, 22, 23, 25, 25, 26, 28, 28, 29, 30, 31, 31, 32, 31, 31, 31, 31, 31, 30, 29, 28, 28, 27, 26, 25, 23, 22, 21, 19, 18, 17, 15, 14, 13, 11, 10, 9, 9, 7, 7, 5, 5, 5, 4, 4, 3, 2, 2, 1, 1, 1, 1, 1, 1, 0, 0, 0, 0, 0, 0, 0, 0, 0},
{0, 0, 0, 0, 0, 0, 0, 0, 0, 0, 0, 0, 1, 1, 2, 2, 2, 3, 3, 4, 4, 5, 6, 6, 7, 8, 8, 8, 10, 11, 12, 13, 15, 16, 16, 18, 19, 20, 22, 22, 23, 23, 25, 26, 26, 27, 27, 27, 27, 27, 27, 27, 26, 26, 25, 25, 24, 23, 22, 21, 20, 19, 18, 16, 15, 14, 13, 12, 11, 10, 9, 9, 8, 7, 6, 5, 4, 4, 4, 3, 2, 2, 2, 1, 1, 1, 1, 1, 0, 0, 0, 0, 0, 0, 0, 0, 0, 0},
{0, 0, 0, 0, 0, 0, 0, 0, 0, 1, 0, 0, 1, 1, 2, 1, 1, 2, 3, 3, 3, 3, 5, 5, 5, 6, 7, 8, 8, 9, 10, 11, 12, 14, 14, 16, 17, 18, 17, 20, 21, 21, 21, 22, 23, 23, 23, 23, 23, 24, 24, 23, 23, 22, 23, 21, 21, 20, 19, 19, 18, 17, 15, 14, 13, 12, 11, 10, 9, 8, 7, 7, 6, 5, 5, 4, 4, 3, 2, 2, 2, 2, 1, 1, 1, 1, 1, 0, 0, 0, 0, 0, 0, 0, 0, 0, 0, 0},
{0, 0, 0, 0, 0, 0, 0, 0, 0, 0, 0, 0, 1, 1, 1, 1, 2, 2, 2, 3, 3, 3, 4, 4, 5, 5, 6, 7, 7, 8, 9, 9, 11, 11, 12, 14, 14, 15, 16, 17, 17, 18, 19, 19, 20, 20, 20, 20, 20, 21, 21, 20, 20, 19, 19, 19, 18, 17, 16, 16, 15, 14, 14, 12, 12, 11, 9, 9, 8, 7, 6, 6, 5, 5, 4, 3, 3, 3, 2, 2, 2, 2, 1, 1, 1, 0, 0, 0, 0, 0, 0, 0, 0, 0, 0, 0, 0, 0},
{0, 0, 0, 0, 0, 0, 0, 0, 0, 0, 0, 0, 0, 1, 1, 1, 2, 2, 2, 2, 2, 3, 4, 4, 4, 4, 5, 5, 6, 7, 8, 9, 9, 9, 10, 12, 12, 12, 13, 14, 15, 15, 16, 16, 16, 16, 17, 17, 17, 17, 17, 17, 17, 16, 16, 16, 15, 14, 14, 14, 12, 12, 11, 10, 10, 9, 8, 7, 7, 6, 5, 5, 5, 4, 4, 3, 3, 3, 2, 2, 1, 1, 1, 1, 1, 0, 0, 0, 0, 0, 0, 0, 0, 0, 0, 0, 0, 0},
{0, 0, 0, 0, 0, 0, 0, 0, 0, 0, 0, 0, 0, 1, 1, 1, 1, 1, 1, 2, 2, 2, 2, 3, 3, 4, 4, 5, 5, 6, 6, 7, 7, 8, 8, 10, 10, 10, 10, 11, 13, 13, 12, 14, 14, 14, 15, 15, 14, 14, 15, 15, 14, 13, 14, 13, 12, 12, 12, 12, 10, 10, 9, 8, 8, 7, 7, 6, 6, 5, 4, 4, 3, 3, 3, 3, 2, 2, 2, 1, 1, 1, 1, 1, 0, 0, 0, 0, 0, 0, 0, 0, 0, 0, 0, 0, 0, 0},
{0, 0, 0, 0, 0, 0, 0, 0, 0, 0, 0, 0, 0, 0, 1, 1, 1, 1, 1, 2, 2, 2, 2, 2, 3, 3, 4, 4, 4, 5, 5, 6, 7, 7, 7, 8, 8, 9, 9, 10, 11, 11, 11, 12, 12, 12, 13, 13, 12, 12, 13, 12, 12, 12, 12, 11, 11, 10, 10, 9, 9, 8, 8, 7, 7, 6, 6, 5, 5, 4, 4, 4, 3, 3, 2, 2, 2, 2, 2, 1, 1, 1, 1, 1, 0, 0, 0, 0, 0, 0, 0, 0, 0, 0, 0, 0, 0, 0},
{0, 0, 0, 0, 0, 0, 0, 0, 0, 0, 0, 0, 0, 0, 0, 0, 0, 1, 1, 2, 2, 2, 2, 2, 2, 2, 3, 4, 4, 3, 4, 6, 6, 6, 6, 7, 7, 8, 8, 9, 9, 9, 9, 10, 10, 9, 10, 11, 10, 10, 11, 10, 10, 10, 10, 9, 9, 9, 9, 8, 7, 7, 7, 6, 5, 4, 5, 5, 4, 3, 3, 4, 3, 3, 2, 1, 1, 1, 1, 1, 1, 1, 1, 0, 0, 0, 0, 0, 0, 0, 0, 0, 0, 0, 0, 0, 0, 0},
{0, 0, 0, 0, 0, 0, 0, 0, 0, 0, 0, 0, 0, 0, 0, 0, 0, 0, 1, 1, 1, 1, 2, 2, 2, 2, 3, 3, 3, 3, 4, 4, 4, 4, 5, 5, 5, 6, 6, 7, 7, 7, 7, 8, 8, 8, 8, 9, 8, 8, 9, 8, 8, 8, 8, 7, 7, 7, 7, 6, 6, 6, 5, 5, 5, 4, 3, 3, 4, 3, 3, 3, 2, 2, 2, 2, 1, 1, 1, 1, 0, 0, 0, 0, 0, 0, 0, 0, 0, 0, 0, 0, 0, 0, 0, 0, 0, 0},
{0, 0, 0, 0, 0, 0, 0, 0, 0, 0, 0, 0, 0, 0, 0, 0, 0, 0, 1, 1, 1, 1, 2, 1, 1, 1, 2, 2, 3, 3, 3, 4, 4, 4, 4, 4, 5, 5, 5, 6, 6, 6, 6, 7, 7, 7, 7, 7, 7, 7, 7, 7, 7, 6, 6, 6, 6, 6, 5, 5, 5, 5, 5, 4, 4, 4, 3, 3, 3, 2, 2, 2, 1, 1, 1, 1, 1, 1, 1, 0, 0, 0, 0, 0, 0, 0, 0, 0, 0, 0, 0, 0, 0, 0, 0, 0, 0, 0},
{0, 0, 0, 0, 0, 0, 0, 0, 0, 0, 0, 0, 0, 0, 0, 0, 0, 0, 0, 1, 1, 1, 1, 1, 1, 1, 2, 2, 2, 2, 2, 2, 2, 3, 4, 4, 3, 4, 4, 5, 5, 5, 6, 6, 5, 5, 5, 6, 6, 5, 5, 6, 6, 5, 6, 5, 5, 4, 4, 5, 4, 3, 3, 4, 3, 3, 3, 2, 2, 2, 2, 2, 1, 1, 1, 1, 1, 1, 1, 0, 0, 0, 0, 0, 0, 0, 0, 0, 0, 0, 0, 0, 0, 0, 0, 0, 0, 0},
{0, 0, 0, 0, 0, 0, 0, 0, 0, 0, 0, 0, 0, 0, 0, 0, 0, 0, 0, 0, 0, 1, 1, 1, 1, 1, 1, 1, 1, 2, 2, 2, 2, 2, 2, 3, 3, 3, 4, 3, 4, 4, 4, 4, 5, 5, 5, 4, 4, 5, 5, 5, 4, 4, 4, 4, 4, 4, 4, 4, 3, 3, 3, 2, 2, 2, 3, 2, 2, 2, 1, 1, 1, 1, 1, 0, 0, 0, 0, 0, 0, 0, 0, 0, 0, 0, 0, 0, 0, 0, 0, 0, 0, 0, 0, 0, 0, 0},
{0, 0, 0, 0, 0, 0, 0, 0, 0, 0, 0, 0, 0, 0, 0, 0, 0, 0, 0, 0, 0, 0, 1, 1, 1, 1, 1, 1, 1, 2, 2, 2, 2, 2, 2, 3, 3, 3, 3, 3, 3, 4, 3, 3, 4, 4, 4, 3, 3, 4, 4, 4, 4, 4, 3, 3, 3, 3, 3, 3, 3, 3, 3, 2, 2, 2, 2, 2, 1, 1, 1, 1, 1, 1, 0, 0, 0, 0, 0, 0, 0, 0, 0, 0, 0, 0, 0, 0, 0, 0, 0, 0, 0, 0, 0, 0, 0, 0},
{0, 0, 0, 0, 0, 0, 0, 0, 0, 0, 0, 0, 0, 0, 0, 0, 0, 0, 0, 0, 0, 0, 0, 0, 1, 1, 1, 1, 1, 1, 2, 2, 2, 2, 2, 2, 2, 3, 3, 3, 2, 3, 3, 3, 3, 3, 3, 3, 2, 3, 3, 3, 2, 2, 2, 3, 2, 3, 2, 2, 2, 2, 2, 2, 2, 2, 2, 2, 1, 1, 1, 1, 1, 1, 0, 1, 0, 0, 0, 0, 0, 0, 0, 0, 0, 0, 0, 0, 0, 0, 0, 0, 0, 0, 0, 0, 0, 0},
{0, 0, 0, 0, 0, 0, 0, 0, 0, 0, 0, 0, 0, 0, 0, 0, 0, 0, 0, 0, 0, 0, 0, 0, 0, 0, 1, 1, 1, 1, 1, 2, 1, 1, 1, 1, 1, 1, 2, 2, 2, 2, 2, 2, 2, 2, 2, 2, 2, 2, 2, 2, 2, 2, 2, 2, 2, 2, 2, 2, 1, 2, 2, 2, 1, 1, 1, 1, 1, 1, 0, 0, 0, 0, 0, 0, 0, 0, 0, 0, 0, 0, 0, 0, 0, 0, 0, 0, 0, 0, 0, 0, 0, 0, 0, 0, 0, 0},
{0, 0, 0, 0, 0, 0, 0, 0, 0, 0, 0, 0, 0, 0, 0, 0, 0, 0, 0, 0, 0, 0, 0, 0, 0, 0, 0, 0, 0, 1, 1, 1, 1, 1, 1, 1, 1, 1, 1, 2, 2, 1, 2, 2, 2, 2, 2, 2, 2, 2, 2, 2, 2, 2, 2, 2, 2, 2, 2, 2, 1, 2, 2, 1, 1, 1, 1, 1, 1, 0, 0, 0, 0, 0, 0, 0, 0, 0, 0, 0, 0, 0, 0, 0, 0, 0, 0, 0, 0, 0, 0, 0, 0, 0, 0, 0, 0, 0},
{0, 0, 0, 0, 0, 0, 0, 0, 0, 0, 0, 0, 0, 0, 0, 0, 0, 0, 0, 0, 0, 0, 0, 0, 0, 0, 0, 0, 0, 0, 0, 0, 1, 1, 1, 1, 1, 1, 1, 1, 1, 1, 2, 2, 2, 2, 2, 1, 2, 2, 2, 1, 1, 1, 1, 1, 2, 1, 1, 1, 1, 1, 1, 1, 1, 1, 0, 0, 0, 0, 0, 0, 0, 0, 0, 0, 0, 0, 0, 0, 0, 0, 0, 0, 0, 0, 0, 0, 0, 0, 0, 0, 0, 0, 0, 0, 0, 0},
{0, 0, 0, 0, 0, 0, 0, 0, 0, 0, 0, 0, 0, 0, 0, 0, 0, 0, 0, 0, 0, 0, 0, 0, 0, 0, 0, 0, 0, 0, 0, 0, 0, 1, 0, 0, 0, 1, 1, 1, 1, 1, 1, 1, 1, 1, 2, 2, 1, 1, 1, 1, 1, 1, 1, 1, 1, 1, 1, 1, 1, 0, 0, 0, 0, 0, 0, 0, 0, 0, 0, 0, 0, 0, 0, 0, 0, 0, 0, 0, 0, 0, 0, 0, 0, 0, 0, 0, 0, 0, 0, 0, 0, 0, 0, 0, 0, 0},
{0, 0, 0, 0, 0, 0, 0, 0, 0, 0, 0, 0, 0, 0, 0, 0, 0, 0, 0, 0, 0, 0, 0, 0, 0, 0, 0, 0, 0, 0, 0, 0, 0, 0, 0, 0, 0, 0, 1, 1, 1, 1, 1, 1, 1, 1, 1, 1, 1, 1, 1, 1, 1, 1, 1, 1, 1, 1, 1, 1, 0, 0, 0, 0, 0, 0, 0, 0, 0, 0, 0, 0, 0, 0, 0, 0, 0, 0, 0, 0, 0, 0, 0, 0, 0, 0, 0, 0, 0, 0, 0, 0, 0, 0, 0, 0, 0, 0},
{0, 0, 0, 0, 0, 0, 0, 0, 0, 0, 0, 0, 0, 0, 0, 0, 0, 0, 0, 0, 0, 0, 0, 0, 0, 0, 0, 0, 0, 0, 0, 0, 0, 0, 0, 0, 0, 0, 1, 0, 0, 0, 1, 1, 1, 1, 0, 0, 0, 0, 1, 1, 1, 1, 1, 0, 0, 1, 1, 0, 0, 0, 0, 0, 0, 0, 0, 0, 0, 0, 0, 0, 0, 0, 0, 0, 0, 0, 0, 0, 0, 0, 0, 0, 0, 0, 0, 0, 0, 0, 0, 0, 0, 0, 0, 0, 0, 0}
};
    }
}
Mycket nöje!
Funktioner är andra klassens medborgare i C#

I C# 8 är fortfarande funktioner ett slags “andra klassens medborgare” i jämförelse med variabler. Man kan alltså fortfarande göra mer med en variabel än en funktion i C# 8.
Varken variabler eller funktioner kan skapas i namnrymder, båda kan skapas i en klass och båda kan skapas i en funktion, vilket illustreras av detta exempel:
namespace ConsoleApp1
{
    public class MyClass
    {
        public int VariableInClass;

        public void FunctionInClass()
        {
            int variableInFunction;

            void functionInFunction() { }
        }
    }
}
Eftersom det finns saker som du kan göra med variabler som du inte kan göra med funktioner, så är funktioner fortfarande att betrakta som ett slags andra klassens medborgare. Du kan inte lagra en funktion i en variabel, du kan inte skicka funktioner som argument och du kan inte använda type inference när du skapar funktioner.
var x = 10;

//Variabel som påverkar x
Action y = () => x++;
y();
Console.WriteLine(x);

//Funktion som påverkar x
void z() => x++;
z();
Console.WriteLine(x);
Att man inte kan lagra funktioner i variabler spelar inte någon jättestor roll. Som namnet antyder beskriver funktioner ofta något funktionellt, vilket i praktiken innebär att de innehåller programsatser. Programsatser kan även lagras i variabler, vilket innebär att funktionalitet kan lagras i en variabel och skickas som argument. Detta exempel visar hur instruktionen att summera två tal lagras i en variabel:
//Add the ability to add
//two integers in x.
Func<int, int, int> x =
    (int a, int b) => a + b;

//Execute the content
//of x, save the result in y.
var y = x(10, 20);
Detta exempel visar hur samma instruktion skickas som parameter till en funktion:
GiveMeFunctionality((a, b) => a + b);
C#-programmets startpunkt kan inte ersättas av en variabel, utan måste vara en riktig funktion kallad Main. I vissa fall kan man kringgå att en funktion inte kan användas som en variabel genom att skapa en variabel som anropar en funktion, och skicka den istället. T.ex. så här:
using System;

namespace ConsoleApp1
{
    class Program
    {
        static void Main(string[] args)
        {
            GiveMeFunctionality(
                Functionality);
        }

        static int Functionality
            (int a, int b) =>
            a + b;

        static void GiveMeFunctionality(
            Func<int, int, int> x)
        {
            Console.WriteLine(x(10, 20));
        }
    }
}
Men till skillnad från variabler kan funktioner vara rekursiva. En funktion kan alltid anropas från en annan funktion, och tack vara stödet för reflection i C# (som t.ex. C++ saknar) kan funktioner alltid anropas oberoende av var i koden de är deklarerade.
var x = 0;
void i()
{
    x++;
    while (x < 10)
        i();
}
Motsvarigheten skulle kunna vara något i den här stilen, vilket kräver att variabeln i finns medan den fortfarande deklareras:
var x = 0;
var i = () => {
    x++;
    while (x < 10)
        i();
};
Mitt första intryck av Windows Terminal
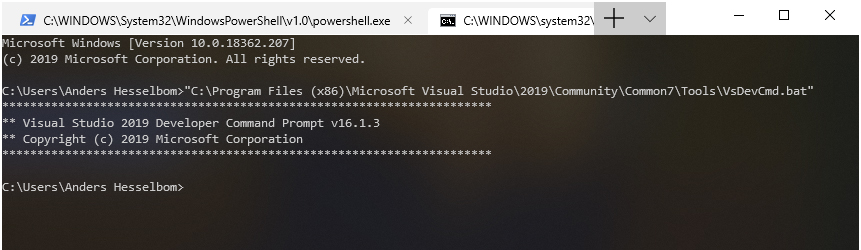
Sent om sidor lyckades jag installera rätt version av Windows 10 för att få ladda hem förhandsversionen av Windows Terminal, och efter att ha testat den så måste jag säga att jag å ena sidan inte har några stående ovationer att bjuda på, men måste samtidigt säga att det verkligen är hög tid att Windows fick en bra konsol-emulator.
För den som inte är varm i kläderna när det gäller grafiska användargränssnitt (GUI) av WIMP-typ så vill jag påpeka att dessa ofta behöver en konsol-emulator som erbjuder användaren att köra applikationer som inte har något passande grafiskt gränssnitt, utan en enkel kommandotolk, inte minst för att komma åt operativsystemets egna funktioner och tjänster. I Windows 10 handlar det om den gamla CMD, om den lite nyare PowerShell och sedermera även om Bash, men när helst textkommandon ska skrivas i en WIMP-miljö, behövs en konsol-emulator.
Det har funnits lite olika alternativ att välja på i Windows 10, men den enda som Microsoft har erhållit är cmd.exe, som är så pass eftersatt att möjligheten att klippa ut, kopiera och klistra in text är att betrakta som relativt ny funktionalitet. Men det är cmd.exe som använts för den som vill köra CMD, PowerShell eller Bash.
Windows Terminal verkar som sagt inte vara någon revolution (än) men är definitivt ett behövligt tillskott till Windows 10. Fönstret bjuder på ett plus-tecken där man kan öppna en ny flik med någon installerad kommandotolk (vilket endast är CMD och PowerShell om man inte lagt till någon tredjepartstolk).
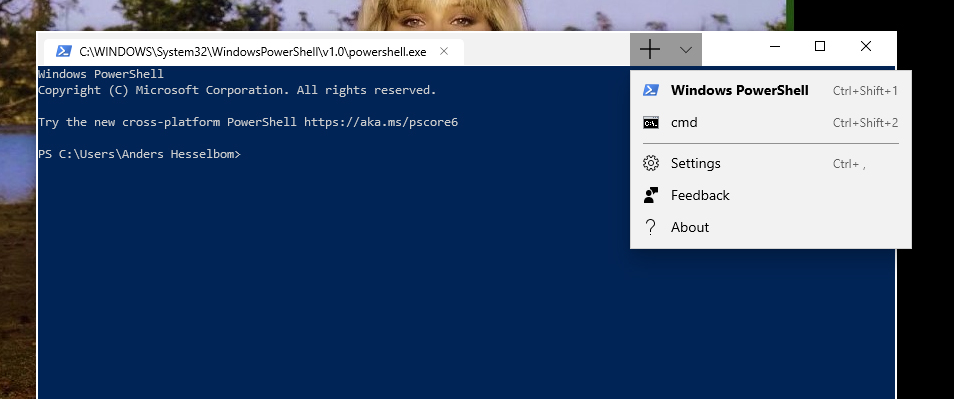
Ett irritationsmoment i den här förhandsversionen är att du inte kan flytta själva fönstret genom att dra i fönstertiteln utanför PowerShell-fliken, före plus-symbolen. Det är endast området mellan plus-symbolen och minimeringsknappen som kan användas för att positionera fönstret. Det måste väl ändå vara en bugg?
Om man väljer att ändra inställningarna för Windows Terminal startar den editor du valt att använda för JSON, vilket i mitt fall (tydligen) är Visual Studio. Fördelen med att inställningarna är lagrade i INI-filer, XML-filer eller JSON-filer är att det är enkelt att redigera och förvalta dem, men nackdelen är att man får konsultera Bing (eller motsvarande) för att få reda på vad som går att göra. Men eftersom Windows Terminal installeras med stöd för CMD och PowerShell och eftersom jag titt som tätt använder Developer Command Prompt for Visual Studio (DCPVS), så tänker jag att jag vill lägga till den under plus-tecknet.
Inställningsfilen (som av någon anledning heter profiles.json) innehåller ett objekt per flik, så genom att klippa och klistra, och justera så borde man enkelt kunna lägga till DCPVS.

Trodde jag. Men på den punkten får jag inget gensvar. Min nya post visas, men kommandot jag vill exekvera, körs inte.
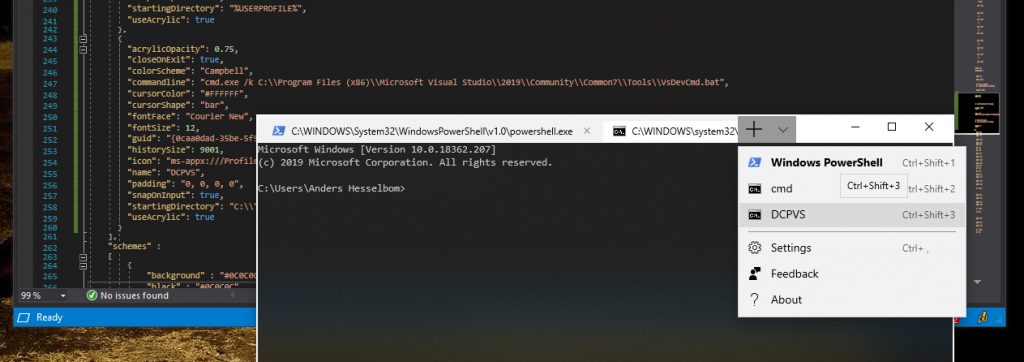
Det kan såklart handla om skit bakom spakarna, men om så är fallet, så behöver åtminstone jag mer tydlighet. Så för att köra DCPVS måste jag fortfarande snällt köra VsDevCmd.bat manuellt, min konfiguration till trots.
Detta projekt behövs, och jag kör som sagt en förhandsversion av Windows Terminal, men hittills är jag inte jätteimponerad.
Skapa binära filer snabbt och enkelt
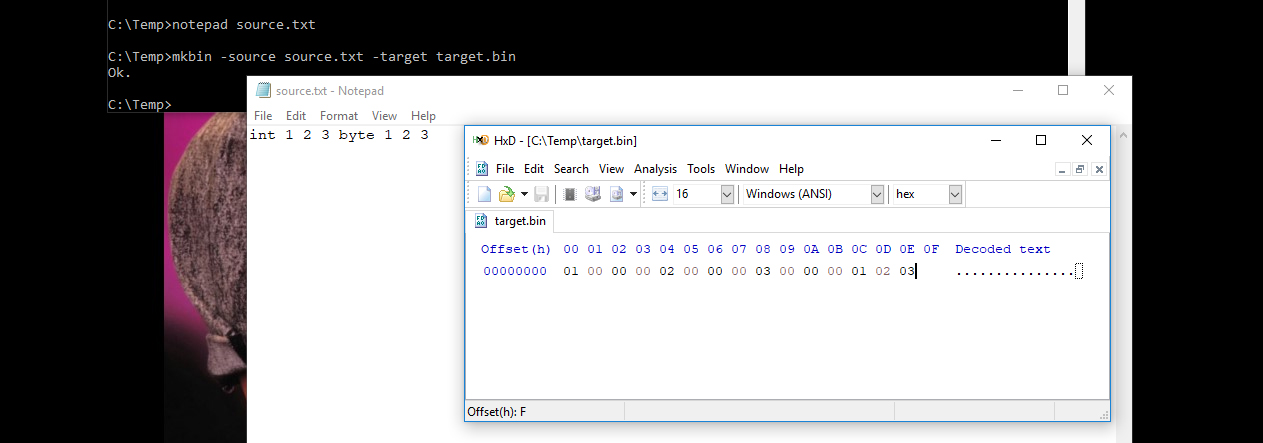
Ibland behöver man skapa binära filer, t.ex. för att testa en egenutvecklad file header. För att göra detta kan man starta HxD och peta in de bytes man vill ha i filen. Men om man vill trycka in tal större än 255 eller textsträngar så är det en del att hålla i huvudet. Programmet MkBin bygger en binärfil efter instruktioner i en textfil.
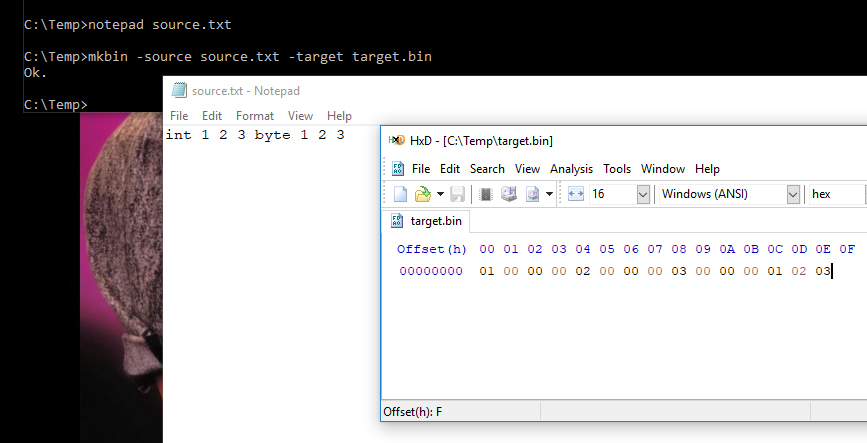
Programmet tar två argument. Först -source som anger textfilen som beskriver binärfilen och -target som anger den binära filen som ska skrivas.
Tal som anges i textfilen antas vara bytes (8-bitarstal mellan 0 och 255), men det går att skriva in kontrollord framför för att ändra datatyp, vilket exemplet i bilden ovan visar.
Om man vill laborera med vilka texter som ger vilket binära resultat, kan man starta programmet med växeln -prompt istället för -source och -target, bara genom att skriva:
MkBin.exe -prompt
Då kan man skriva text och få direkt feedback på vad som skulle hamna i en textfil. Kontrollord som byte, short, int och long, eller 8-bit, 16-bit, 32-bit eller 64-bit anger formatet på efterföljande tal och uttryck som anges inom citat antas vara strängar med UTF-8-kodning. Exempel:
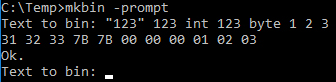
MkBin finns att hämta här.
Sprdef 1.7
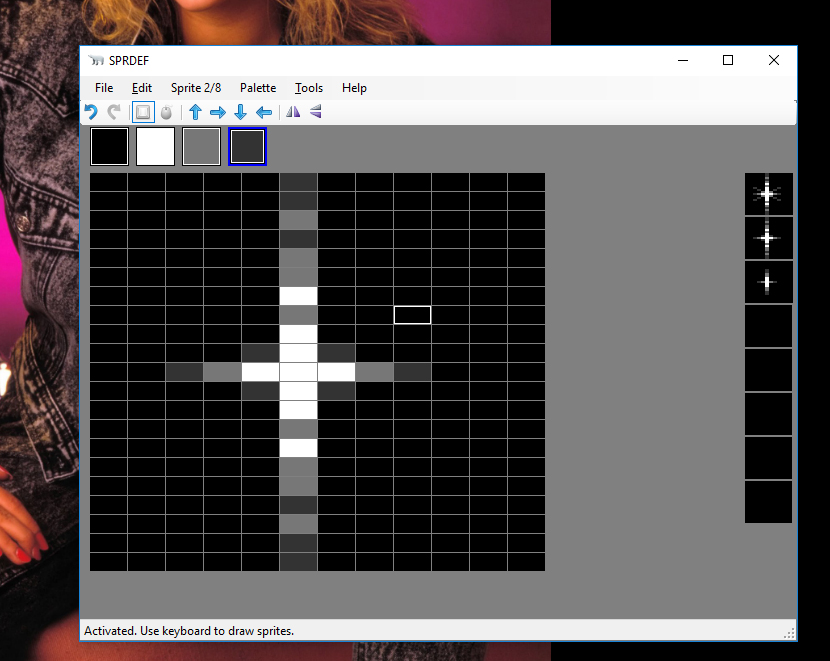
Version 1.7 of the Commodore 64 sprite editor for Windows, Sprdef, allows the user to scroll and flip a sprite and fixes a bug with thumbnail updates.
Features:
- Undo/redo buffer
- Single color/multi color sprite edit
- CBM prg Studio integration
- BASIC import/export
- Keyboard first editing or mouse first editing
Download: https://winsoft.se/files/SetupSprdef.exe
Sprdef requires .NET Framework 4.8 or later.
JobRunner
JobRunner är ett program som exekverar andra processer i turordning, vilket t.ex. är användbart för den som behandlar RSS-filer eller jobbar med genererade HTML-sidor. Mer information och nedladdningslänk finns här: https://github.com/Anders-H/JobRunner
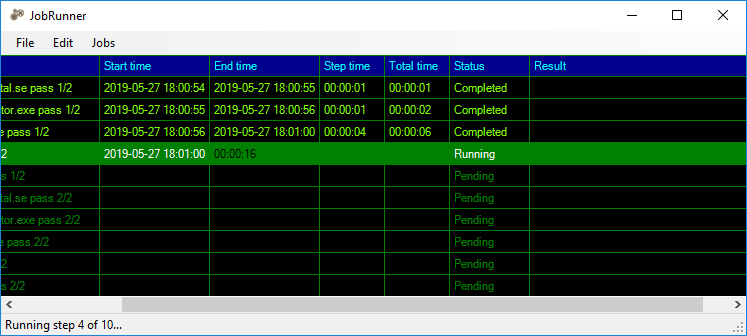
Commodore 128 Hello world!
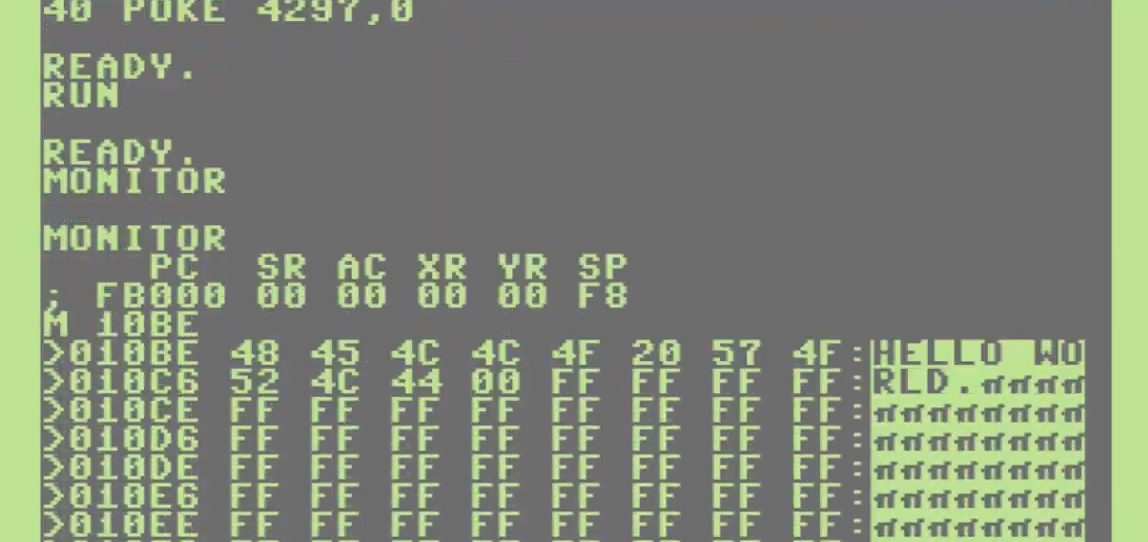
Några exempel på hur man kan skriva “Hello world” på den mångsidiga Commodore 128 (1985).
Value tuples i C# 7.3
En av många anledningar till att jag älskar C#: Språkligt stöd för value tuples!
Skärmbyte på arkadspelet
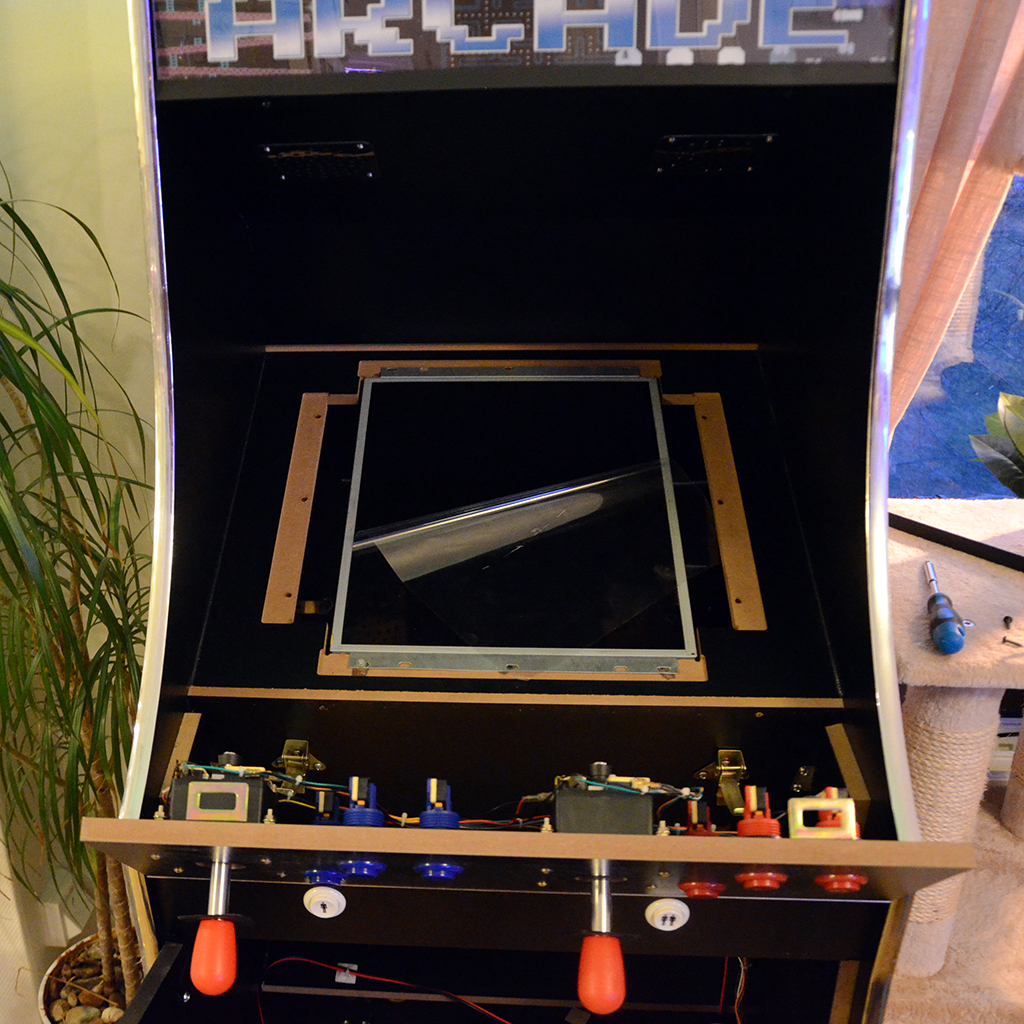
Jag äger en nytillverkad klassisk argadmaskin som spelar Jamma-kassetter, där skärmen tyvärr gav upp. Som synes klarar arkadspelet antingen vertikala eller horisontella spel med digital styrning. Jag använder den för vertikala spel.
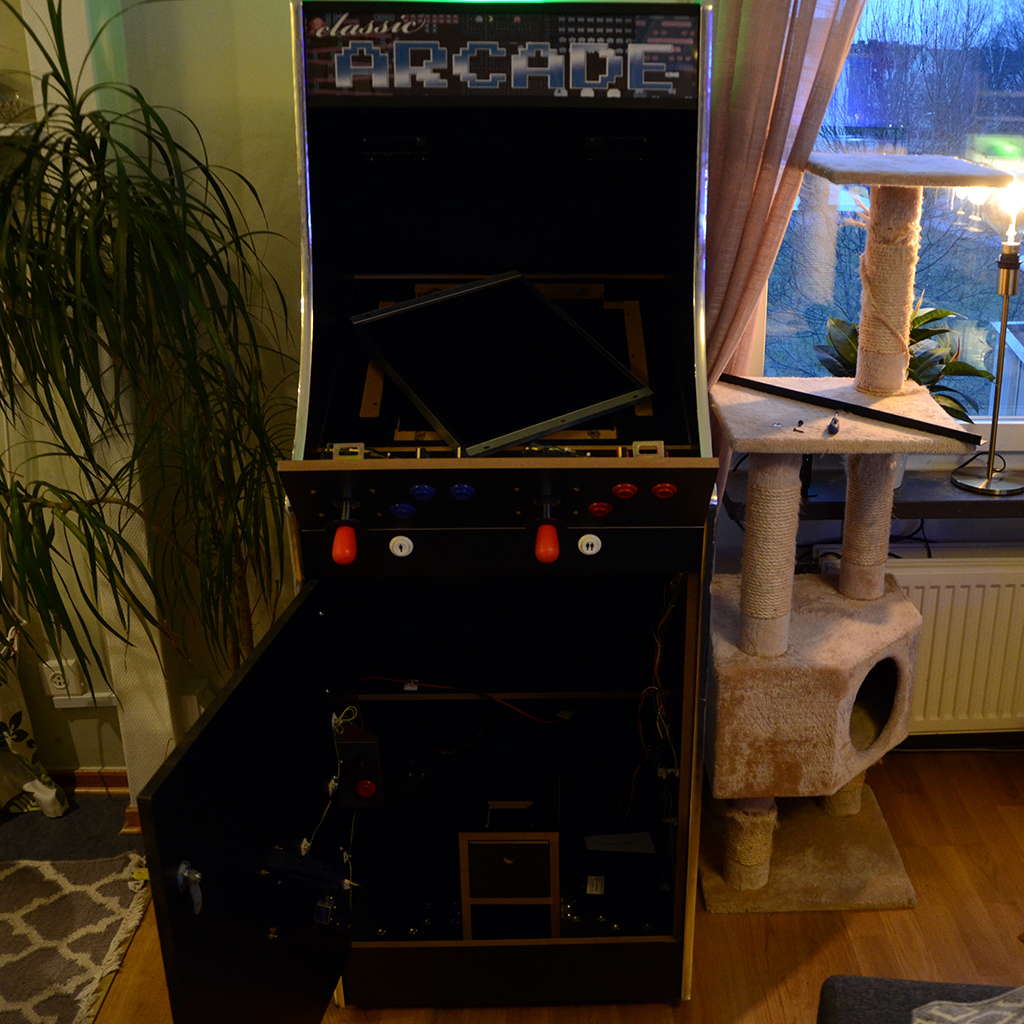
Det var enkelt att skruva loss den gamla skärmen och sätta den nya panelen på plats, men jag upptäckte naturligtvis lite för sent att jag satte den nya panelen 1,5 millimeter för långt till höger.
Framför skärmen sitter två glasskivor med ett motivtryckt papper emellan, för att dölja skärmens kant.
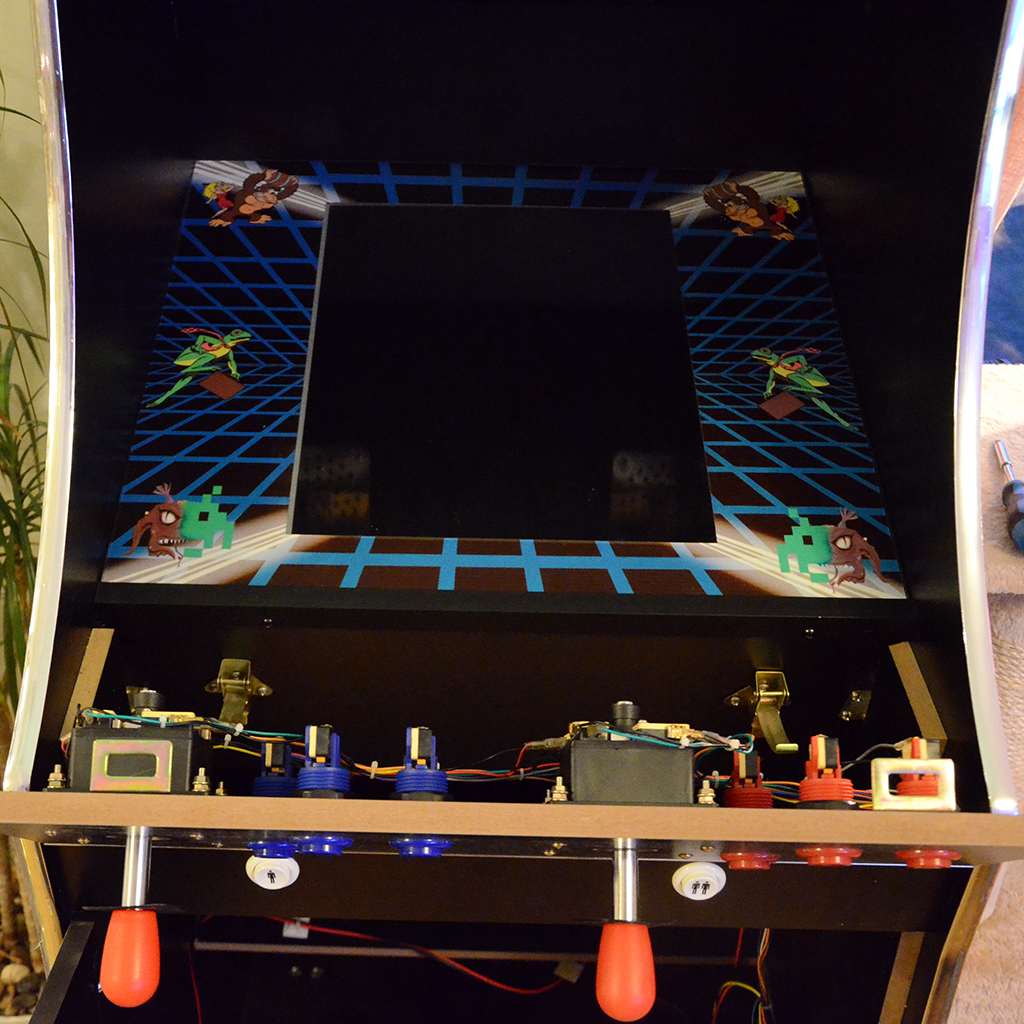
Här är glasskivorna på plats och listen som håller fast dem är fastskruvade. Här såg jag mitt lilla misstag, men beslutade mig för att skruva ihop den ändå, och justera panelens position i sidled vid ett senare tillfälle.
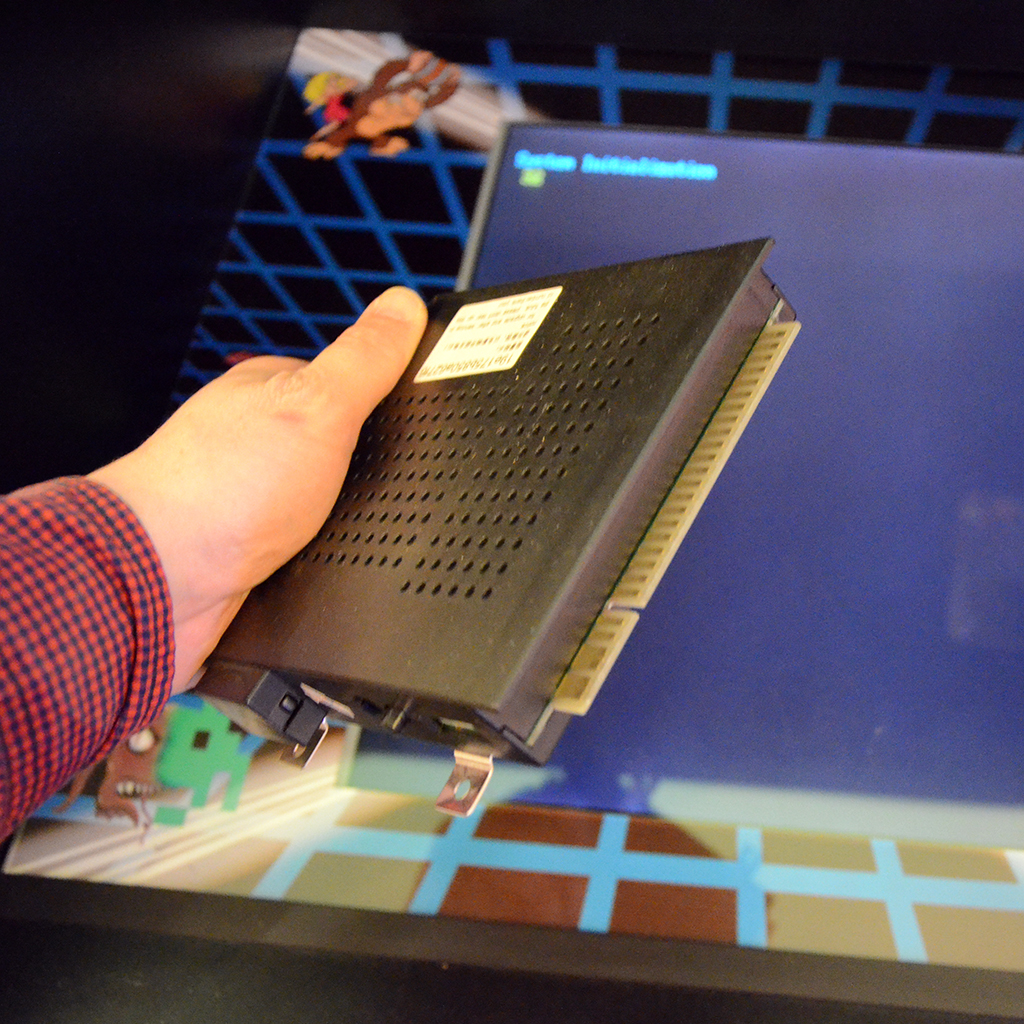
Så här ser spelkassetterna ut. Idag finns även nytillverkade spelkassetter med flera spel på, men typiskt innehåller kassetterna spel från Pac Man- och Galaga-eran. Så här ser den ut med Ms. Pac Man laddad:
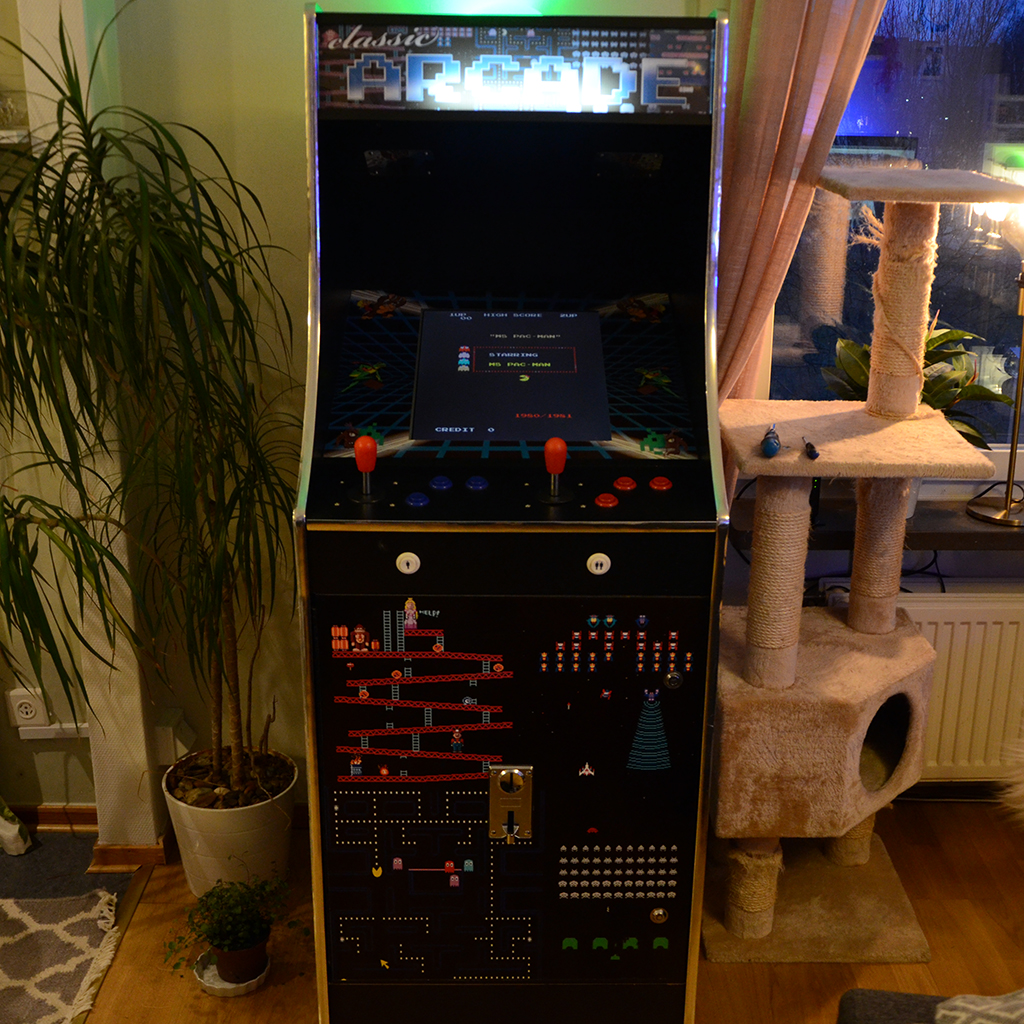
Så nu är det bara att stoppa in en femma och köra igång!
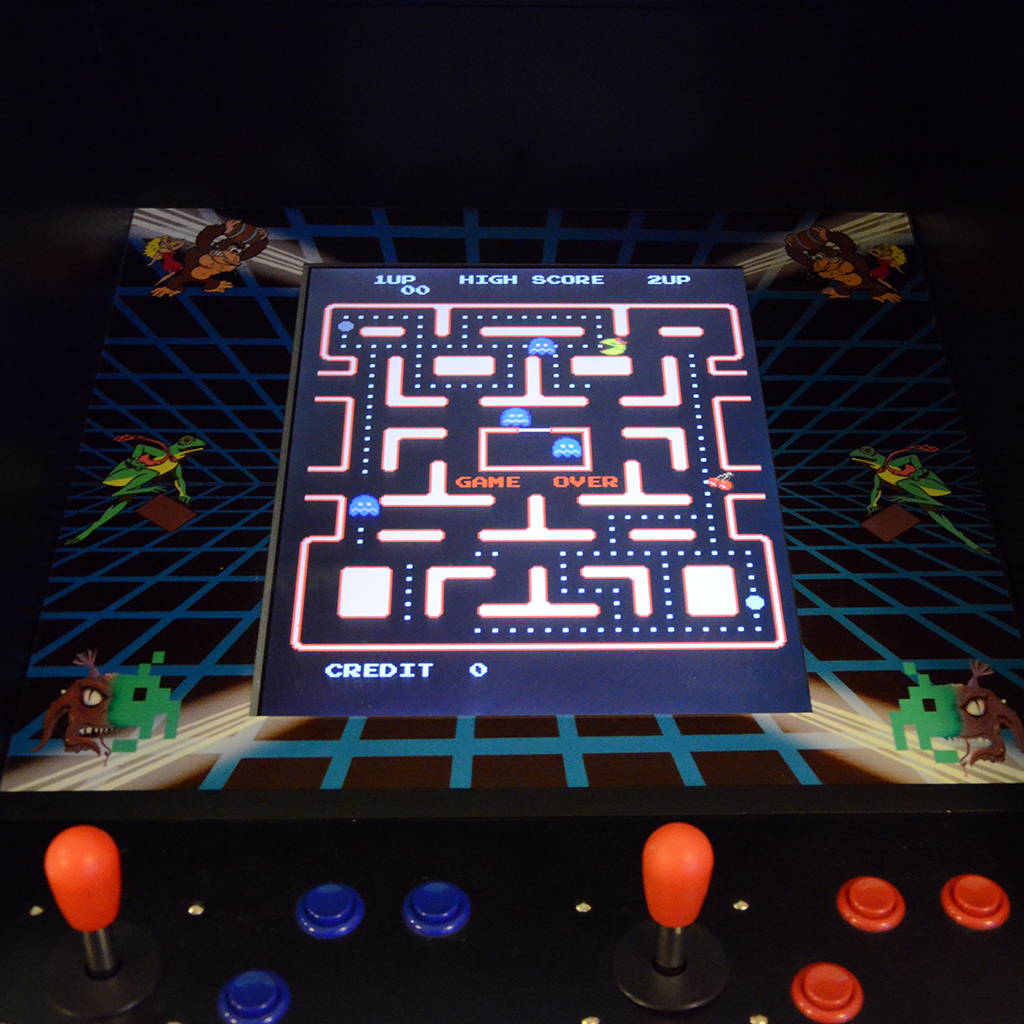
Följ mig på Instagram för fler äventyr:
Sprdef 1.5
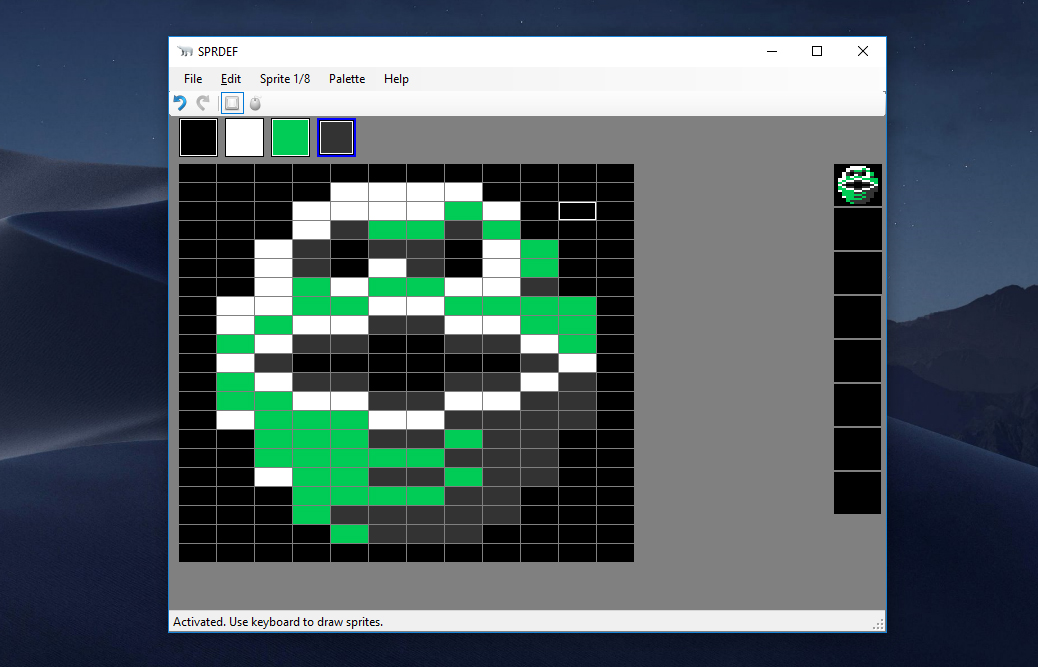
Sprdef är en sprite-editor för Windows 10 som används vid spelutveckling för Commodore 64 med Windows som utvecklingsmiljö. Version 1.5 integrerar med CBM prg Studio, har undo/redo-buffer, fungerar i både single- och multicolor-läge och kan importera/exportera BASIC-data. Ladda hem programmet här.
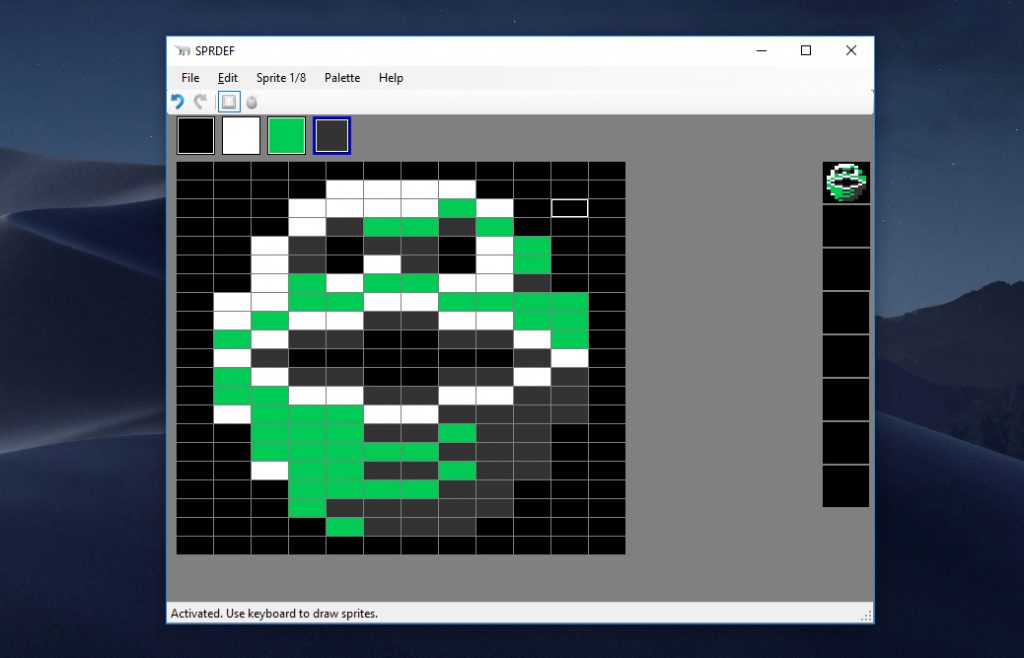
Pathfinding i terräng
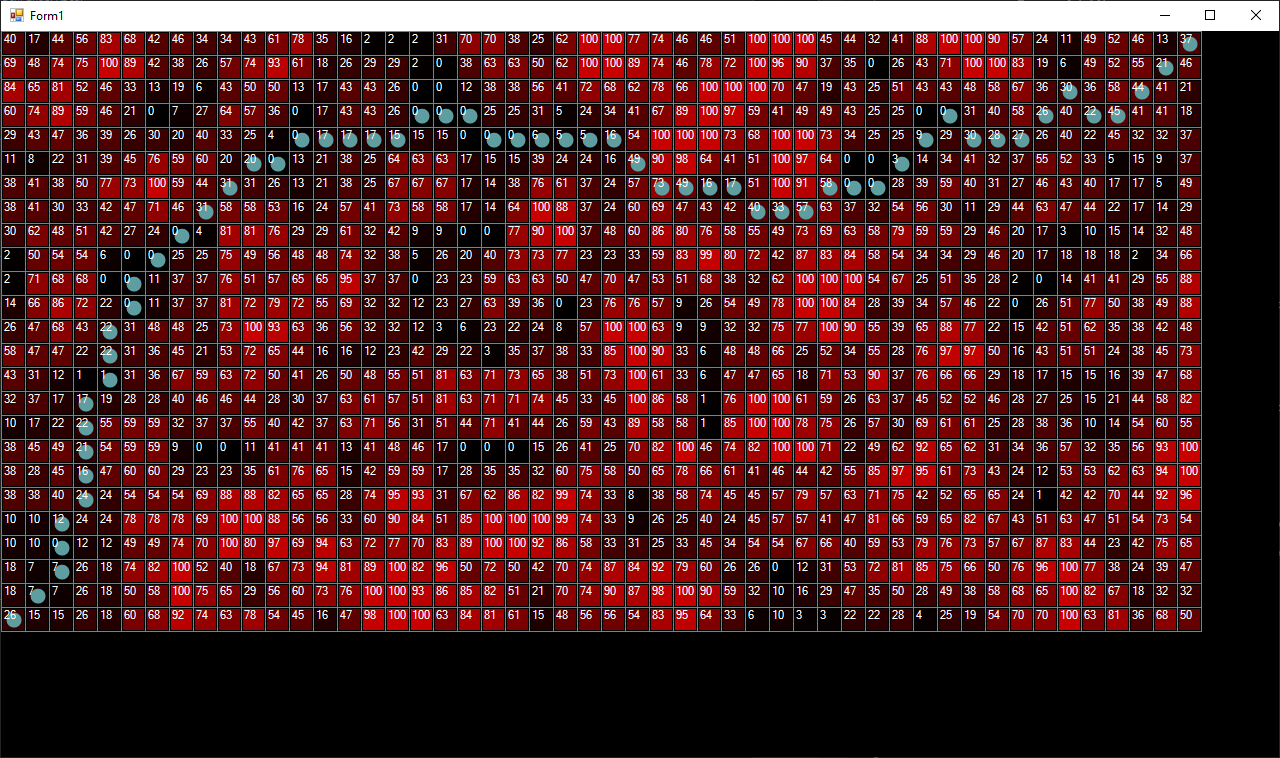
A* (A-star) är en snabb pathfinder-algoritm som kan användas i t.ex. strategispel för att hitta vägar genom labyrinter eller terräng. Christoph Husse publicerade 2010 en briljant implementation i C# som tillåter egna kriterier, definierade i en solver, för kostnaden att flytta sig från en nod till en annan. I följande exempel har jag använt Christophs kod, men jag har skalat bort hans solver och istället hårdkodat in en viktad terräng. Kartan i exemplet är liten, endast 50×25 celler, och kostnaden för att gå på en cell sträcker sig från 0 till 99. De celler som har värdet 100 betraktas som ett oöverstigligt hinder. Bilden visar en körning, där startpositionen är längst ner till vänster.
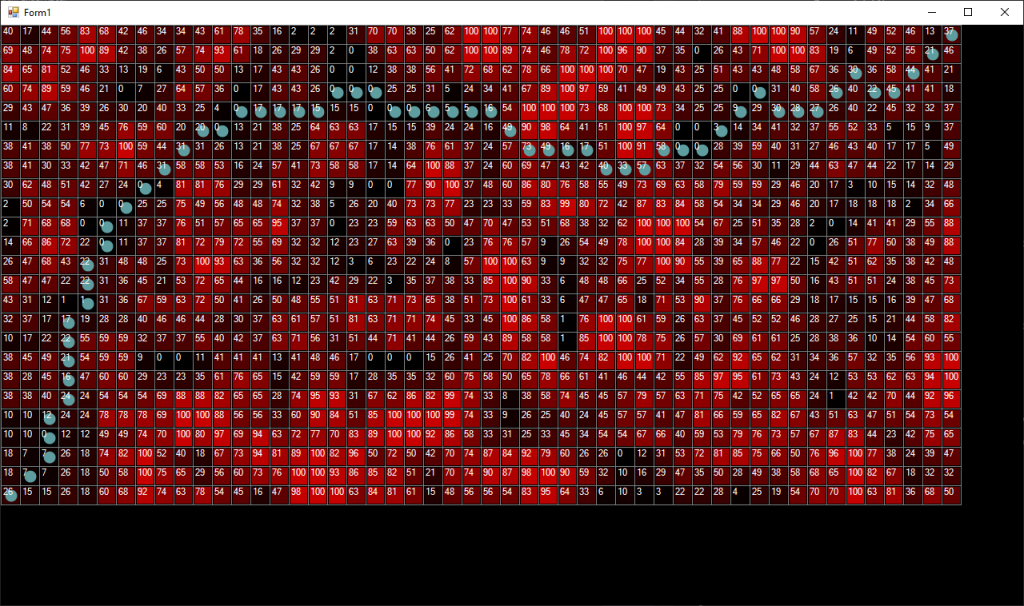
Det hela utspelar sig i ett vanligt Windows Forms-fönster som har en karta (typen Map) och en stig (typen Path). Både Map och Path presenteras nedan. (De första fyra kodblocken visar alltså innehållet i fönstret, och de resterande kodblocken visar klasserna som används i projektet.)
private Map Map { get; set; }
private Path Path { get; set; }
I fönstrets Load-event skapar jag kartan, kartans terräng och använder sedan klassen som implementerar A* för att hitta den bästa vägen från start (längst ner till vänster) till mål (längst upp till höger). Funktionen FindPath ger null om det inte finns någon väg mellan punkterna.
private void Form1_Load(object sender, EventArgs e)
{
    Map = new Map(50, 25);
    CreateTerrain(Map);
    var aStar = new AStar(Map);
    Path = aStar.FindPath(
        new Point(0, Map.Height - 1),
        new Point(Map.Width - 1, 0))
        ?? new Path();
    Invalidate();
}
Funktionen för att generera terrängen, CreateTerrain, skapar ett godtyckligt bergslandskap.
private void CreateTerrain(Map map)
{
    var rnd = new Random();
    var walkcosts = new int[map.Width + 2, map.Height + 2];
    for (var y = 0; y < map.Height + 2; y++)
        for (var x = 0; x < map.Width + 2; x++)
            if (rnd.Next(0, 3) == 1)
                walkcosts[x, y] = rnd.Next(-10, 300);
    int GetAverage(int[,] a, int x, int y) =>
        (a[x - 1, y - 1] + a[x, y - 1] + a[x + 1, y - 1]
         + a[x - 1, y] + a[x, y] + a[x + 1, y]
         + a[x - 1, y + 1] + a[x, y + 1] + a[x + 1, y + 1]) / 9;
    for (var y = 0; y < map.Height; y++)
    {
        for (var x = 0; x < map.Width; x++)
        {
            var avg = GetAverage(walkcosts, x + 1, y + 1);
            if (avg < 0)
                avg = 0;
            else if (avg > 100)
                avg = 100;
            map.SetWalkCost(x, y, (byte)avg);
        }
    }
}
I fönstrets Paint-event ritas det hela ut på skärmen.
private void Form1_Paint(object sender, PaintEventArgs e)
{
    e.Graphics.Clear(Color.Black);
    var m = new MapRenderer(Map, Path, 24);
    m.Draw(e.Graphics, 0, 0);
}
Klassen MapRenderer som ansvarar för ritandet ser ut så här:
using System.Drawing;
using System.Drawing.Drawing2D;

namespace PathFinderAStar
{
    public class MapRenderer
    {
        public Map Map { get; }
        public Path Path { get; }
        public int CellSize { get; }

        public MapRenderer(Map map, Path path, int cellSize)
        {
            Map = map;
            Path = path;
            CellSize = cellSize;
        }

        public void Draw(Graphics g, int offsetX, int offsetY)
        {
            var xpos = offsetX;
            var ypos = offsetY;
            using (var font = new Font(FontFamily.GenericSansSerif, 8))
            {
                for (var y = 0; y < Map.Height; y++)
                {
                    for (var x = 0; x < Map.Width; x++)
                    {
                        g.SmoothingMode = SmoothingMode.None;
                        g.DrawRectangle(
                            Pens.Gray,
                            xpos,
                            ypos,
                            CellSize,
                            CellSize);
                        using (var b = new SolidBrush(
                            Color.FromArgb(Map.GetWalkCost(x, y) * 2,
                            0,
                            0)))
                            g.FillRectangle(
                                b,
                                xpos + 2,
                                ypos + 2,
                                CellSize - 3,
                                CellSize - 3);
                        var pathCell = Path.GetCellAt(x, y);
                        g.SmoothingMode = SmoothingMode.HighQuality;
                        if (pathCell != null)
                            g.FillEllipse(
                                Brushes.CadetBlue,
                                xpos + 5,
                                ypos + 5,
                                CellSize - 9,
                                CellSize - 9);
                        g.DrawString(
                            Map.GetWalkCost(x, y).ToString(),
                            font,
                            Brushes.White,
                            xpos + 1,
                            ypos + 1);
                        xpos += CellSize;
                    }
                    xpos = offsetX;
                    ypos += CellSize;
                }
            }
        }
    }
}
Klassen Map beskriver en 2-dimensionell karta, på vilken vi ska hitta en stig.
using System;
using System.Diagnostics;
using System.Drawing;

namespace PathFinderAStar
{
    public class Map
    {
        private readonly MapCell[,] _terrain;
        public int Width { get; }
        public int Height { get; }

        public Map(int width, int height)
        {
            if (width < 2 || width > 2000)
                throw new ArgumentOutOfRangeException(nameof(width));
            if (height < 2 || height > 2000)
                throw new ArgumentOutOfRangeException(nameof(height));
            Width = width;
            Height = height;
            _terrain = new MapCell[width, height];
        }

        public byte GetWalkCost(int x, int y)
        {
            if (x < 0 || x >= Width)
                throw new ArgumentOutOfRangeException(nameof(x));
            if (y < 0 || y >= Height)
                throw new ArgumentOutOfRangeException(nameof(y));
            var cell = _terrain[x, y];
            if (cell == null)
                return 0;
            Debug.Assert(cell.X == x);
            Debug.Assert(cell.Y == y);
            return cell.WalkCost;
        }

        public void SetWalkCost(int x, int y, byte walkCost)
        {
            if (x < 0 || x >= Width)
                throw new ArgumentOutOfRangeException(nameof(x));
            if (y < 0 || y >= Height)
                throw new ArgumentOutOfRangeException(nameof(y));
            if (walkCost > 100)
                throw new ArgumentOutOfRangeException(nameof(walkCost));
            var cell = _terrain[x, y];
            if (cell == null)
            {
                cell = new MapCell(x, y, walkCost);
                _terrain[x, y] = cell;
                return;
            }
            Debug.Assert(cell.X == x);
            Debug.Assert(cell.Y == y);
            cell.WalkCost = walkCost;
        }

        public void Clear()
        {
            for (var y = 0; y < Height; y++)
                for (var x = 0; x < Width; x++)
                    _terrain[x, y] = null;
        }

        public MapCell GetCell(int x, int y) =>
            GetCell(new Point(x, y));

        public MapCell GetCell(Point p)
        {
            if (p.X < 0 || p.X >= Width || p.Y < 0 || p.Y >= Height)
                return null;
            var c = _terrain[p.X, p.Y];
            return c;
        }

        public double GetDistance(MapCell start, MapCell goal)
        {
            var actualDistance = Math.Sqrt((start.X - goal.X)
                * (start.X - goal.X)
                + (start.Y - goal.Y)
                * (start.Y - goal.Y));
            return actualDistance + (double)goal.WalkCost / 10;
        }

        public void Add(MapCell cell)
        {
            if (cell == null)
                throw new ArgumentNullException(nameof(cell));
            if (cell.X < 0 || cell.X >= Width)
                throw new ArgumentOutOfRangeException(nameof(cell.X));
            if (cell.Y < 0 || cell.Y >= Height)
                throw new ArgumentOutOfRangeException(nameof(cell.Y));
            if (_terrain[cell.X, cell.Y] != null)
                throw new SystemException();
            _terrain[cell.X, cell.Y] = cell;
        }

        public void Remove(MapCell cell)
        {
            if (cell == null)
                throw new ArgumentNullException(nameof(cell));
            if (_terrain[cell.X, cell.Y] == null)
                throw new SystemException();
            if (_terrain[cell.X, cell.Y] != cell)
                throw new SystemException();
            _terrain[cell.X, cell.Y] = null;
        }

        public bool Contains(MapCell cell) =>
            _terrain[cell.X, cell.Y] != null;

        public void SetWithHistory(int x, int y, MapCell cell) =>
            _terrain[x, y] = cell;

        public bool IsEmpty
        {
            get
            {
                for (var y = 0; y < Height; y++)
                    for (var x = 0; x < Width; x++)
                        if (_terrain[x, y] != null)
                            return false;
                return true;
            }
        }

        public int CompareCells(MapCell c1, MapCell c2)
        {
            if (c1 == null)
                throw new ArgumentNullException(nameof(c1));
            if (c2 == null)
                throw new ArgumentNullException(nameof(c2));
            if (c1.F < c2.F)
                return -1;
            if (c1.F > c2.F)
                return 1;
            return 0;
        }

    }
}
Stigen beskrivs av klassen Path:
using System.Collections.Generic;
using System.Linq;

namespace PathFinderAStar
{
    public class Path : List<MapCell>
    {
        public Path()
        {
        }

        public Path(int count)
        {
            for (var i = 0; i < count; i++)
                Add(null);
        }

        public MapCell GetCellAt(int x, int y) =>
            this.FirstOrDefault(c => c.X == x && c.Y == y);
    }
}
Både kartan (Map) och stigen (Path) består av referenser till celler som beskriver hur terrängen ser ut på en specifik plats. Typen heter MapCell (G, H, F och Index används av A*.):
namespace PathFinderAStar
{
    public class MapCell
    {
        private byte _walkCost;
        public int X { get; }
        public int Y { get; }
        public double G { get; set; }
        public double H { get; set; }
        public double F { get; set; }
        public int Index { get; set; }

        public byte WalkCost
        {
            get => _walkCost;
            set => _walkCost = value > 100 ? (byte)100 : value;
        }

        public bool IsWall =>
            WalkCost >= 100;

        public MapCell(int x, int y, byte walkCost)
        {
            X = x;
            Y = y;
            WalkCost = walkCost;
        }
    }
}
Sen har vi själva A*-algoritmen, såsom den implementerats av Christoph Husse, med mina förenklingar. Den konsumeras direkt i formulärets Load-event och ligger i klassen AStar.
using System.Drawing;

namespace PathFinderAStar
{
    public class AStar
    {
        private Map Map { get; }
        private Map ClosedSet { get; }
        private Map OpenSet { get; }
        private Map CameFrom { get; }
        private Map RuntimeGrid { get; }
        private PriorityQueue OrderedOpenSet { get; }

        public AStar(Map map)
        {
            Map = map;
            ClosedSet = new Map(Map.Width, Map.Height);
            OpenSet = new Map(Map.Width, Map.Height);
            CameFrom = new Map(Map.Width, Map.Height);
            RuntimeGrid = new Map(Map.Width, Map.Height);
            OrderedOpenSet = new PriorityQueue(Map);
        }

        public Path FindPath(Point start, Point goal)
        {
            var startCell = Map.GetCell(start);
            var goalCell = Map.GetCell(goal);
            if (startCell == goalCell)
                return new Path { startCell };
            ClosedSet.Clear();
            OpenSet.Clear();
            CameFrom.Clear();
            RuntimeGrid.Clear();
            OrderedOpenSet.Clear();
            startCell.G = 0.0;
            startCell.H = Map.GetDistance(startCell, goalCell);
            startCell.F = startCell.H;
            OpenSet.Add(startCell);
            OrderedOpenSet.Push(startCell);
            RuntimeGrid.Add(startCell);
            var neighbours = new Path(8);
            while (!OpenSet.IsEmpty)
            {
                var next = OrderedOpenSet.Pop();
                if (next == goalCell)
                {
                    var result = ReconstructPath(
                        CameFrom,
                        CameFrom.GetCell(goalCell.X, goalCell.Y));
                    result.Add(goalCell);
                    return result;
                }
                OpenSet.Remove(next);
                ClosedSet.Add(next);
                StoreNeighbours(next, neighbours);
                foreach (var currentNeighbour in neighbours)
                {
                    if (currentNeighbour == null
                        || currentNeighbour.IsWall
                        || ClosedSet.Contains(currentNeighbour))
                        continue;
                    var tentativeG = RuntimeGrid.GetCell(next.X, next.Y).G
                        + Map.GetDistance(next, currentNeighbour);
                    if (!TentativeIsBetter(currentNeighbour,
                        tentativeG, out var added))
                        continue;
                    CameFrom.SetWithHistory(
                        currentNeighbour.X,
                        currentNeighbour.Y,
                       next);
                    if (!RuntimeGrid.Contains(currentNeighbour))
                        RuntimeGrid.Add(currentNeighbour);
                    currentNeighbour.G = tentativeG;
                    currentNeighbour.H = Map.GetDistance(
                        currentNeighbour,
                        goalCell);
                    currentNeighbour.F = currentNeighbour.G
                        + currentNeighbour.H;
                    if (added)
                        OrderedOpenSet.Push(currentNeighbour);
                    else
                        OrderedOpenSet.Update(currentNeighbour);
                }

            }
            return null;
        }

        private bool TentativeIsBetter(
            MapCell currentNeighbour,
            double tentativeG,
            out bool added)
        {
            if (!OpenSet.Contains(currentNeighbour))
            {
                OpenSet.Add(currentNeighbour);
                added = true;
                return true;
            }
            added = false;
            return tentativeG < RuntimeGrid.GetCell(
                currentNeighbour.X,
                currentNeighbour.Y).G;
        }

        private void StoreNeighbours(MapCell c, Path neighbours)
        {
            neighbours[0] = Map.GetCell(c.X - 1, c.Y - 1);
            neighbours[1] = Map.GetCell(c.X, c.Y - 1);
            neighbours[2] = Map.GetCell(c.X + 1, c.Y - 1);
            neighbours[3] = Map.GetCell(c.X - 1, c.Y);
            neighbours[4] = Map.GetCell(c.X + 1, c.Y);
            neighbours[5] = Map.GetCell(c.X - 1, c.Y + 1);
            neighbours[6] = Map.GetCell(c.X, c.Y + 1);
            neighbours[7] = Map.GetCell(c.X + 1, c.Y + 1);
        }

        private Path ReconstructPath(Map cameFrom, MapCell currentCell)
        {
            void ReconstructPathRecursive(
                Map recursiveCameFrom,
                MapCell recursiveCurrentCell,
                Path result)
            {
                var item = recursiveCameFrom.GetCell(
                    recursiveCurrentCell.X,
                    recursiveCurrentCell.Y);
                if (item != null)
                    ReconstructPathRecursive(
                        recursiveCameFrom,
                        item,
                        result);
                result.Add(recursiveCurrentCell);

            }
            var path = new Path();
            ReconstructPathRecursive(cameFrom, currentCell, path);
            return path;
        }
    }
}
Och slutligen, typen PriorityQueue som algoritmen använder för att hålla reda på vilka celler som undersöks, ser ut så här:
using System.Collections.Generic;

namespace PathFinderAStar
{
    public class PriorityQueue
    {
        private List<MapCell> InnerList { get; } = new List<MapCell>();
        private Map Map { get; }

        public PriorityQueue(Map map)
        {
            Map = map;
        }

        public void Clear() =>
            InnerList.Clear();

        public int Push(MapCell c)
        {
            var index1 = InnerList.Count;
            c.Index = index1;
            InnerList.Add(c);
            do
            {
                if (index1 <= 0)
                    break;
                var index2 = (index1 - 1) / 2;
                if (Compare(index1, index2) < 0)
                {
                    SwitchElements(index1, index2);
                    index1 = index2;
                    continue;
                }
                break;

            } while (true);
            return index1;
        }

        public MapCell Pop()
        {
            var result = InnerList[0];
            InnerList[0] = InnerList[InnerList.Count - 1];
            InnerList[0].Index = 0;
            InnerList.RemoveAt(InnerList.Count - 1);
            result.Index = -1;
            var p = 0;
            do
            {
                var pn = p;
                var p1 = 2 * p + 1;
                var p2 = 2 * p + 2;
                if (InnerList.Count > p1 && Compare(p, p1) > 0)
                    p = p1;
                if (InnerList.Count > p2 && Compare(p, p2) > 0)
                    p = p2;
                if (p == pn)
                    break;
                SwitchElements(p, pn);
            } while (true);
            return result;
        }

        public void Update(MapCell cell)
        {
            var count = InnerList.Count;
            while (cell.Index - 1 > 0
                && Compare(cell.Index - 1, cell.Index) > 0)
                SwitchElements(cell.Index - 1, cell.Index);
            while (cell.Index + 1 < count
                && Compare(cell.Index + 1, cell.Index) < 0)
                SwitchElements(cell.Index + 1, cell.Index);
        }

        private int Compare(int i1, int i2) =>
            Map.CompareCells(InnerList[i1], InnerList[i2]);

        private void SwitchElements(int i1, int i2)
        {
            var c1 = InnerList[i1];
            InnerList[i1] = InnerList[i2];
            InnerList[i2] = c1;
            InnerList[i1].Index = i1;
            InnerList[i2].Index = i2;
        }
    }
}
Med denna kod på plats har man en enkel funktion (FindPath) att anropa för att hitta en stig mellan två punkter (om sådan finns). Och om man vill anpassa kriterierna för hur en stig väljs, t.ex. hur terrängen ska viktas mot avståndet, görs det i funktionen GetDistance i klassen Map.
Diamantproblemet i C# 8

Idag skriver jag på Nethouse-bloggen om diamantproblemet i C#, som introduceras med default interface members. Läs gärna inlägget här.
Hold-and-modify compression
A photograph usually requires 24 bits (3 bytes) per pixel. One strategy for reducing memory is to reduce the number of bits used to describe the color of each pixel, but that also reduces the number of possible colors that the format can display. A high-resolution image on the Amiga 500 typically consist of a table of 16 colors, which often is a bit too few colors for most photographic images. This is a 24-bit oroginal:

And this is the 4-bit 16-color version, that could be displayed on an Amiga:

In the 16-bit version, each pixel is a 3-byte color description, but in the 4-bit version, each pixel is a reference to a color in a 16-records long table of color. The decrease of memory consumption causes a rather obvious loss in image quality.
Hold-and-modify (HAM) allows for displaying more colors than the 16 colors stored in the table. The Amiga implementation of HAM uses a 16-color palette, and the byte array that make out the image data uses two control bits and four data bits. The control bits decide if the next four bits of the byte describes a color set (an index reference), a red modify, a green modify, or a blue modify. The last two bits per byte are not used.
So, a while a regular 16-color image uses 4 bits per pixel (a reference to a color in the table), a HAM image uses 6 bits per pixel, and if the first two is a color set, then the next four are still just a reference, like all pixels are in a regular 16-color image. But the other control bits indicate that the next four bits carries information on how the pixel color is different from the pixel to the left. It could be that it contains more red or less green, and so on, allowing up to 4096 colors to be displayed.
This method works very well on photographic images, but sharp edges may cause bleeding colors, because any pixel that is not a reference to a color table depends on its neighbor to the left. But the method works well for displaying full color images using only 6 bits per pixel instead of 3 bytes.
The artifact can be observed in this classic HAM animation by Ken Offer (1987):
Character compression per image depth
An image is a two-dimensional array of colored pixels, in this case 200 rows pf 320 pixels (320×200), today typically a 2-dimensional pixel array. Color indexing is the concept of replacing the 24-bit pixels with an 8-bit pointer to a color palette, thus reducing the memory required to represent the image. Character compression is the concept of replacing the pixel matrix with a matrix of references to a palette of 8×8 cells. Fewer bits per pixel results in poorer quality, but higher probability of finding similar 8×8 cells, and therefore a smaller image. More bits per pixel results in higher quality, but less probability of finding similar 8×8 cells, and therefore a larger image. The technique does not work well on photographic images. I use these original images:
1-bit (2 colors)

2-bit (4 colors)

3-bit (8 colors)

4-bit (16 colors)

5-bit (32 colors)

8-bit (256 colors)
In total, a 320×200 (64000) pixels image (8000 bytes) consist of 40×25 (1000) characters. On a blank image, only one of them are unique and needs to be stored. If the image contains just one set pixel, then the image contains two unique characters. One blank and one containing the pixel. Using character compression, the one pixel image requires 2000 bytes for the character index (1000 entries of 2 bytes each), 8 bytes for the empty character and 8 bytes for the character with a pixel. 2016 bytes in total, instead of the 8000 bytes that is required to store a 1-bit 320×200 pixel image.
The first (1-bit) image in this example contains 716 of 1000 unique characters and the 2000-byte index, meaning that the compressed images requires 716×8 + 2000 bytes (7728 bytes). Here is one example of matchig characters:
And here are all the matches highlighted:
By reducing the size of the character, you increase the likelihood to find duplicated character, but you increase the size of the character registry.
The probability of finding duplicate characters decrease when more colors are added (the 8-bit version of the image does not contain any duplicated characters) so a strategy for achieving better compression would be to allow a certain degree of mismatch. If two characters are similar to a certain degree, they can be treated as same. If the threshold for treating two characters as similar is too high, no compression will be achieved. If the threshold is too low, the image will look a bit off.
Uncompressed, the 8-bit image consumes one byte per pixel (not counting the color table of 256 colors). The pixel data requires 64000 (320×200) bytes and the color table requires 768 (256×3) bytes. If we use character compression to reduce the number of unique 8×8 pixel cells from 1000 to 500, the table (1000 entries, 2000 bytes) and 500 unique characters (32000 bytes) and the color palette (768 bytes), we would have reduced the memory required from 64768 bytes to 34768 bytes. However, the uncompressed image might be slightly distorted.
If I only look at average color of the character, these 429 cells are similar enough to be interchanged with another character:
Here is the compressed version of the image. The original 8-bit image consists of a color palette (768 bytes) and a pixel array of 64000 bytes. The compressed version consists of the same color palette, a 2000 byte character index and 571 characters, each requiring 64 bytes (36544 bytes).

Of course, the compression level should be slightly lowered for a perfect result, but there are lots of other measures that can be taken. Similarity can be defined in a more sophisticated way than a close average brightness and hue. For photographic images: The threshold for equality could be higher when the detail level is high (in this case, in the center of the image) and lower when the detail level is low. But for pixeled images, top-down-left-right-scanning is good enough. As a conclusion, this is the same image with a slightly lower compression level, still with room for the previous mentioned possible improvements:

A slightly lower compression level increases the output quality significantly, but I am convinced that a more intelligent compression engine will do an even better job.
Mjukvaran SQLite skrivs av oresonliga idioter

SQLite är en mjukvara för datalagring, skriven i C, som fungerar på i princip vilken enhet som helst, från t.ex. Windows Phone till Linux. Mjukvaran är Public Domain, så företaget som utvecklar den försörjer sig istället på att sälja t.ex. support, tilläggsfunktioner eller drift.
Den utvecklare som ska bidra till den officiella produkten måste leva upp till en uppförandekod på 72 punkter som finns publicerad som en del av dokumentationen på deras hemsida (läst 2018-10-23). T.ex. får man inte mörda (punkt 3), vänsterprassla (punkt 4) eller vara stolt (punkt 34), samtidigt som man måste respektera äldre (punkt 68), älska sina fiender (punkt 31) och älska att fasta (punkt 13).
Jag kan ibland vara naiv och utgå ifrån att mina kompanjoner inte är mördare, och kan därför rentav tycka att det är lite nedlåtande att behöva be någon jag ska jobba med att skriva under på det. Och ska jag vara helt ärlig så har jag över huvudet taget svårt att vara kollega med den sortens människa som antas behöva ha en uppförandekod för att inte mörda. Men om jag kan se bortom det, så vill jag naturligtvis hellre jobba med en humanist än mördare. Så vad har fastan med saken att göra?
Det är nog ingen idé att försöka förstå, för det visar sig att SQLite utvecklas av vidskepliga idioter. T.ex. finns det ingen som bidrar till produkten som inte älskar en 2000 år gammal krigsgud från Mellanöstern (punkt 1) eller som inte ger denna övernaturliga entitet äran för sina egna insatser (punkt 42). Som mjukvaruutvecklare i behov av datalagring bör du fundera på om den som behöver denna uppförandekod, och vidare, den som lever efter denna uppförandekod, är någon som du vill ha att göra med? Över huvudet taget, på något tänkbart vis? I så fall har du problem.
Fri som i öl eller fri som i frihet?

En kommentar till kopplingen mellan Public Service-media och yttrandefrihet.
God utan Gud?

Jag pratar om religion och moral hos Humanisterna Kalmar. Är det Gud som skapat godheten? Mycket nöje!
Kort intervju om bl.a. VoF, Humanisterna, podcasts och skepticism

Fredagen den 13/7 var jag i Kalmar för att föreläsa om religion och moral på en krogträff som anordnades av Humanisterna Kalmar. I samband med det gjordes en kort intervju där vi pratade om bl.a. Vetenskap och Folkbildning, Humanisterna, podcasts och om skepticism.
IMDb Scraper

IMDb Scraper is a simple library for extracting a movie title and year from a IMDb ID.
Installation (.NET Framework 4.6):
Install-Package ImdbScraper
Example:
var repository = new Repository();
var result = repository.GetMovie(87332);
Console.WriteLine(result.ToString());
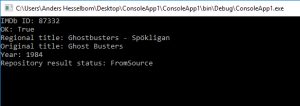
Update 2023-06-18: The scraper now requires .NET 7.0, and it also downloads the movie rating from imdb.com.
“Mannen på gatan”

Jag ogillar verkligen att SVT använder “mannen på gatan”, men när de väl slänger kameran i ansiktet och frågar, så svarar man. Så den som tittar här, 9:30 minuter in, får veta av mig vilka nyhetskällor som är pålitliga.

Eftersom frågan kom på tal, så måste jag tillstå att jag gillar SVT och jag gillar Sveriges Radio P1. Jag vet om att de är min politiska motståndare, men jag uppskattar deras ambition att leverera objektiv och oberoende samhällsinformation.
Feel-bad movie: Excision
Excision is an excellent and very beautifully made movie about a seriously misunderstood girl. Pauline (AnnaLynne McCord) is living in the shadow of her sister Grace (Ariel Winter). The film portraits her breaking away from the high expectations put upon her, with a worst possible ending.
Beautiful performances from Malcolm McDowell, Traci Lords and Ray Wise!


Categories: Pop culture
En kopp kaffe!
Bjud mig på en kopp kaffe (20:-) som tack för bra innehåll!


Följ mig

|

|

|

|